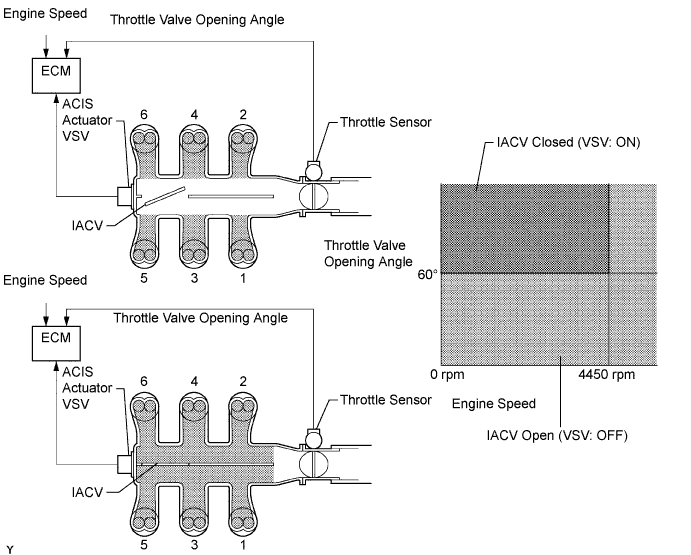
SFI SYSTEM > ACIS Control Circuit |
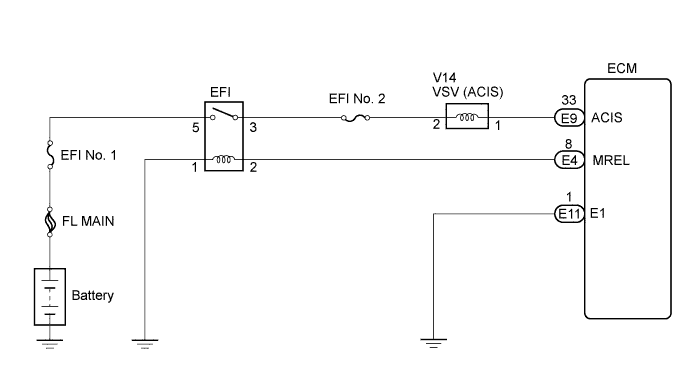
| 1.PERFORM ACTIVE TEST USING TECHSTREAM (OPERATE VSV FOR ACIS) |
Connect the Techstream to the DLC3.
Start the engine and turn the Techstream on.
Select the following menu items: Powertrain / Engine and ECT / Active Test / Activate the VSV for Intake Control. Operate the VSV for AICS.
|
| ||||
| NG | |
 |
| 2.CHECK INTAKE AIR CONTROL VALVE (OPERATION) |
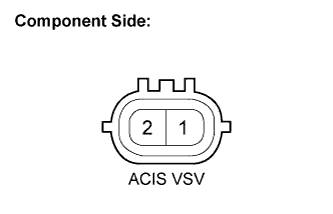 |
Disconnect the V14 VSV for ACIS connector.
Apply battery voltage between the terminals of the air intake valve connector.
Check the air intake valve operation.
Reconnect the VSV for ACIS connector.
|
| ||||
| OK | |
|
| 3.CHECK HARNESS AND CONNECTOR (VSV FOR ACIS - ECM) |
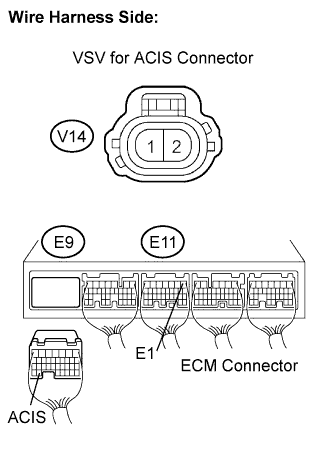 |
Check the wire harness and connectors between the VSV for ACIS and ECM.
Disconnect the V14 VSV for ACIS connector.
Disconnect the E9 ECM connector.
Measure the resistance according to the value(s) in the table below.
| Tester Connection | Specified Condition |
| VSV for ACIS (V14-1) - ACIS (E9-33) | Below 1 Ω |
| Tester Connection | Specified Condition |
| VSV for ACIS (V14-1) or ACIS (E9-33) - E1 (E11-1) | 10 kΩ or higher |
Reconnect the VSV for ACIS connector.
Reconnect the ECM connector.
|
| ||||
| OK | |
|
| 4.INSPECT FUSE (EFI NO. 2 FUSE) |
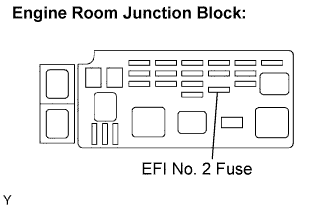 |
Check the EFI No. 2 fuse.
Remove the EFI No. 2 fuse from the engine room junction block.
Measure the EFI No. 2 fuse resistance.
Reinstall the EFI No. 2 fuse.
|
| ||||
| OK | |
|
| 5.CHECK HARNESS AND CONNECTOR (VSV FOR ACIS - EFI RELAY) |
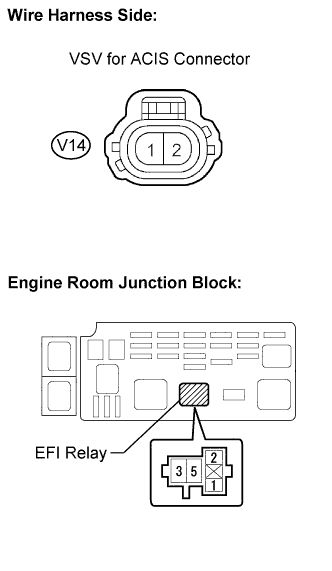 |
Check the wire harness between the VSV for ACIS connector and EFI relay.
Remove the EFI relay from the engine room junction block.
Disconnect the V14 VSV connector.
Measure the resistance according to the value(s) in the table below.
| Tester Connection | Specified Condition |
| VSV for ACIS (V14-2) - EFI relay terminal (3) | Below 1 Ω |
Reinstall the EFI relay.
Reconnect the VSV connector.
|
| ||||
| OK | ||
 | ||
| ||
