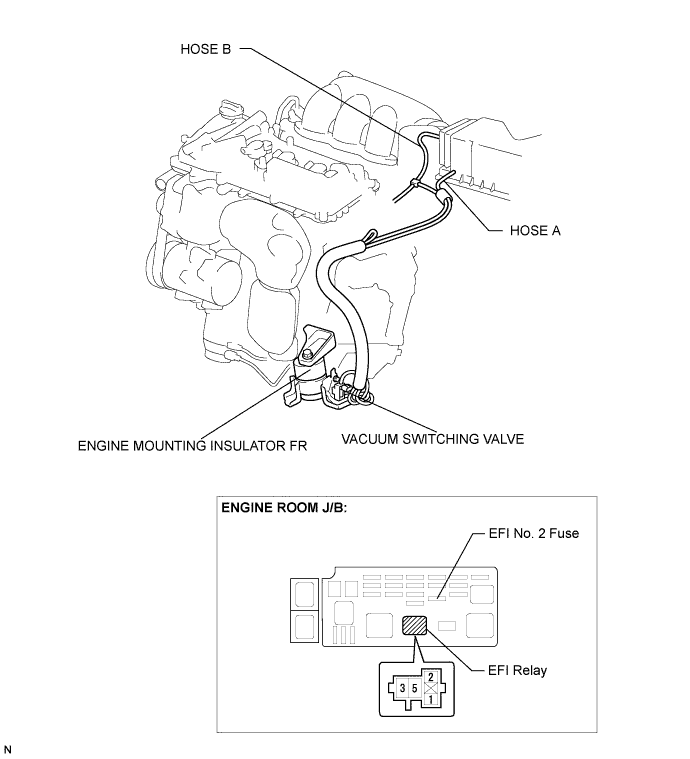
SFI SYSTEM > Active Control Engine Mount System |
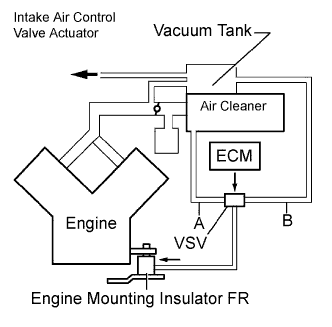
| 1.CHECK VACUUM HOSES |
 |
If the hose is damaged, replace the vacuum hose assembly.
Check the air and vacuum hoses for looseness, disconnection and blockage.
|
| ||||
| OK | |
 |
| 2.CHECK VACUUM |
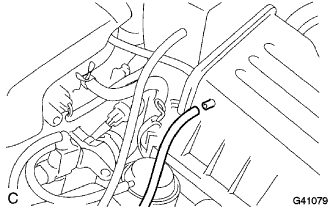 |
Start the engine.
Disconnect the vacuum hose from the air cleaner cap.
Check that the disconnected port located on the vacuum tank applies suction to your finger.
Reconnect the vacuum hose.
|
| ||||
| OK | |
|
| 3.INSPECT ECM |
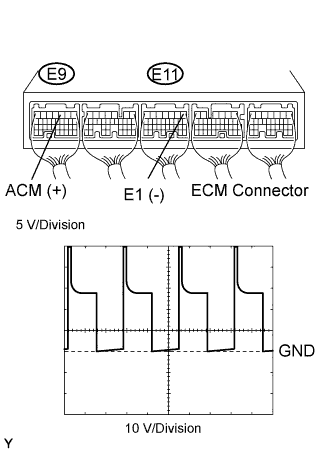 |
Connect the oscilloscope between terminals ACM and E1 of the E9 and E11 ECM connectors.
Warm up the engine to normal operating temperature.
Turn the A/C switch on.
Measure the voltage according to the value(s) in the table below.
| Condition | Voltage |
| Shift position is D, and engine speed is 850 rpm or less | Pulse generation |
| Shift position is D, and engine speed is 950 rpm or more | 9 to 14 V |
| Shift position is P | 9 to 14 V |
|
| ||||
| NG | |
|
| 4.INSPECT DUTY VACUUM SWITCHING VALVE (RESISTANCE) |
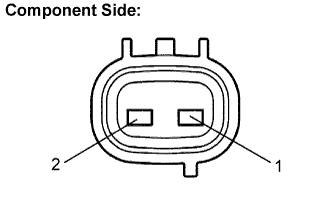 |
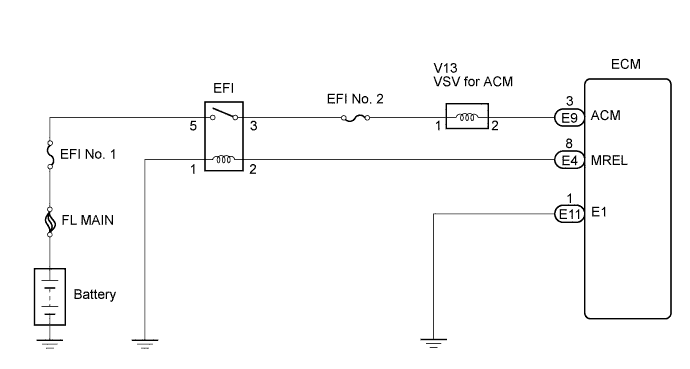
Disconnect the V13 VSV for ACM connector.
Measure the resistance according to the value(s) in the table below.
Reconnect the VSV for ACM connector.
|
| ||||
| OK | |
|
| 5.CHECK HARNESS AND CONNECTOR (VSV FOR ACM - ECM) |
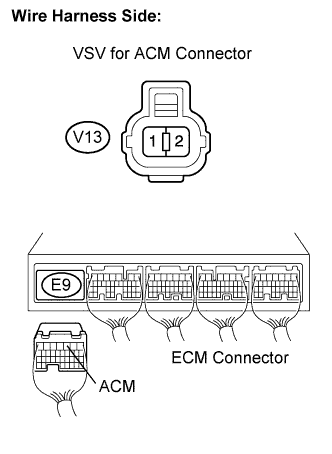 |
Check the wire harness between the VSV for ACM connector and the ECM connector.
Disconnect the V13 VSV for ACM connector.
Disconnect the E9 ECM connector.
Measure the resistance according to the value(s) in the table below.
| Tester Connection | Specified Condition |
| VSV for ACM (V13-2) - ACM (E9-3) | Below 1 Ω |
| Tester Connection | Specified Condition |
| VSV for ACM (V13-2) or ACM (E9-3) - Body ground | 10 kΩ or higher |
Reconnect the ECM connector.
|
| ||||
| OK | |
|
| 6.INSPECT FUSE (EFI NO. 2 FUSE) |
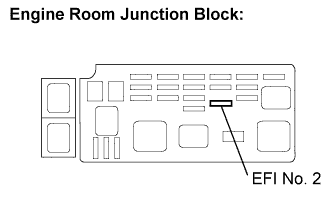 |
Remove the EFI No. 2 fuse from the engine room junction block.
Measure the resistance according to the value(s) in the table below.
Reinstall the EFI No. 2 fuse.
|
| ||||
| OK | |
|
| 7.INSPECT RELAY (EFI RELAY) |
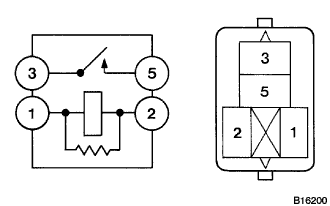 |
Remove the EFI relay from the engine room junction block.
Measure the resistance according to the value(s) in the table below.
| Tester Connection | Specified Condition |
| 3 - 5 | 10 kΩ or higher |
| 3 - 5 | Below 1 Ω (Apply battery voltage between terminals 1 and 2) |
Reinstall the EFI relay.
|
| ||||
| OK | |
|
| 8.CHECK HARNESS AND CONNECTOR (VSV FOR ACM - EFI RELAY) |
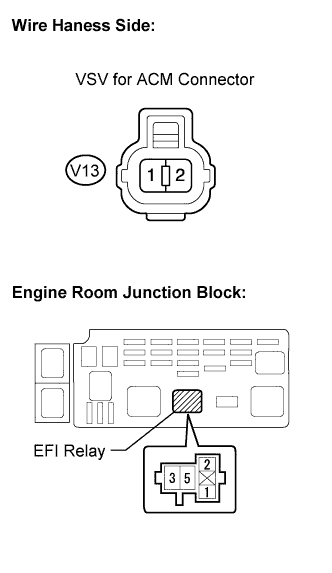 |
Check the wire harness between the VSV for ACM and the EFI relay.
Remove the EFI relay from the engine room junction block.
Measure the resistance according to the value(s) in the table below.
| Tester Connection | Specified Condition |
| VSV for ACM (V13-1) - EFI relay terminal (3) | Below 1 Ω |
Reconnect the VSV for ACM connector.
Reinstall the EFI relay.
|
| ||||
| OK | ||
 | ||
| ||
| 9.INSPECT DUTY VACUUM SWITCHING VALVE (OPERATION) |
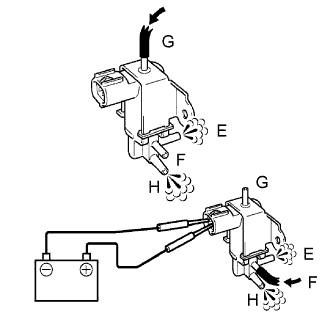 |
Remove the VSV for ACM.
Check operation of the VSV for ACM when positive battery voltage is applied to the terminals of the VSV for ACM connector.
Reinstall the VSV for ACM.
|
| ||||
| OK | |
|
| 10.INSPECT ENGINE MOUNTING INSULATOR ASSEMBLY FRONT |
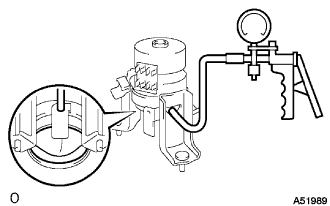 |
Disconnect the vacuum hose from the front engine mount insulator.
Using a vacuum pump, apply vacuum of 80 kPa (600 mmHg, 25 in.Hg) and wait for 1 minute.
Check that there is no change in the needle movement of the vacuum pump gauge.
Check that there is no fluid leakage caused by a break in the diaphragm.
Reconnect the vacuum hose.
|
| ||||
| OK | ||
| ||
| ||

