 |
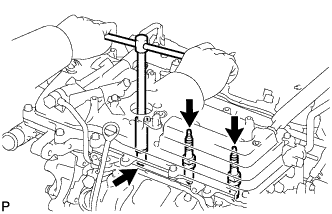
Install the 6 spark plugs.
- Torque:
- 18 N*m{ 183 kgf*cm , 13 ft.*lbf }
IGNITION COIL AND SPARK PLUG > INSTALLATION |
| 1. INSTALL SPARK PLUG |
|
Install the 6 spark plugs.
| 2. INSTALL IGNITION COIL ASSEMBLY |
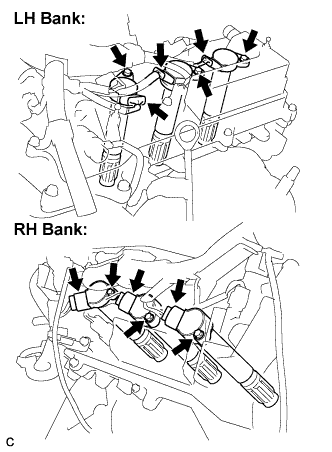 |
Install the 6 ignition coils with the 6 bolts.
Connect the 6 ignition coil connectors.
| 3. INSTALL NO. 1 SURGE TANK STAY |
| Tightening Parts |
| No. 1 surge tank stay and cylinder head cover |
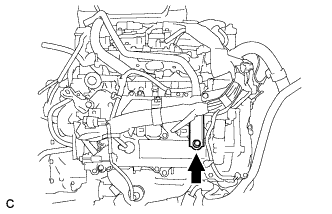 |
Install the No. 1 surge tank stay with the bolt.
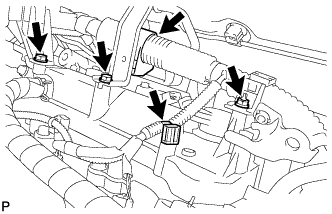 |
Install the 2 bolts, 2 clamps, and nut.
| 4. INSTALL INTAKE AIR SURGE TANK ASSEMBLY |
| Tightening Parts | ||
| Surge Tank and Intake Manifold | ||
| No. 1 Surge Tank Stay and Surge Tank | ||
| Throttle Body Bracket and Surge Tank |
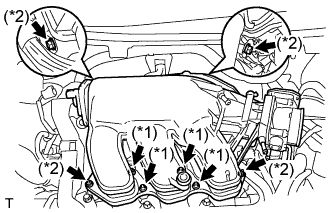 |
Install a new gasket to the intake air surge tank assembly.
Using a 5 mm hexagon socket wrench, install the 4 bolts. (*1)
Install the intake air surge tank assembly with the 2 nuts and 2 bolts. (*2)
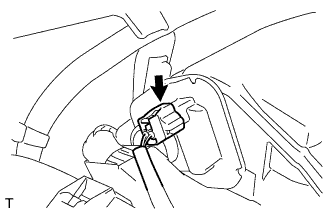 |
Connect the connector.
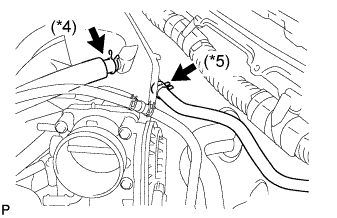 |
Connect the union to check valve hose. (*1)
Connect the No. 1 ventilation hose. (*2)
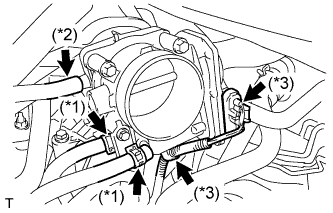 |
Install the clamp and connect the throttle with motor body assembly connector. (*3)
Connect the vapor feed hose assembly. (*4)
Connect the 2 water by-pass hoses to the throttle with motor body assembly. (*5)
| 5. INSTALL AIR CLEANER CAP SUB-ASSEMBLY |
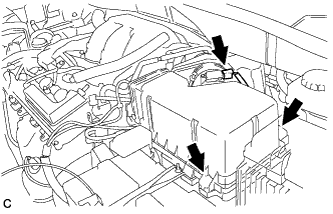 |
Install the 2 bolts and air cleaner cap sub-assembly.
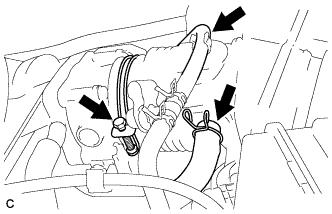 |
Connect the No. 2 ventilation hose and air cleaner hose band.
Connect the vacuum hose (EVAP) to the air cleaner hose.
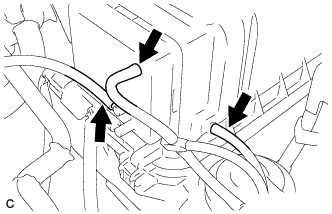 |
Connect the 3 vacuum hoses.
| 6. ADD ENGINE COOLANT |
Tighten the radiator drain cock plug by hand.
Tighten the 2 cylinder block drain cock plugs.
Remove the air drain cock plug from the water inlet housing.
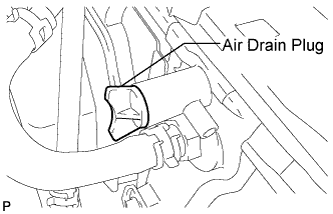 |
Loosen the air drain plug at the top of the radiator 3 or 4 turns.
Add TOYOTA Super Long Life Coolant (SLLC) to the radiator inlet opening until coolant overflows from the engine air drain cock hole. Then install the air drain cock plug to the water inlet housing.
Continue to add TOYOTA Super Long Life Coolant (SLLC) to the radiator inlet opening until coolant overflows from the radiator air drain hole. Then close the air drain plug at the top of the radiator.
Slowly fill the radiator with TOYOTA Super Long Life Coolant (SLLC).
Slowly pour coolant into the radiator reservoir tank until it reaches the FULL line.
Squeeze the No. 1 and No. 2 radiator hoses several times by hand, and then check the level of the coolant.
If the coolant level is low, add coolant.
Bleed air from the cooling system.
Warm up the engine until the thermostat opens. While the thermostat is open, circulate the coolant for several minutes.
Maintain the engine speed at 2500 to 3000 rpm.
Squeeze the inlet and outlet radiator hoses several times by hand to bleed air.
Stop the engine and wait until the engine coolant cools down.
Add engine coolant to the FULL line on the radiator reservoir.
| 7. CONNECT CABLE TO NEGATIVE BATTERY TERMINAL |
| 8. INSPECT FOR ENGINE COOLANT LEAK |
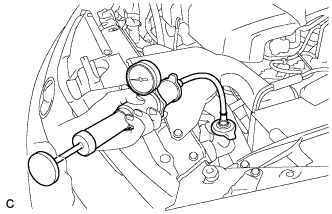 |
Fill the radiator with coolant and attach a radiator cap tester.
Warm up the engine.
Using a radiator cap tester, increase the pressure inside the radiator to 118 kPa (1.2 kgf/cm2, 17 psi), and check that the pressure does not drop.
If the pressure drops, check the hoses, radiator and water pump for leaks. If no external leaks are found, check the heater core, cylinder block and cylinder head.
| 9. INSTALL V-BANK COVER SUB-ASSEMBLY |
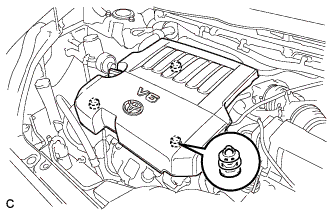 |
Fit the 3 retainers and install the V-bank cover.
| 10. INSTALL COWL TOP PANEL SUB-ASSEMBLY OUTER FRONT |
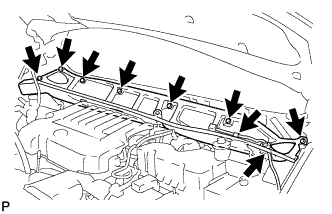 |
Install the 7 bolts and the cowl top panel sub-assembly outer front.
Connect the fuel pump resistor connector.
Connect the wire harness clamp.
| 11. INSTALL NO. 1 COWL TOP TO COWL BRACE INNER |
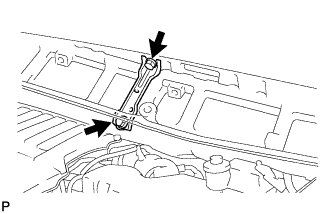 |
Install the 2 bolts and the No.1 cowl top to cowl brace inner.
| 12. INSTALL WINDSHIELD WIPER MOTOR AND LINK ASSEMBLY |
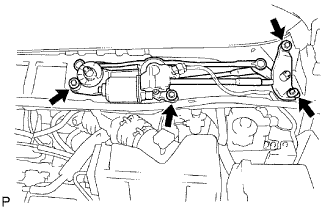 |
Install the wiper motor & link assembly with the 4 bolts.
Connect the connector.
| 13. INSTALL FRONT WIPER ARM LH |
Operate the wiper, and stop the windshield wiper motor assembly to the automatic stop position.
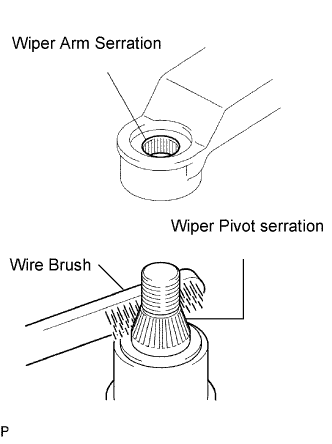 |
Scrape off the serration part of the wiper arm with a round file or equivalent.
Clean the wiper pivot serration with a wire brush.
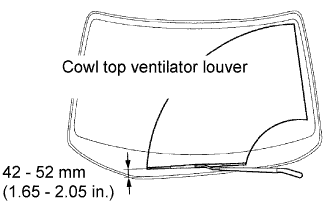 |
Install the front wiper arm LH with the nut to the position shown in the illustration.
| 14. INSTALL FRONT WIPER ARM RH |
Scrape off the serration part of the wiper arm with a round file or equivalent.
Clean the wiper pivot serration with a wire brush.
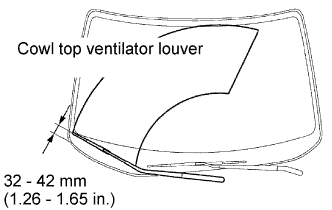 |
Install the front wiper arm RH with the nut to the position shown in the illustration.
Operate the wiper while running the water or the washer fluid over the window, and check the wiping condition and that the front wiper does not hit against the vehicle body.