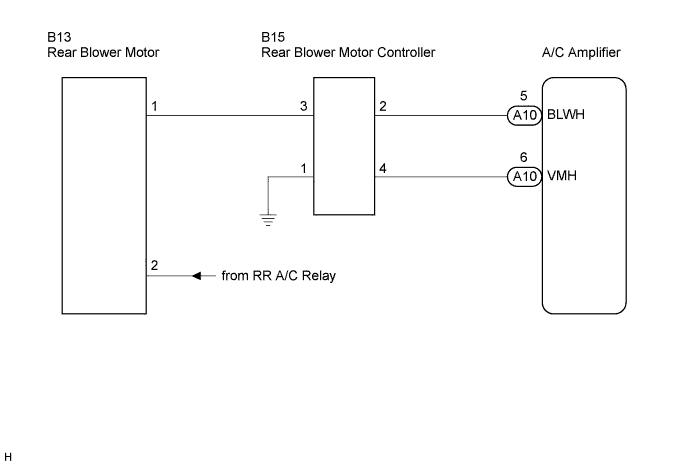
AIR CONDITIONING SYSTEM (for Automatic Air Conditioning System) > Rear Blower Motor Circuit |
| 1.READ VALUE USING TECHSTREAM |
Connect Techstream to the DLC3.
Turn the ignition switch to the ON position and turn Techstream on.
Select the item below in the Data List, and read the display on Techstream.
| Tester Display | Measurement Item/Range | Normal Condition | Diagnostic Note |
| Blower Motor Level (Rear) | Blower motor speed level (Rear) / min.: Level 0, max.: Level 31 | Changes depending on blower level (Rear) | - |
|
| ||||
| OK | ||
 | ||
| ||
| 2.INSPECT REAR BLOWER MOTOR |
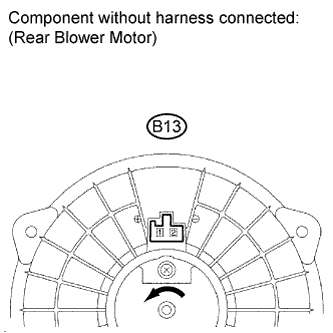 |
Remove the rear blower motor with the connector still connected.
Disconnect the connector from the rear blower motor.
Connect the positive (+) lead to terminal 1 of the rear blower motor connector, and the negative (-) lead to terminal 2.
|
| ||||
| OK | |
 |
| 3.CHECK HARNESS AND CONNECTOR (REAR BLOWER MOTOR - BATTERY) |
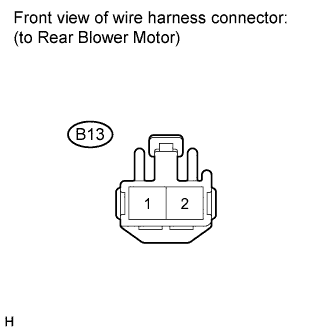 |
Measure the voltage according to the value(s) in the table below.
| Tester Connection | Condition | Specified Condition |
| B13-2 - Body ground | Ignition switch: ON Rear blower control dial: OFF | Below 1 V |
| B13-2 - Body ground | Ignition switch: ON Rear blower control dial: ON | 11 to 14 V |
|
| ||||
| OK | |
|
| 4.CHECK HARNESS AND CONNECTOR (REAR BLOWER MOTOR CONTROLLER - BODY GROUND) |
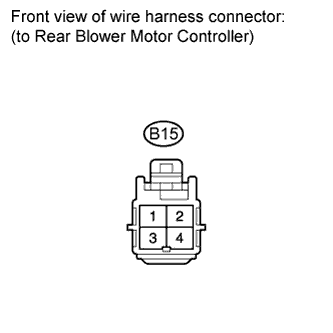 |
Disconnect the connector from the rear blower motor controller.
Measure the resistance according to the value(s) in the table below.
| Tester Connection | Condition | Specified Condition |
| B15-1 - Body ground | Always | Below 1 Ω |
|
| ||||
| OK | |
|
| 5.CHECK HARNESS AND CONNECTOR (REAR BLOWER MOTOR - REAR BLOWER MOTOR CONTROLLER) |
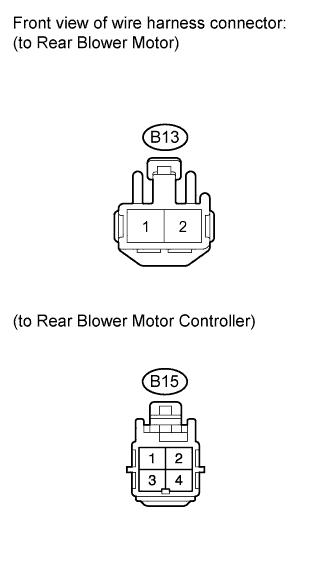 |
Measure the resistance according to the value(s) in the table below.
| Tester Connection | Condition | Specified Condition |
| B13-1 - B15-3 | Always | Below 1 Ω |
| B13-1 - Body ground | Always | 10 kΩ or higher |
|
| ||||
| OK | |
|
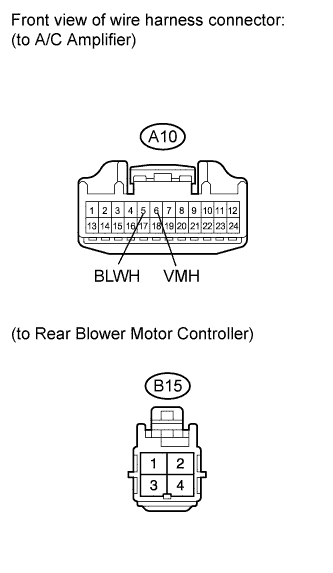
| 6.CHECK HARNESS AND CONNECTOR (REAR BLOWER MOTOR CONTROLLER - A/C AMPLIFIER) |
 |
Disconnect the connector from the A/C amplifier.
Measure the resistance according to the value(s) in the table below.
| Tester Connection | Condition | Specified Condition |
| A10-5 (BLWH) - B15-2 | Always | Below 1 Ω |
| A10-6 (VMH) - B15-4 | Always | Below 1 Ω |
| A10-5 (BLWH) - Body ground | Always | 10 kΩ or higher |
| A10-6 (VMH) - Body ground | Always | 10 kΩ or higher |
|
| ||||
| OK | |
|
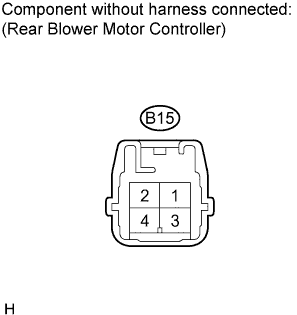
| 7.INSPECT REAR BLOWER MOTOR CONTROLLER |
 |
Disconnect the connector from the rear blower motor controller.
Measure the resistance according to the value(s) in the table below.
| Tester Connection | Condition | Specified Condition |
| B15-3 - B15-4 | Always | 2.0 to 2.4 kΩ |
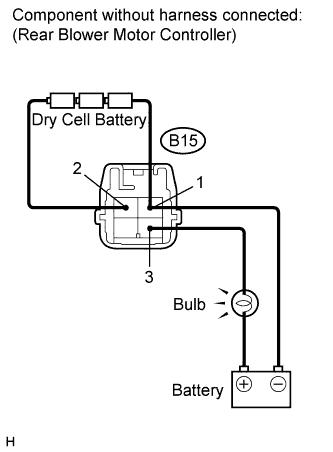 |
Connect the positive (+) lead to terminal 3 through a 12 V 3.4 W test bulb, and the negative (-) lead to terminal 1.
Connect the three 1.5 V dry cell batteries' positive (+) lead to terminal 2, and the negative (-) lead to terminal 1. Then check that the test bulb comes on.
|
| ||||
| OK | ||
| ||
| ||

