BODY PANEL QUARTER WHEEL HOUSING OUTER PANEL ASSEMBLY REPLACEMENT
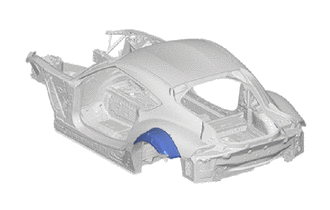
With the quarter panel cut and join replacement sections removed.
REMOVAL
| Symbol Meaning | |
|---|---|

|
Remove Weld Points |

|
Remove Weld Points |

|
Remove Weld Points |

|
Cut Location |
Mark and carry out the separating cut in accordance with the specified dimension.
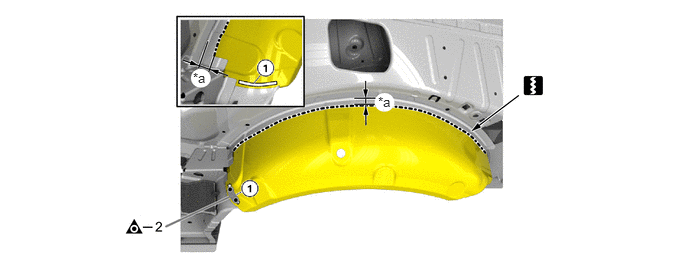
| *a | 25 mm (0.98 in.) | - | - |
Remove the weld points in areas (1).
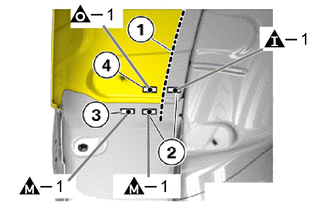
Continue with the separating cut (1) from the previous operation as shown.
Remove the weld points in areas (2), (3) and (4).
Remove section of the quarter wheel house panel outer.
PREPARE NEW PART
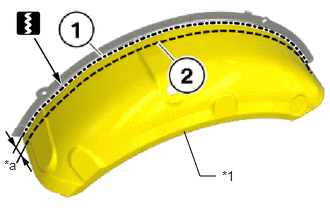
| *1 | QUARTER WHEEL HOUSE PANEL OUTER |
| *a | 20 mm (0.79 in.) |
Mark and make separating cut (1) on the new part of the quarter wheel house panel outer on the separating cut on the vehicle (2) with material allowance of 20 mm (0.79 in.).
Adjust the new part of the quarter wheel house panel outer on the vehicle.
INSTALLATION
| Symbol Meaning | |
|---|---|

|
Plug Weld |

|
Plug Weld |
Adjust and fix quarter wheel house panel sub-assy inner (1).
Perform plug-welding in the area where the panel are overlapped (2).
- HINT:
-
Apply body sealer to both sides of each panel.
Weld the quarter wheel house panel outer in the areas (3).
- HINT:
-
Be careful to avoid damaging the foamed sealing material (4) while performing work.
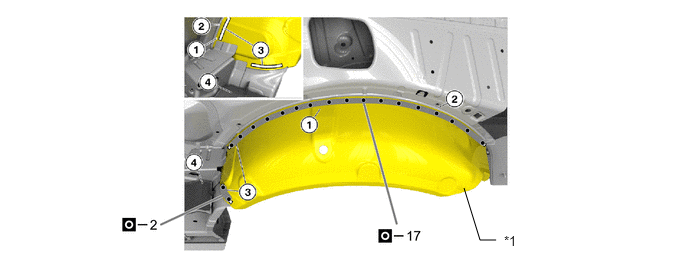
| *1 | QUARTER WHEEL HOUSE PANEL OUTER | - | - |
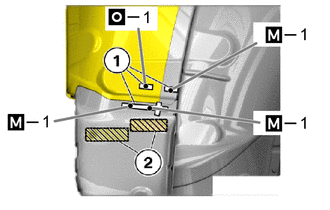

|
Foamed Sealing Material |
Weld the quarter wheel house panel outer in areas (1).
- NOTICE:
-
Be careful to avoid damaging the foamed sealing material (2) while performing work.
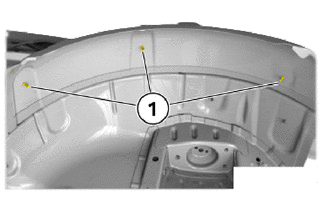
Weld the coarse thread bolt (1) on the new part.
- HINT:
-
Take the quantity and position from the component to be replaced.
After welding, apply body sealer and undercoating to the corresponding parts. (See the painting/coating)
After applying the top coat, apply anti-rust agent to the internal panel portion of the closed section structural weld points.