BODY PANEL REAR FLOOR PAN ASSEMBLY REPLACEMENT (PATTERN 2)
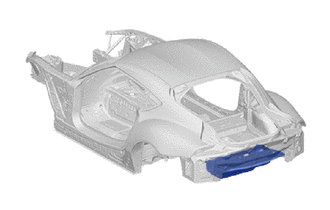
With the body lower back panel assembly removed.
REMOVAL
| Symbol Meaning | |
|---|---|

|
Remove Weld Points |

|
Cut Location |
- HINT:
-
The operations shown only for one side must be carried out on both sides.
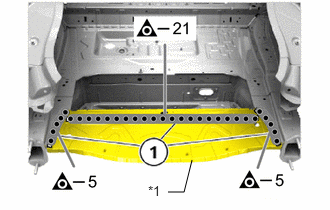
| *1 | REAR FLOOR PANEL REAR |
Remove the welding points in areas (1).
Remove the rear floor panel rear.
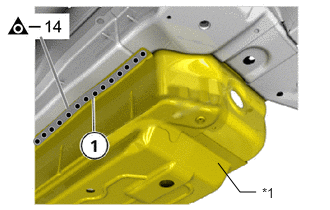
| *1 | REAR FLOOR CROSS MEMBER NO.1 |
Remove the welding points in areas (1).
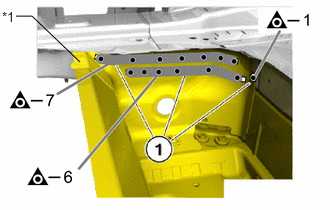
| *1 | REAR FLOOR TO QUARTER EXTENSION SUB-ASSY |
Remove the welding points in areas (1).
Remove the section of the rear floor cross member No.1 and rear floor to quarter extension sub-assy.
INSTALLATION
| Symbol Meaning | |
|---|---|

|
Plug Weld |
- HINT:
-
The operations shown only for one side must be carried out on both sides.
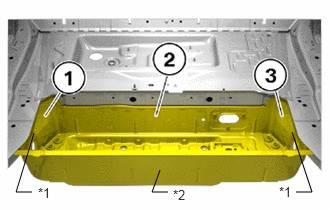
| *1 | REAR FLOOR TO QUARTER EXTENSION SUB-ASSY |
| *2 | REAR FLOOR CROSS MEMBER NO.1 |
Adjust and fix the centre of the luggage compartment floor, consisting of the rear floor to quarter extension sub-assy (1), (3) and rear floor cross member No.1 (2).
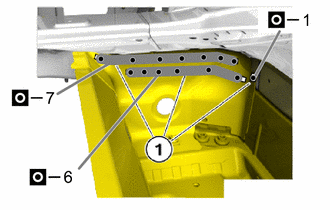
Weld the rear floor to quarter extension sub-assy in the areas (1).
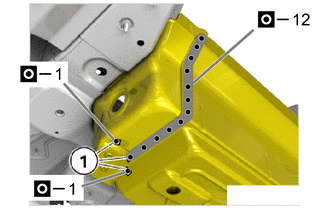
Weld the rear floor to quarter extension sub-assy in the areas (1).
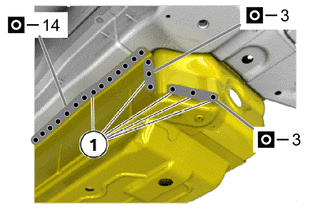
Weld the rear floor cross member No.1 in the areas (1).
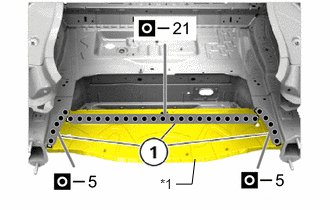
| *1 | REAR FLOOR PANEL REAR |
Install, adjust and secure the rear floor pan.
Weld the rear floor panel rear in the areas (1).
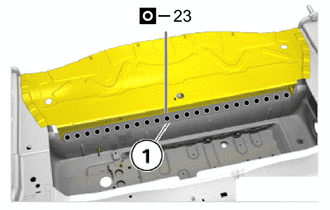
Weld the rear floor panel rear in the area (1).
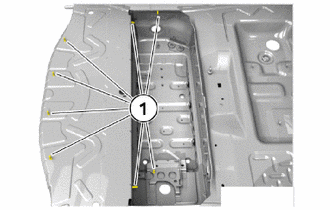
Weld coarse thread bolt (1) on the new part.
- HINT:
-
Take the quantity and position from the component to be replaced.
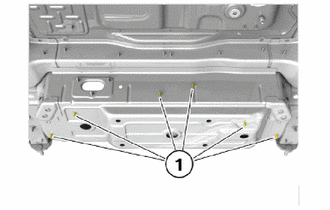
Weld coarse thread bolt (1) on the new part.
- HINT:
-
Take the quantity and position from the component to be replaced.
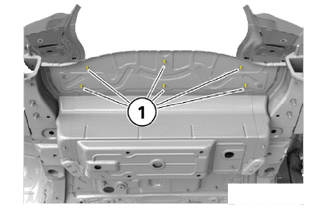
Weld coarse thread bolt (1) on the new part.
- HINT:
-
Take the quantity and position from the component to be replaced.
After welding, apply body sealer and undercoating to the corresponding parts. (See the painting/coating)
After applying the top coat, apply anti-rust agent to the internal panel portion of the closed section structural weld points.