BODY PANEL TORQUE FRONT BOX ASSEMBLY REPLACEMENT
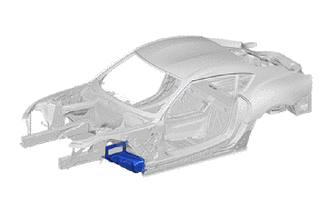
With the front side member assembly removed.
REMOVAL
| Symbol Meaning | |
|---|---|

|
Remove Weld Points |

|
Remove Weld Points |

|
Remove Weld Points |

|
Cut Location |
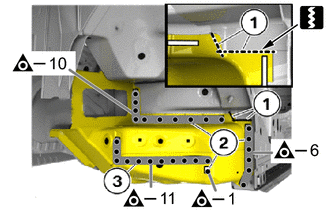
Mark the separating cuts (1) according to the schematic diagram and carry out the cuts.
- NOTICE:
-
Thereby disconnect only the outer panel.
Remove the weld points in areas (2) and (3).
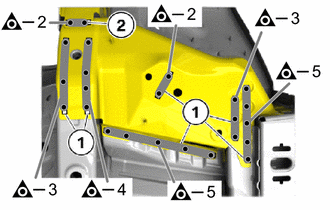
Remove the weld points in areas (1) and (2).
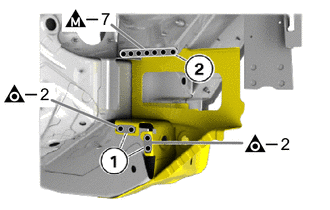
Remove the weld points in areas (1) and (2).
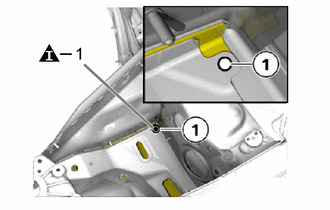
Remove the weld point in the area (1).
PREPARE NEW PART
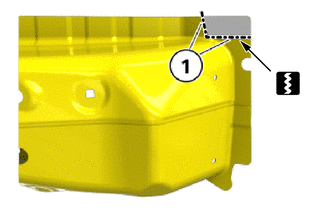
Mark and carry out separating cuts (1) on the new part in accordance with the separating cuts on the vehicle with an allowance of 2 to 3 mm (0.08 to 0.12 in.).
INSTALLATION
| Symbol Meaning | |
|---|---|

|
Plug Weld |

|
Plug Weld |

|
Plug Weld |

|
Fillet Weld |
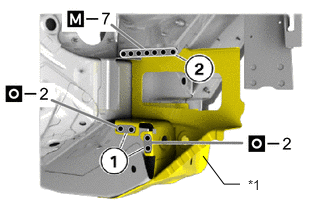
| *1 | FRONT SIDE MEMBER REINFORCEMENT SUB-ASSY |
Align and fix front side member reinforcement sub-assy.
Weld the front side member reinforcement sub-assy in the areas (1) and (2).
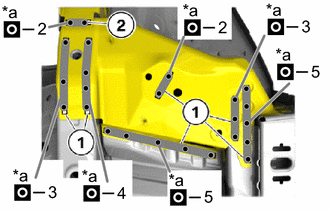
| *a | Ultra High Strength Steel Welding Point |
Weld the front side member reinforcement sub-assy in the areas (1) and (2).
When welding 2 panels together including 1180 MPa ultra high strength steel.
| Plug weld | Plug diameter | 8 mm (0.31 in.) |
| Wire type | AWS A5.18 ER70S-3 | |
| Shield gas | Metal active gas |
- NOTICE:
-
Be sure to use Metal active gas (Ar 80% + CO2 20%) as the shield gas when plug welding.Sufficient weld strength cannot be assured when using 100% CO2 shield gas.
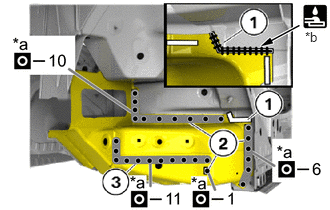
| *a | Ultra High Strength Steel Welding Point |
| *b | 70 mm (2.76 in.) |
Weld the front side member reinforcement sub-assy in the areas (1), (2) and (3).
- HINT:
-
Weld using MAG weld seam in the area (1).
When welding 2 panels together including 1180 MPa ultra high strength steel.
| Plug weld | Plug diameter | 8 mm (0.31 in.) |
| Wire type | AWS A5.18 ER70S-3 | |
| Shield gas | Metal active gas |
- NOTICE:
-
Be sure to use Metal active gas (Ar 80% + CO2 20%) as the shield gas when plug welding.Sufficient weld strength cannot be assured when using 100% CO2 shield gas.
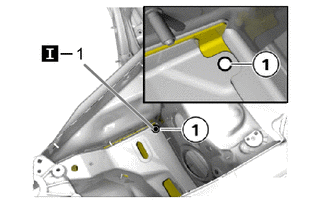
Weld the front side member reinforcement sub-assy in the area (1).
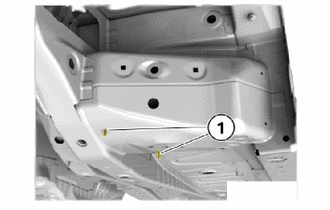
Weld the coarse thread bolt (1) on the new part.
- HINT:
-
Take the quantity and position from the new part to be replaced.
After welding, apply body sealer and undercoating to the corresponding parts. (See the painting/coating)
After applying the top coat, apply anti-rust agent to the internal panel portion of the closed section structural weld points.