MAINTENANCE TIRE AND WHEEL INSTALLATION
PROCEDURE

 1.INSTALL WHEEL ASSEMBLY
Clean the contact surfaces between the brake disc and the wheel rim.
- NOTICE:
-
The contact surface between the brake disc and the wheel rim must be clean and free from oil and grease. There is otherwise a risk of the wheel becoming loose at a later time.
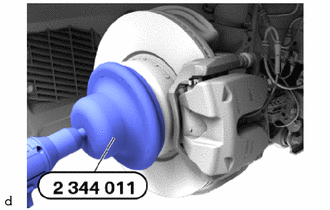
Remove dirt, grease residues and corrosion from the contact surface with a drill and the special tool 2 344 011.
- SST
- 09600-WA010
- NOTICE:
-
Do not operate special tool 2 344 011 with an impact wrench.
In the event of grease residue in the area of the axle hub bolt holes, remove and clean the brake disc.
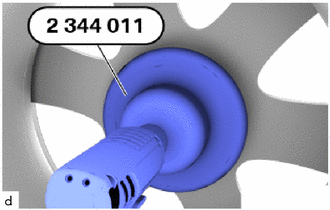
Remove dirt, grease residues and corrosion from the contact surface with a drill and the special tool 2 344 011.
- SST
- 09600-WA010
- NOTICE:
-
Do not operate special tool 2 344 011 with an impact wrench.
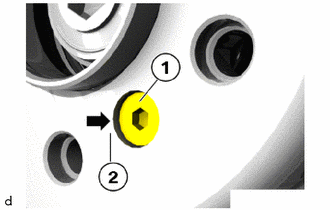
Check that the mounting bolt (1) for the brake disc is securely seated.
- Torque:
- 16 N*m (163 kgf*cm, 12 ft.*lbf)
- NOTICE:
-
The mounting bolt (1) for the brake disc must not under any circumstances protrude onto the contact surface (2) between the brake disc and the wheel rim.
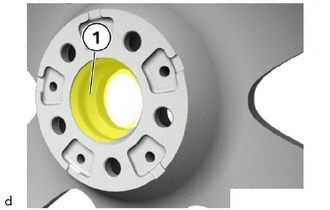
Thinly grease the wheel centering (1) in the wheel rim.
- Grease:
Brake Pad Paste
Clean the axle hub bolts.
- HINT:
-
Check the axle hub bolts and threads for damage, replace the axle hub bolts if necessary.
Tighten the axle hub bolts as follows:
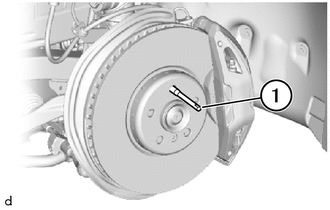
Install SST (1) at the position as shown in the illustration.
- SST
- 09650-14010
- NOTICE:
- ·
Place the mounting position of SST at the top.
·Be sure to screw in the thread of SST completely.
Use SST as a guide to install the wheel assembly and then temporarily install the 4 axle hub bolts by hand.
- NOTICE:
- ·
Never use impact wrench or electric screwdrivers to screw in and tighten the axle hub bolts.
·The wheel rim must rest uniformly against the brake disc.
·Do not apply oil to the axle hub bolts.
- HINT:
-
Because this vehicle does not have wheel studs, SST is used as a guide to assist with removal and installation of the wheel assembly.
Remove SST and then temporarily install the axle hub bolt by hand.
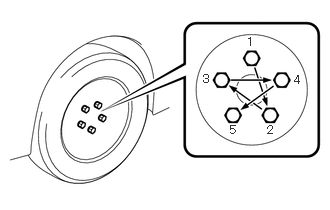
Temporarily tighten the axle hub bolts in the order shown in the illustration.
Lower the vehicle then fully tighten the axle hub bolts in the order shown in the illustration.
- Torque:
- 140 N*m (1428 kgf*cm, 103 ft.*lbf)