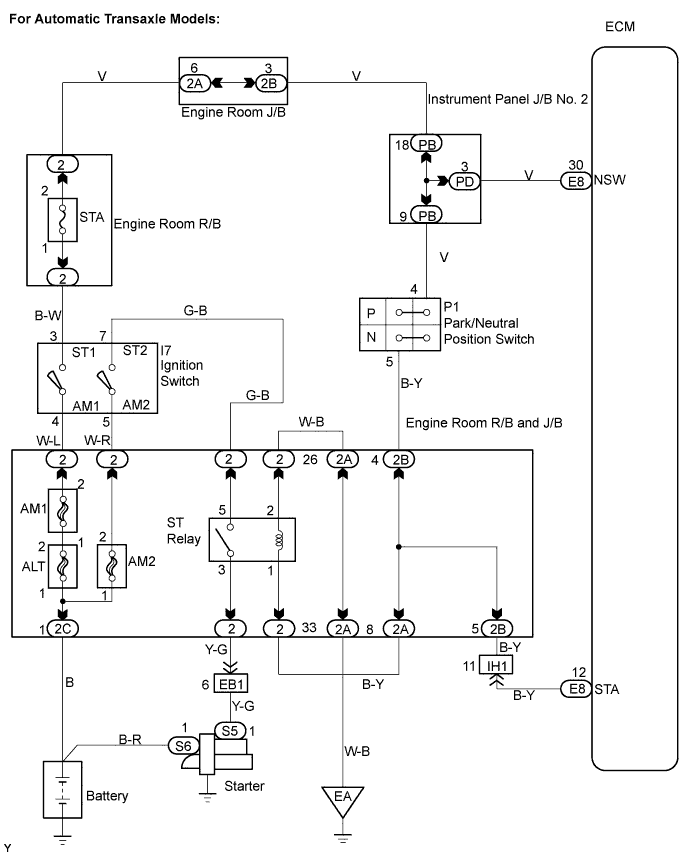
DTC P0617 Starter Relay Circuit High |
| DTC No. | DTC Detection Conditions | Trouble Areas |
| P0617 | When conditions (a), (b) and (c) met, positive (+B) battery voltage 10.5 V or more applied to ECM for 20 seconds (1 trip detection logic):
|
|
| Related DTCs | P0617: Starter signal |
| Required Sensors/Components (Main) | STARTER relay, PNP switch, Clutch start switch and Ignition switch |
| Required Sensors/Components (Related) | Vehicle Speed Sensor (VSS), Crankshaft Position (CKP) sensor |
| Frequency of Operation | Continuous |
| Duration | 20 seconds |
| MIL Operation | Immediate |
| Sequence of Operation | None |
| Monitor runs whenever following DTCs not present | None |
| Battery voltage | 10.5 V or more |
| Vehicle speed | 12.4 mph (20 km/h) or more |
| Engine speed | 1,000 rpm or more |
| Starter signal | ON |
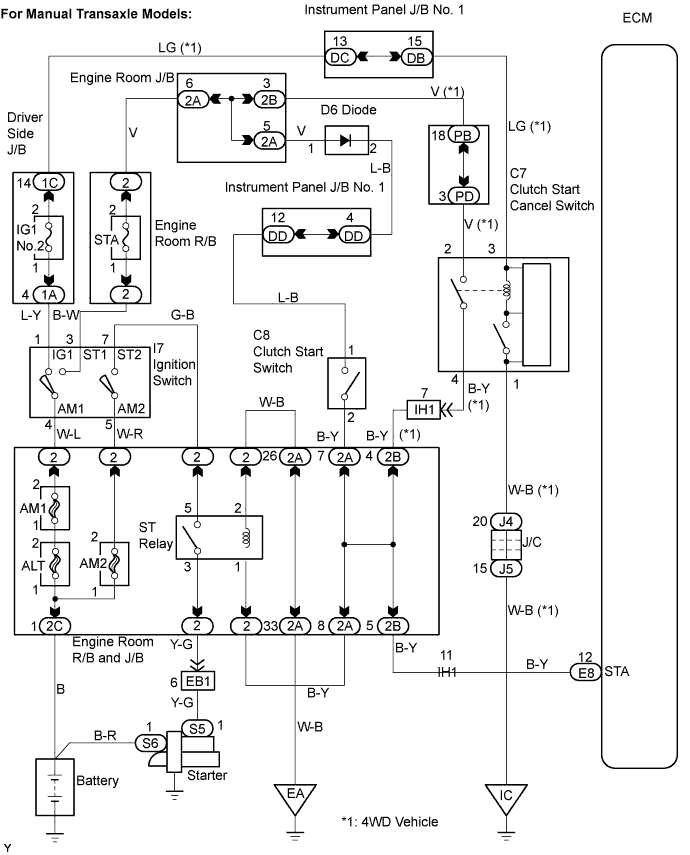
| 1.READ DATA LIST (STARTER SIGNAL) |
Connect an intelligent tester to the DLC3.
Turn the ignition switch to ON and turn the tester ON.
Select the following menu items: DIAGNOSIS / ENHANCED OBD II / DATA LIST / PRIMARY / STARTER SIG.
Check the value displayed on the tester when the ignition switch is turned to the ON and START positions.
| Ignition Switch Positions | STARTER SIG |
| ON | OFF |
| START | ON |
|
| ||||
| NG | |
 |
| 2.INSPECT PARK / NEUTRAL POSITION SWITCH OR CLUTCH START SWITCH ASSEMBLY |
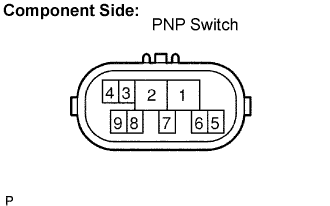 |
Inspect the Park/Neutral Position (PNP) switch (for A/T models).
Disconnect the P1 PNP switch connector.
Check the resistance when the transmission gear selector lever is moved to each position.
| Gear Selector Lever Positions | Tester Connections | Specified Conditions |
| P | 2 - 6, 4 - 5 | Below 1 Ω |
| R | 1 - 2 | Below 1 Ω |
| N | 2 - 9, 4 - 5 | Below 1 Ω |
| D | 2 - 7 | Below 1 Ω |
| 2 | 2 - 3 | Below 1 Ω |
| L | 2 - 8 | Below 1 Ω |
Reconnect the PNP switch connector.
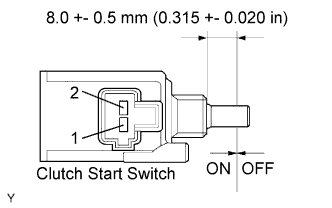 |
Inspect the clutch start switch (for M/T models).
Disconnect the C8 clutch start switch connector.
Check the resistance when the clutch start switch is ON and OFF.
| Ignition Switch Positions | Tester Connections | Specified Conditions |
| ON (pushed) | 1 - 2 | Below 1 Ω |
| OFF (free) | 1 - 2 | 10 kΩ or higher |
Reconnect the clutch start switch connector.
|
| ||||
| OK | |
|
| 3.READ DATA LIST (STARTER SIGNAL) |
Connect the intelligent tester to the DLC3.
Turn the ignition switch to ON and turn the tester ON.
Select the following menu items: DIAGNOSIS / ENHANCED OBD II / DATA LIST / PRIMARY / STARTER SIG.
Check the value displayed on the tester when the ignition switch is turned to the ON and START positions.
| Ignition Switch Positions | STARTER SIG |
| ON | OFF |
| START | ON |
|
| ||||
| NG | |
|
| 4.INSPECT IGNITION OR STARTER SWITCH ASSEMBLY |
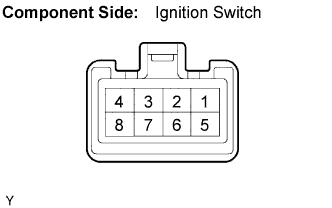 |
Disconnect the I7 ignition switch connector.
Check the resistance.
| Ignition Switch Positions | Tester Connections | Specified Conditions |
| LOCK | All Terminals | 10 kΩ or higher |
| ACC | 2-4 | Below 1 Ω |
| ON | 1-4, 1-6, 2-4, 3-4, 5-6 | Below 1 Ω |
| START | 1-4, 3-4, 5-6, 5-7 | Below 1 Ω |
Reconnect the ignition switch connector.
|
| ||||
| OK | |
|
| 5.READ DATA LIST (STARTER SIGNAL) |
Connect the intelligent tester to the DLC3.
Turn the ignition switch to ON and turn the tester ON.
Select the following menu items: DIAGNOSIS / ENHANCED OBD II / DATA LIST / PRIMARY / STARTER SIG.
Check the value displayed on the tester when the ignition switch is turned to the ON and START positions.
| Ignition Switch Positions | STARTER SIG |
| ON | OFF |
| START | ON |
|
| ||||
| NG | ||
 | ||
| ||
