 |
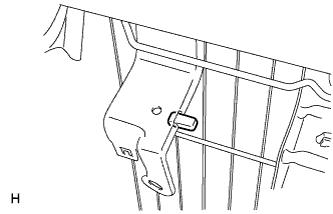
Install the front seat cushion spring protector.
FRONT SEAT ASSEMBLY (for Bench Seat Type) > REASSEMBLY |
| 1. INSTALL FRONT SEAT CUSHION SPRING PROTECTOR |
|
Install the front seat cushion spring protector.
| 2. INSTALL SEAT WIRE |
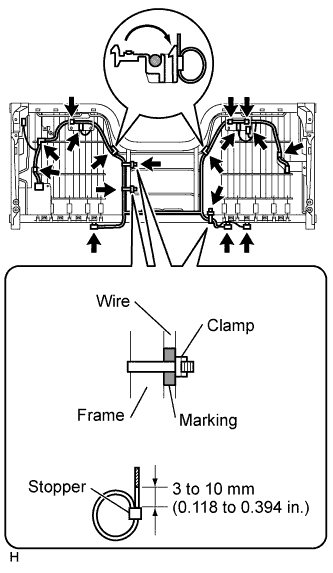 |
Install the seat wire with the 12 wiring harness clamps.
Install the 2 wiring harness clamps as shown in the illustration.
Install 3 new wiring harness clamps as shown in the illustration.
Cut each wiring harness clamp 3 to 10 mm (0.118 to 0.394 in.) from the stopper, as shown in the illustration.
| 3. INSTALL SEAT TRACK HANDLE SUB-ASSEMBLY LH |
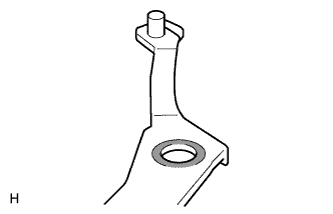 |
Apply grease to the seat track handle as shown in the illustration.
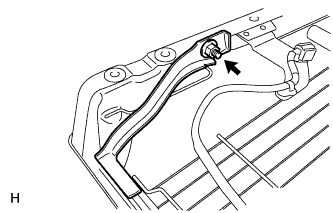 |
Install the seat track handle with the nut.
| 4. INSTALL SEAT TRACK HANDLE SUB-ASSEMBLY RH |
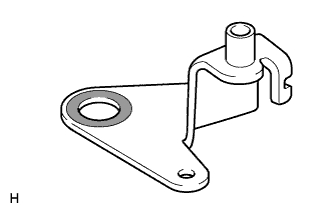 |
Apply grease to the seat track handle as shown in the illustration.
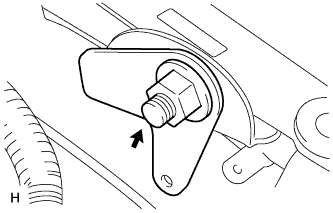 |
Install the seat track handle with the nut.
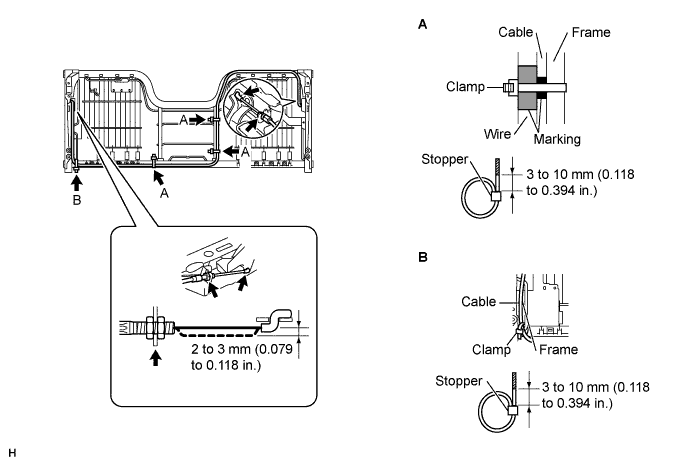
| 5. INSTALL FRONT SEAT SLIDE CONTROL CABLE ASSEMBLY |
Install the 2 cable ends and the front seat slide control cable.
Install the casing cap.
Install the screw cap with the nut.
Check that the cable is slack.
Install 4 new wiring harness clamps as shown in the illustration.
Cut each wiring harness clamp 3 to 10 mm (0.118 to 0.394 in.) from the stopper, as shown in the illustration.
| 6. INSTALL SEAT TRACK SPRING |
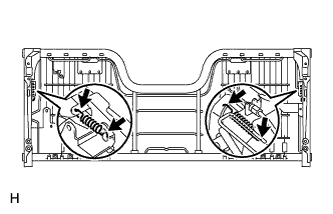 |
Install the 2 seat track springs.
| 7. INSTALL OCCUPANT CLASSIFICATION SENSOR |
Install the occupant classification sensor with the 2 clips.
Engage the clamps to the seat cushion frame.
Pass the tube of the occupant classification sensor through marked portion A and then fix it at marked portion B on the front seat cushion spring assembly with the wiring harness clamp, as shown in the illustration on the following page.
Connect the connector to the occupant classification sensor.
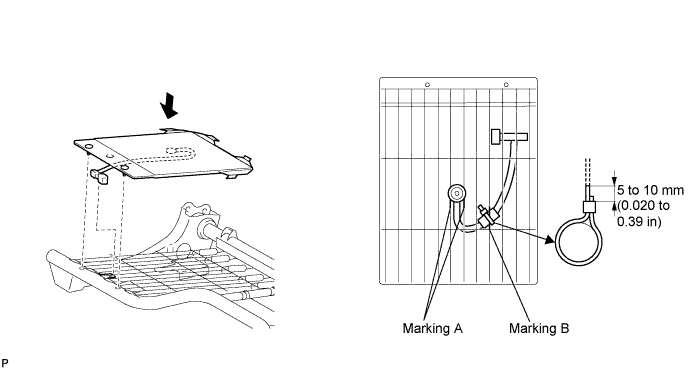
| 8. INSTALL FRONT SEAT CUSHION SPRING ASSEMBLY |
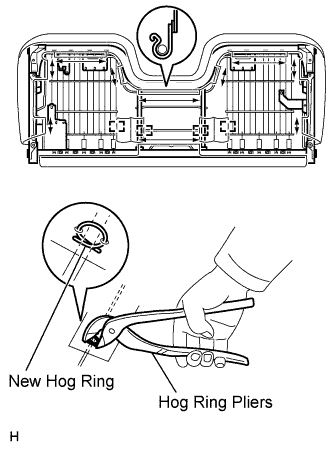 |
Engage the 10 hooks and install the front seat cushion spring.
Using hog ring pliers, install 4 new hog rings.
| 9. INSTALL FRONT SEAT TRACK OUTER ASSEMBLY LH |
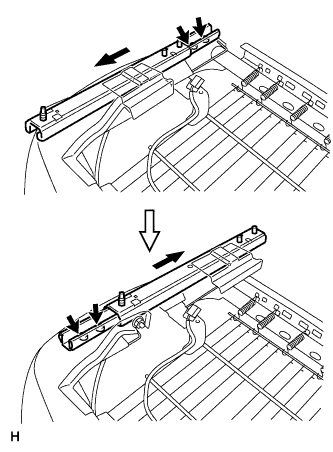 |
Insert the lever as shown in the illustration.
Slide the front seat track outer to the most forward position.
Using "Torx" socket wrench T40, tighten the 2 bolts.
Slide the front seat track outer to the most rearward position.
Using "Torx" socket wrench T40, tighten the 2 bolts.
| 10. INSTALL FRONT SEAT TRACK OUTER ASSEMBLY RH |
| 11. INSTALL FRONT SEAT TRACK REAR BRACKET LH |
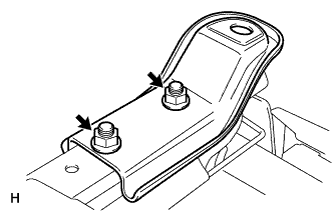 |
Install the front seat track rear bracket with the 2 nuts.
| 12. INSTALL FRONT SEAT TRACK REAR BRACKET RH |
| 13. INSTALL FRONT SEAT TRACK FRONT BRACKET LH |
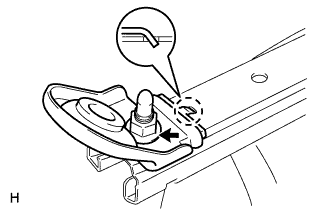 |
Engage the hook and install the front seat track front bracket with the nut.
| 14. INSTALL FRONT SEAT TRACK FRONT BRACKET RH |
| 15. INSTALL SEAT POSITION SENSOR |
for Driver Side:
Install the seat position sensor .
for Front Passenger Side:
Install the seat position sensor .
| 16. INSTALL SEAT POSITION SENSOR PROTECTOR |
Install a new seat position protector onto the seat position sensor.
| 17. INSTALL OCCUPANT CLASSIFICATION ECU |
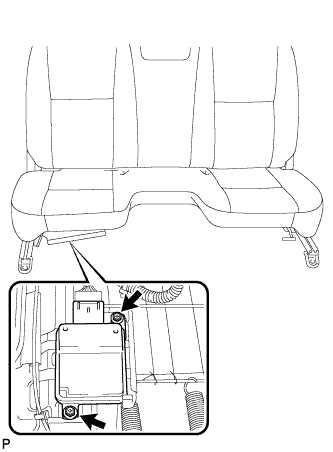 |
Check that the ignition switch is OFF.
Check that the negative battery (-) terminal is disconnected.
Install the occupant classification ECU with the 2 bolts.
Connect the connector to the occupant classification ECU.
| 18. INSTALL FRONT SEAT BACK COVER |
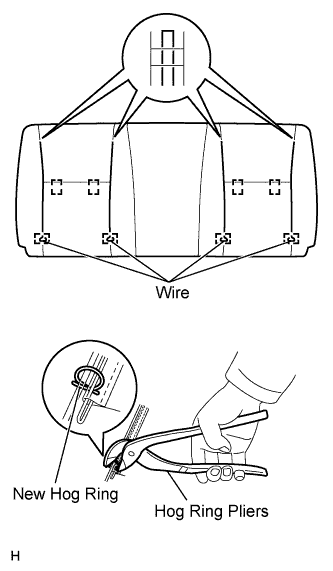 |
Using hog ring pliers, install the front seat back cover with 4 new hog rings.
Using hog ring pliers, install 4 wires with the 4 new hog rings.
| 19. INSTALL FRONT SEAT RECLINING CONTROL CABLE ASSEMBLY |
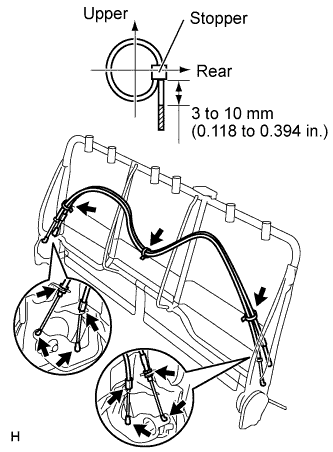 |
Install the 4 cable ends and the 2 front seat reclining control cables.
Install the 2 casing caps.
Install the 2 screw caps with the 2 nuts.
Install 3 new wiring harness clamps as shown in the illustration.
Cut each wiring harness clamp 3 to 10 mm (0.118 to 0.394 in.) from the stopper, as shown in the illustration.
| 20. INSTALL FRONT SEAT BACK SPRING ASSEMBLY |
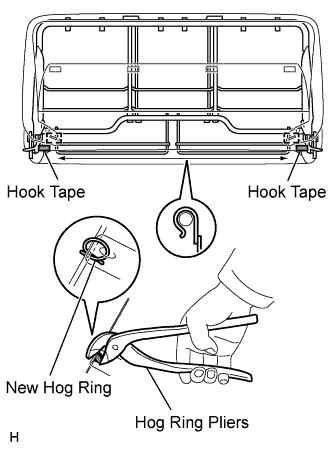 |
Engage the 4 hooks and install the front seat back spring.
Install the 2 pieces of hook tape.
Using hog ring pliers, install 2 new hog rings.
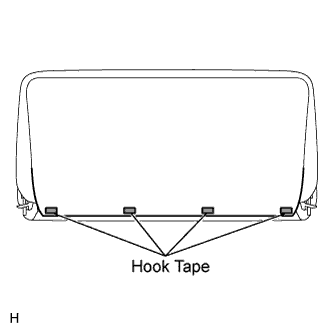 |
Install the 4 pieces of hook tape.
| 21. INSTALL FRONT SEAT HEADREST SUPPORT |
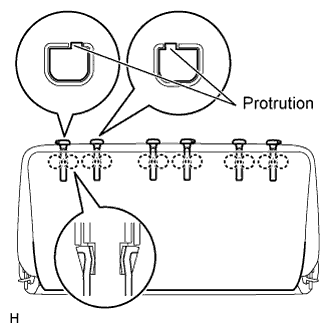 |
Align the protruding portions of the front seat headrest support with the installation grooves of the front seat back spring.
Engage the 12 claws and install the 6 front seat headrest supports.
| 22. INSTALL FRONT CENTER SEAT OUTER BELT GUIDE |
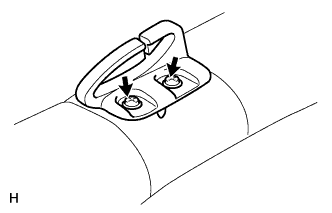 |
Align the pin of the front center seat outer belt guide with the installation hole in the front seat back spring.
Install the front center seat outer belt guide with the 2 screws.
| 23. INSTALL FRONT SEAT BACK ASSEMBLY |
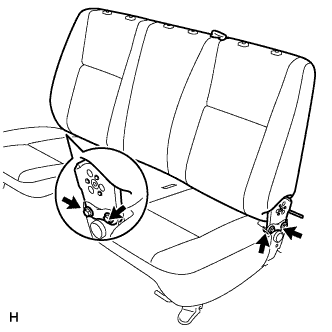 |
Install the front seat back with the 4 bolts.
| 24. INSTALL FRONT SEAT HINGE COVER LH |
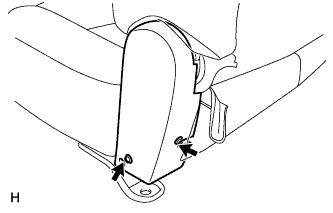 |
Install the front seat hinge cover with the 2 screws.
| 25. INSTALL FRONT SEAT HINGE COVER RH |
| 26. INSTALL FRONT CENTER SEAT HEADREST ASSEMBLY |
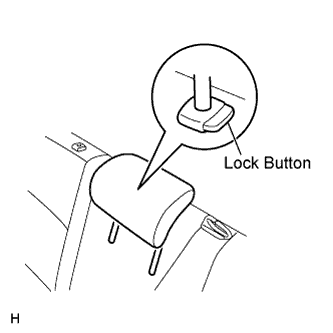 |
Push in the lock button of the front seat headrest support and install the front center seat headrest.