REAR DOOR BELT MOULDING > REMOVAL |
| 1. DISCONNECT CABLE FROM NEGATIVE BATTERY TERMINAL |
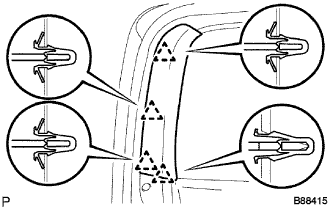
| 2. REMOVE REAR DOOR FRAME GARNISH |
|
Disengage the 4 clips and remove the rear door frame garnish LH.
| 3. REMOVE REAR POWER WINDOW REGULATOR SWITCH ASSEMBLY |
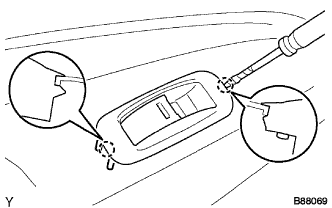 |
Using a screwdriver with its tip wrapped in protective tape, disengage the 2 claws, then pull out the rear power window regulator switch assembly by pulling it toward the front of the vehicle.
Disconnect the connector, then remove the rear power window regulator switch assembly.
| 4. REMOVE REAR DOOR TRIM PANEL ASSEMBLY |
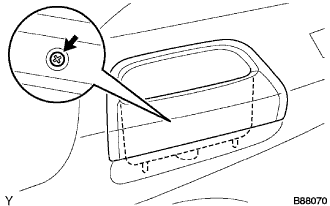 |
Remove the screw, then remove the door assist grip assembly LH.
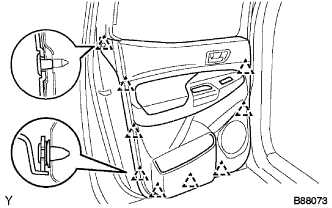 |
Disengage the 9 clips.
Remove the rear door trim panel assembly by sliding it upward.
| 5. REMOVE REAR DOOR BELT MOULDING |
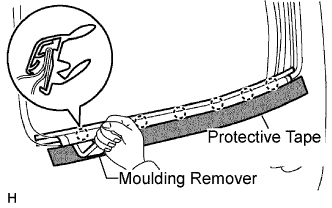 |
Apply protective tape to the outer circumference of the rear door belt moulding.
Using a moulding remover, disengage the 6 claws and remove the rear door belt moulding.