ROOF DRIP SIDE FINISH MOULDING > INSTALLATION |
| 1. INSTALL ROOF DRIP SIDE FINISH MOULDING |
|
Remove the tape that remains on the mounting surface of the vehicle body, and clean the surface with white gasoline.
Using a heat light, heat the clip installation surfaces of the vehicle body and roof drip side finish moulding.
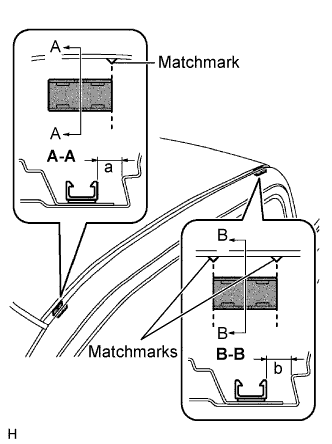
Install new clips in the positions shown in the illustration. Press the clips by hand.
| Area | Measurement |
| a | 7.0 mm (0.276 in.) |
| b | 8.2 mm (0.323 in.) |
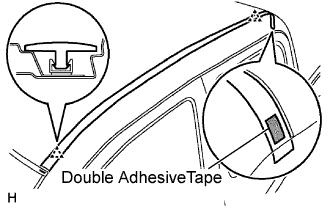 |
Engage the 2 clips and install the roof drip side finish moulding.