QUARTER WINDOW GLASS (for Access Cab) > INSTALLATION |
| 1. CLEAN VEHICLE BODY |
|
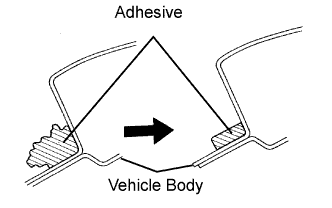
Clean and shape the contact surface of the vehicle body.
Using a knife, cut away any rough adhesive on the contact surface of the vehicle body to ensure the appropriate surface shape.
Clean the contact surface of the vehicle body with a shop rag saturated with cleaner.
| 2. INSTALL REAR DOOR GLASS SUB-ASSEMBLY LH |
Using a brush, apply Primer M to the exposed part of the vehicle body.
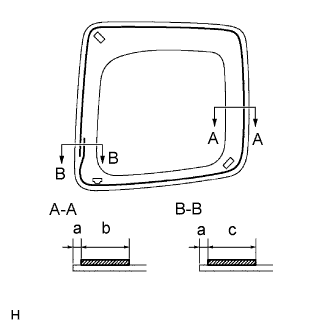 |
Using a brush or sponge, apply Primer G to the edge of the quarter window and contact surface.
| Area | Measurement |
| a | 5 mm (0.197 in.) |
| b | 20 mm (0.787 in.) |
| c | 26 mm (1.023 in.) |
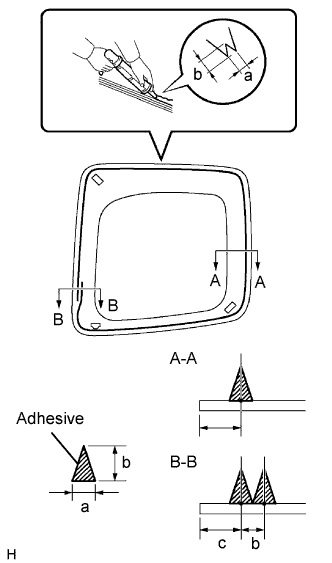 |
Apply adhesive.
Cut off the tip of the cartridge nozzle, as shown in the illustration.
| Temperature | Usage Time Frame |
| 35°C (95°F) | 15 minutes |
| 20°C (68°F) | 1 hour 40 minutes |
| 5°C (41°F) | 8 hours |
Load the sealer gun with the cartridge.
Apply adhesive to the quarter window as shown in the illustration.
| Area | Measurement |
| a | 8 mm (0.315 in.) |
| b | 12 mm (0.472 in.) |
| c | 13 mm (0.512 in.) |
| 3. CHECK FOR LEAKAGE AND REPAIR |
Conduct a leak test after the adhesive has completely hardened.
Seal any leakage with auto glass sealer.
| 4. INSTALL REAR DOOR TRIM BOARD SUB-ASSEMBLY |
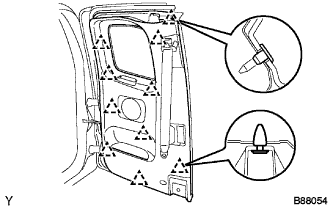 |
Install the rear door trim board sub-assembly LH.
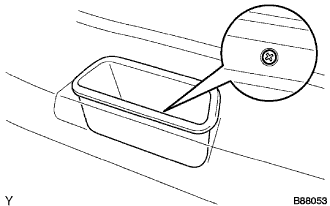 |
Install the door pull handle with the screw.
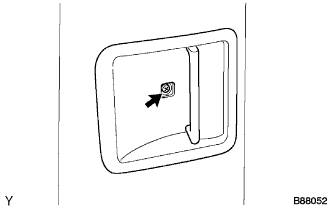 |
Install the access panel inside handle bezel LH with the screw.
Close the cover.
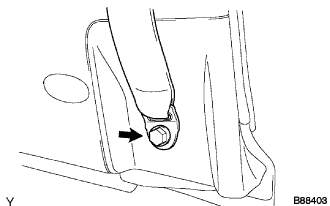 |
Install the outer front seat belt assembly LH (floor side) with the bolt.
| 5. INSTALL LAP BELT OUTER ANCHOR COVER |
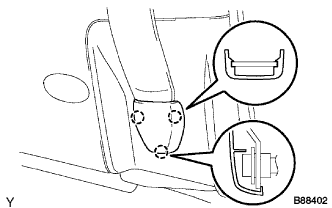 |
Engage the 3 claws and install the lap belt outer anchor cover.
| 6. INSTALL REAR ACCESS PANEL WEATHERSTRIP |
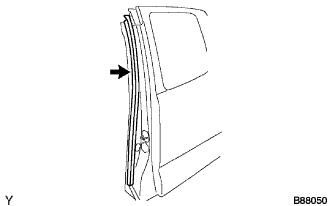 |
Install the rear access panel weatherstrip LH.