FRONT BRAKE (for 4WD and Pre-Runner) > INSTALLATION |
| 1. INSTALL FRONT DISC |
Aligning the matchmarks, install the front disc.
| 2. INSPECT DISC RUNOUT |
|
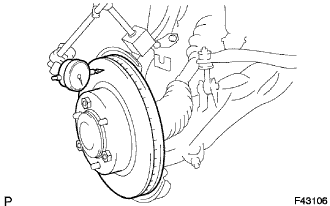
Provisionally fasten the disc with the hub nuts.
Using a dial indicator, measure the disc runout 10 mm (0.39 in.) away from the outer edge of the disc.
If the disc runout is the maximum value or greater, check the bearing play in the axial direction and check the axle hub runout . If the bearing play and axle hub runout are normal, adjust the disc runout or grind it on an on-car brake lathe.
| 3. INSTALL DISC BRAKE CYLINDER ASSEMBLY |
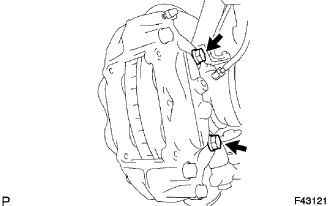 |
Install the disc brake cylinder assembly with the 2 bolts.
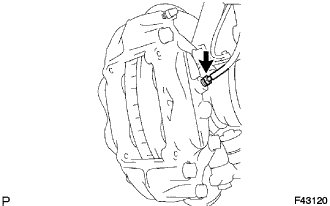 |
Using SST, connect the brake tube to the disc brake cylinder.
| 4. INSTALL ANTI SQUEAL SHIM KIT FRONT |
Install the anti-squeal shims on to each brake pad.
| 5. INSTALL DISC BRAKE PAD KIT FRONT (PAD ONLY) |
Install the 2 disc brake pads with anti-squeal shim onto the disc brake cylinder.
| 6. INSTALL FRONT DISC BRAKE ANTI RATTLE WITH HOLE PIN |
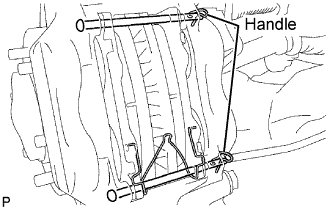 |
Install the 2 anti rattle w/ hole pins and anti-rattle spring onto the disc brake cylinder.
Install the 2 new pin hold clips with the anti-rattle w/ hole pin.
| 7. FILL RESERVOIR WITH BRAKE FLUID (w/ VSC) |
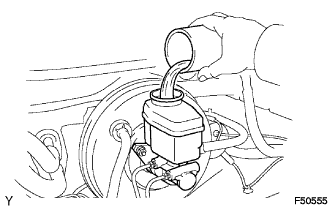
| 8. FILL RESERVOIR WITH BRAKE FLUID (w/o VSC) |
 |
| 9. BLEED MASTER CYLINDER (w/o VSC) |
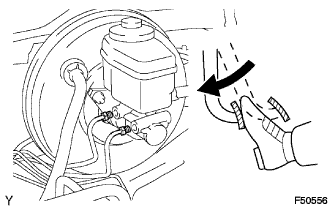 |
Using SST, disconnect the brake lines from the master cylinder.
Slowly depress the brake pedal and hold it there (step A).
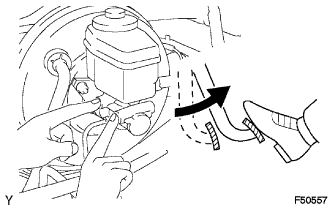 |
Block the outer holes with your fingers, and release the brake pedal (step B).
Repeat step A and B 3 or 4 times.
| 10. BLEED BRAKE LINE (w/ VSC) |
Turn the ignition switch to ON, and wait until the pump motor has stopped.
 |
Front brake line.
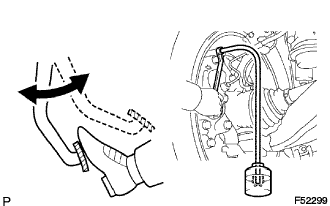
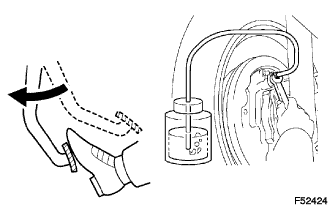
Connect the vinyl tube to the brake caliper.
Depress the brake pedal several times, then loosen the bleeder plug with the pedal held down (step D).
At the point when the fluid stops coming out, tighten the bleeder plug, then release the brake pedal (step E).
Repeat step D and E until all the air in the fluid has been bled out.
Repeat the above procedures to bleed the other brake line.
 |
Rear brake line.
Connect the vinyl tube to the wheel cylinder.
Depress the brake pedal, hold it, and then loosen the bleeder plug.
Loosen the bleeder plug and release air.
When the air is completely bled out of the brake fluid through the bleeder plug, tighten the bleeder plug.
Repeat the above procedures to bleed the other brake line.
| 11. BLEED BRAKE LINE (w/o VSC) |
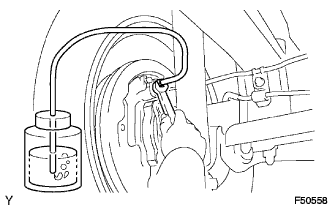 |
Connect the vinyl tube to the bleeder plug.
Depress the brake pedal several times, then loosen the bleeder plug with the pedal held down (step C).
At the point where the fluid stops coming out, tighten the bleeder plug, then release the brake pedal (step D).
Repeat step C and D until all the air in the fluid has been bled out.
Repeat the above procedure to bleed the air out of the brake line for each wheel.
| 12. CHECK FLUID LEVEL IN RESERVOIR (w/ VSC) |
Turn the ignition switch to OFF, and depress the brake pedal more than 20 times (until the pedal reaction feels light and pedal stroke becomes longer), and adjust the fluid level to the MAX level.
When the ignition switch is turned to the ON, brake fluid is sent to the accumulator and the fluid level decreases by approximately 5 mm from the level when the ignition switch is off (normal).
| 13. CHECK FLUID LEVEL IN RESERVOIR (w/o VSC) |
Check the fluid level and add fluid if necessary.
| 14. CHECK FOR BRAKE FLUID LEAKAGE |
| 15. INSTALL FRONT WHEEL |