REAR DIFFERENTIAL CARRIER ASSEMBLY > REMOVAL |
| 1. DISCONNECT CABLE FROM NEGATIVE BATTERY TERMINAL |
| 2. REMOVE REAR WHEEL |
| 3. DRAIN BRAKE FLUID |
| 4. REMOVE REAR BRAKE DRUM SUB-ASSEMBLY |
|
Release the parking brake, and remove the rear brake drum.
If the rear brake drum cannot be removed easily, perform the following procedures.
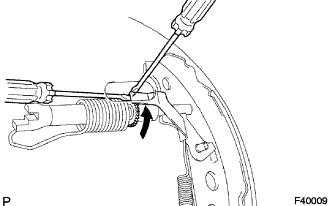
Remove the hole plug and insert a screwdriver through the hole into the backing plate, and hold the automatic adjusting lever away from the adjuster.
Using another screwdriver, contract the brake shoe by turning the adjusting bolt.
Remove the drum gasket from the rear brake drum.
| 5. REMOVE FRONT BRAKE SHOE |
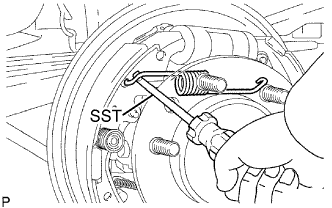 |
Using SST, remove the shoe return spring from the front brake shoe.
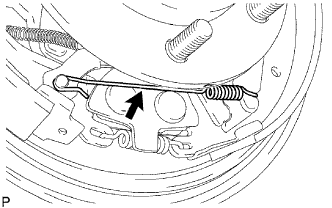 |
Using needle-nose pliers, remove the return spring.
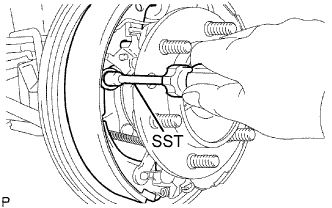 |
Using SST, remove the shoe hold down spring cup, shoe hold down spring and pin.
Remove the parking brake shoe strut lower.
Remove the tension spring and front brake shoe.
Remove the automatic adjust lever spring and automatic adjust lever LH from the front brake shoe.
| 6. REMOVE REAR BRAKE SHOE |
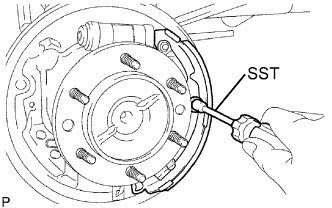 |
Using SST, remove the shoe hold down spring cup, shoe hold down spring and pin.
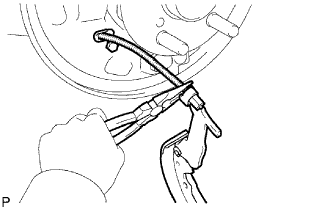 |
Using needle-nose pliers, disconnect the parking brake cable No. 3 and remove the rear brake shoe.
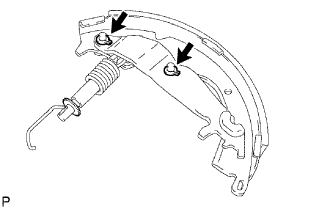 |
Using a screwdriver, remove the 2 C-washers, parking brake shoe lever, parking brake reaction lever and parking brake shoe strut set.
| 7. REMOVE PROPELLER SHAFT ASSEMBLY (for 2WD Drive Type, Regular Cab) |
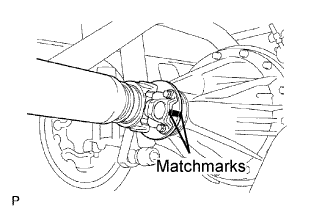 |
Place matchmarks on the propeller shaft flange and differential flange.
Remove the 4 nuts, 4 bolts, 4 washers and front propeller shaft.
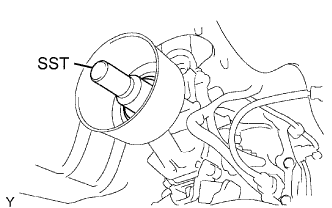 |
Remove the propeller shaft.
Insert SST into the transmission to prevent oil leakage.
| 8. REMOVE PROPELLER WITH CENTER BEARING SHAFT ASSEMBLY (for 2WD Drive Type, Except Regular Cab) |
|
Place matchmarks on the propeller shaft flange and differential flange.
Remove the 4 nuts, 4 bolts and 4 washers, and remove the propeller shaft.
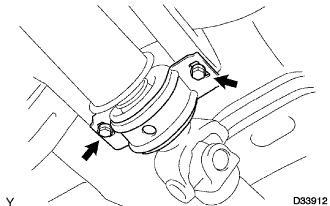 |
Remove the 2 center support bearing bolts from the frame crossmember.
|
Pull out the propeller shaft.
Insert SST into the transmission to prevent oil leakage.
| 9. REMOVE PROPELLER SHAFT ASSEMBLY (for 4WD Type, Regular Cab) |
|
Place matchmarks on the propeller shaft flange and differential flange.
Remove the 4 nuts, 4 bolts, 4 washers and front propeller shaft.
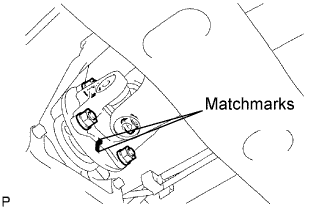 |
Place matchmarks on the propeller shaft flange and transfer flange.
Remove the 4 nuts, 4 washers and front propeller shaft.
| 10. REMOVE PROPELLER WITH CENTER BEARING SHAFT ASSEMBLY (for 4WD Drive Type, Except Regular Cab) |
|
Place matchmarks on the propeller shaft flange and differential flange.
Remove the 4 nuts, 4 bolts and 4 washers, and remove the propeller shaft.
|
Remove the 2 center support bearing bolts from the frame crossmember.
|
Pull out the propeller shaft.
Insert SST into the transmission to prevent oil leakage.
| 11. DRAIN DIFFERENTIAL OIL |
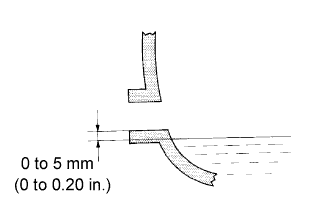 |
Stop the vehicle on a level place.
Remove the differential filler plug and gasket.
Check that the oil level is within 5mm (0 to 0.20 in.) of the bottom of the filler plug opening.
Check for oil leakage if the oil level is low.
Install the differential filler plug and a new gasket.
| 12. SEPARATE REAR SPEED SENSOR LH |
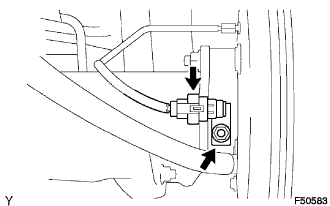 |
Disconnect the speed sensor connector.
Remove the nut and speed sensor rear.
| 13. SEPARATE REAR SPEED SENSOR RH |
| 14. SEPARATE NO.3 PARKING BRAKE CABLE ASSEMBLY |
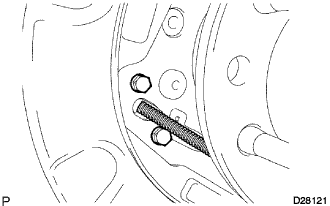 |
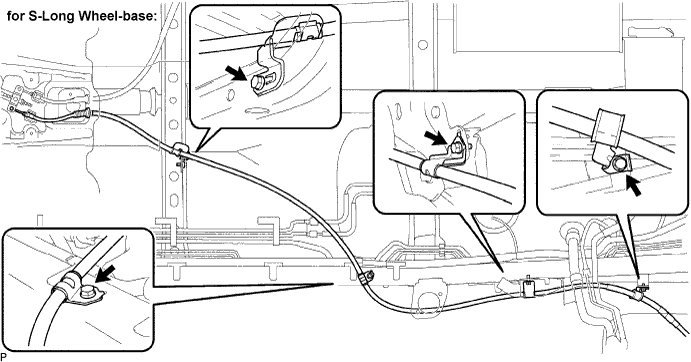
Remove the 2 bolts and disconnect the parking brake cable from the backing plate.
Remove the 4 bolts from the parking brake cable.
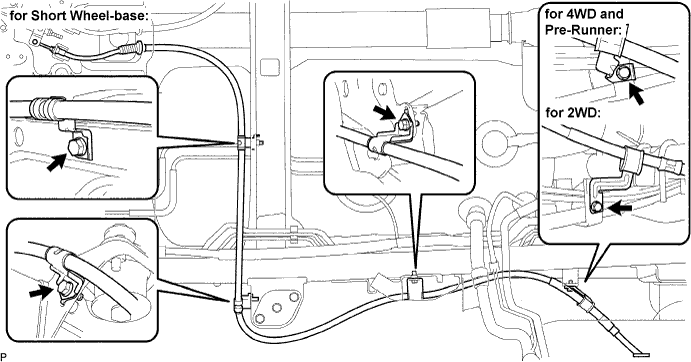
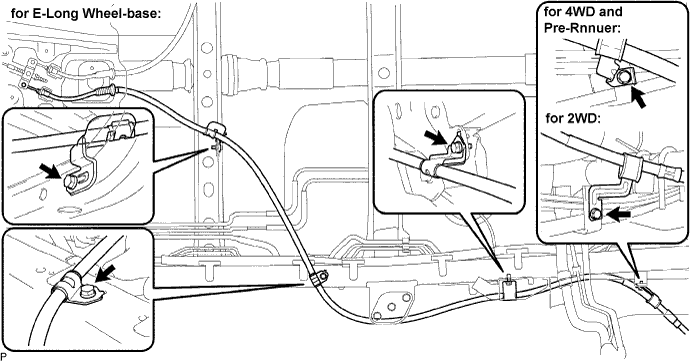
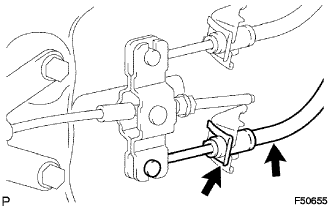 |
Disengage the clip and disconnect the parking brake cable from the parking brake equalizer.
| 15. SEPARATE NO.2 PARKING BRAKE CABLE ASSEMBLY |
| 16. REMOVE REAR AXLE SHAFT WITH BACKING PLATE |
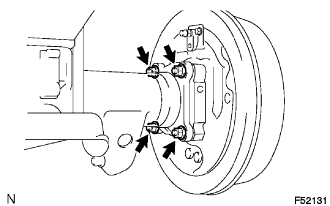 |
Remove the 4 nuts and rear axle shaft with backing plate.
Remove the O-ring.
| 17. REMOVE REAR AXLE SHAFT WITH BACKING PLATE |
| 18. REMOVE REAR DIFFERENTIAL CARRIER ASSEMBLY |
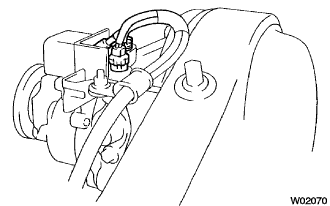 |
Disconnect the differential lock actuator connector.
Disconnect the rear differential lock actuator breather hose from the differential actuator assembly.
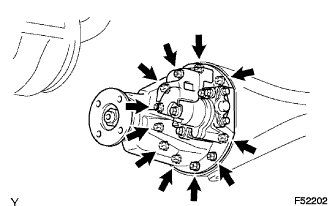 |
Remove the 11 nuts and differential carrier assembly.
Remove the rear differential carrier gasket from the differential carrier assembly.