MANUAL TRANSMISSION UNIT > REASSEMBLY |
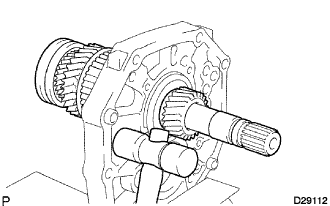
| 1. INSTALL OUTPUT SHAFT ASSEMBLY |
|
Apply gear oil to the sliding part of the output assembly.
Using a plastic hammer, install the output shaft assembly by tapping the intermediate plate.
| 2. INSTALL OUTPUT SHAFT BEARING SHAFT SNAP RING |
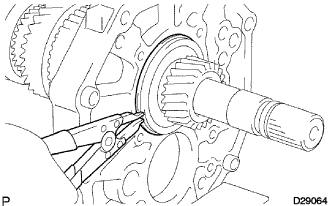 |
Using a snap ring expander, install the output shaft bearing shaft snap ring onto the output shaft.
| 3. INSTALL INPUT SHAFT ASSEMBLY |
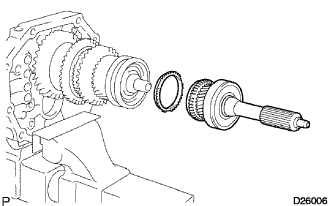 |
Apply gear oil to the input shaft assembly and synchronizer ring No. 2, and install them onto the output shaft.
| 4. INSTALL COUNTER GEAR |
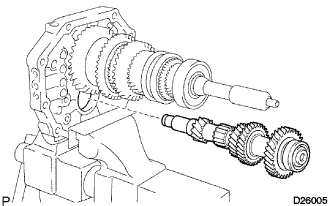 |
Provisionally install the counter gear assembly onto the intermediate plate.
| 5. INSTALL COUNTER SHAFT CENTER BEARING |
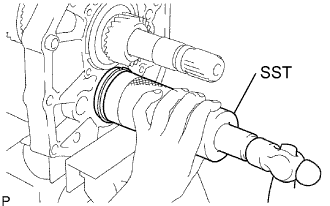 |
Using SST and a hammer, install the new counter shaft center bearing onto the intermediate plate.
| 6. INSTALL REVERSE IDLER GEAR SUB-ASSEMBLY |
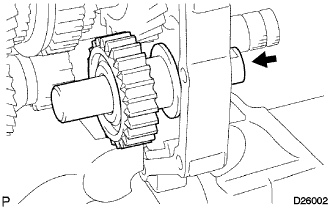 |
Apply gear oil to each sliding part of the reverse idler gear and the reverse idler gear shaft, and install them onto the intermediate plate.
| 7. INSTALL OUTPUT SHAFT REAR BEARING RETAINER |
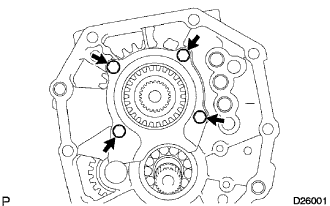 |
Install the output shaft rear bearing retainer into the groove of the reverse idler gear shaft with the 4 bolts.
| 8. INSTALL 5TH GEAR THRUST WASHER PIN |
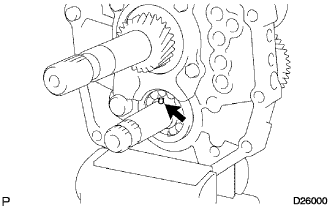 |
Apply MP grease to the 5th gear thrust washer pin, and install it onto the counter gear.
| 9. INSTALL 5TH GEAR THRUST WASHER |
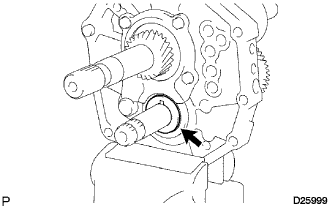 |
Apply gear oil to the 5th gear thrust washer, and install it onto the counter gear.
| 10. INSTALL NO. 3 TRANSMISSION HUB SLEEVE |
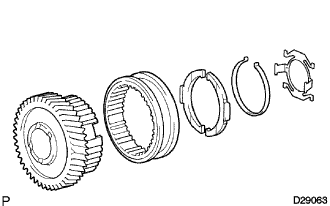 |
Apply gear oil to the sliding part of transmission hub sleeve No. 3, and install it onto the counter shaft 5th gear.
Install the 2 synchromesh shifting keys No. 3 and the 2 synchromesh shifting key springs onto the counter shaft 5th gear.
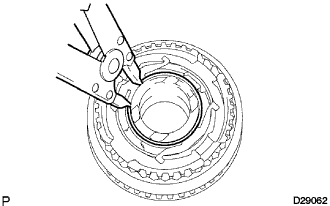 |
Using a snap ring expander, install the bearing shaft snap ring onto the counter 5th gear.
| 11. INSTALL COUNTER 5TH GEAR BEARING |
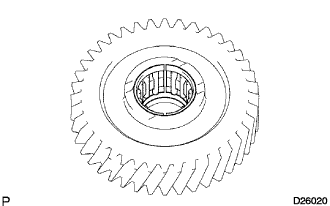 |
Apply gear oil to the counter 5th gear bearing and install it onto the counter 5th gear.
| 12. INSTALL COUNTER SHAFT 5TH GEAR |
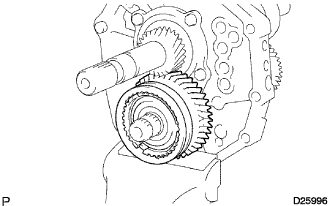 |
Apply gear oil to the counter 5th gear and transmission hub sleeve No. 3 assembly, and install them onto the counter gear.
| 13. INSTALL NO. 3 SYNCHRONIZER RING OUTER |
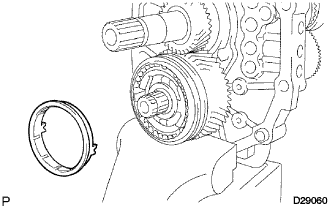 |
Apply gear oil to the synchronizer ring outer No. 3, and install it onto the counter gear.
| 14. INSTALL NO. 5 GEAR SPLINE PIECE |
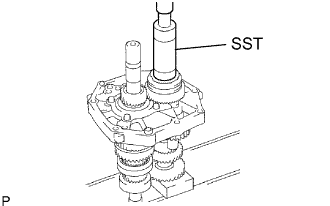 |
Using SST and a press, install the gear spline piece No. 5 onto the counter gear.
| 15. INSTALL COUNTER GEAR REAR SHAFT SNAP RING |
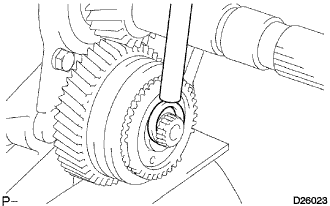 |
Select the counter gear rear shaft snap ring so that the thrust gap between gear spline piece No. 5 and counter gear rear shaft snap ring is within the specified values, and using a brass bar and a hammer, install it onto the counter gear.
| Mark | Thickness mm (in.) |
| A | 2.80 to 2.85 (0.1102 to 0.1122) |
| B | 2.85 to 2.90 (0.1122 to 0.1141) |
| C | 2.90 to 2.95 (0.1141 to 0.1160) |
| D | 2.95 to 3.00 (0.1160 to 0.1181) |
| E | 3.00 to 3.05 (0.1181 to 0.1200) |
| F | 3.05 to 3.10 (0.1200 to 0.1220) |
| G | 3.10 to 3.15 (0.1220 to 0.1240) |
| 16. INSPECT COUNTER SHAFT 5TH GEAR THRUST CLEARANCE |
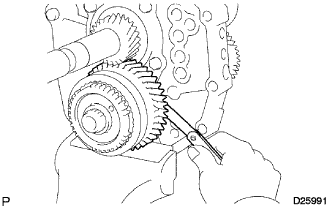 |
Using a feeler gauge, check the thrust clearance of the counter 5th gear.
| 17. INSPECT COUNTER SHAFT 5TH GEAR RADIAL CLEARANCE |
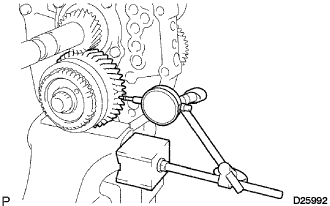 |
Using a dial indicator, check the counter 5th gear radial clearance.
| 18. INSTALL OUTPUT SHAFT REAR BEARING |
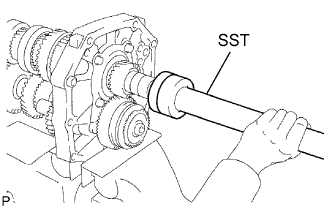 |
Using SST and a press, install the new spacer and output shaft rear bearing onto the output shaft.
| 19. INSTALL OUTPUT SHAFT BEARING SHAFT SNAP RING |
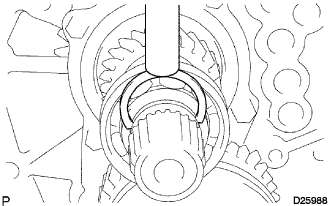 |
Select an output shaft bearing shaft snap ring so the thrust gap between the snap ring and the bearing is within the specified values. Use a brass bar and hammer to install it onto the output shaft.
| Mark | Thickness mm (in.) |
| A | 2.65 to 2.70 (0.1043 to 0.1063) |
| B | 2.70 to 2.75 (0.1063 to 0.1083) |
| C | 2.75 to 2.80 (0.1083 to 0.1102) |
| D | 2.80 to 2.85 (0.1102 to 0.1122) |
| E | 2.85 to 2.90 (0.1122 to 0.1141) |
| F | 2.90 to 2.95 (0.1141 to 0.1160) |
| G | 2.95 to 3.00 (0.1160 to 0.1181) |
| H | 3.00 to 3.05 (0.1181 to 0.1200) |
| J | 3.05 to 3.10 (0.1200 to 0.1220) |
| K | 3.10 to 3.15 (0.1220 to 0.1240) |
| L | 3.15 to 3.20 (0.1240 to 0.1260) |
| M | 3.20 to 3.25 (0.1260 to 0.1280) |
| N | 3.25 to 3.30 (0.1280 to 0.1299) |
| P | 3.30 to 3.35 (0.1299 to 0.1319) |
| Q | 3.35 to 3.40 (0.1319 to 0.1339) |
| R | 3.40 to 3.45 (0.1339 to 0.1358) |
| S | 3.45 to 3.50 (0.1358 to 0.1378) |
| 20. INSTALL SPEEDOMETER DRIVE GEAR |
Install output shaft spacer.
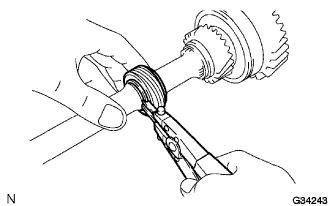 |
Using snap ring pliers, install the snap ring.
Install the ball and drive gear.
Using snap ring pliers, install the snap ring.
| 21. INSTALL REVERSE SHIFT ARM BRACKET |
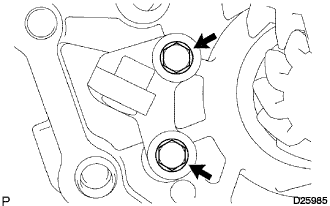 |
Install the reverse shift arm bracket onto the intermediate plate with the 2 bolts.
| 22. INSTALL REVERSE SHIFT FORK |
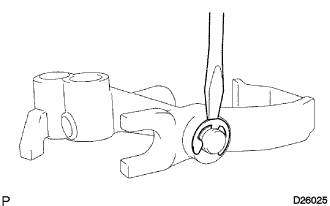 |
Install the reverse shift arm onto the reverse shift fork. Using a screwdriver and a hammer, install the new reverse shift arm end shaft ring.
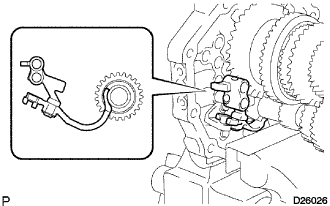 |
Install the tip of the reverse shift arm onto the reverse idler gear. Align the cut end of the reverse shift arm with the reverse shift arm bracket pin, and install them.
| 23. INSTALL 5TH SHIFT ARM SHAFT |
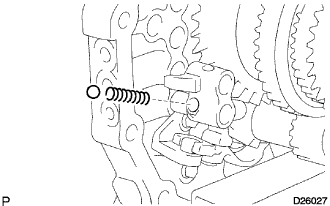 |
Install the reverse shift fork return compression spring and the reverse shift fork ball into the reverse shift fork.
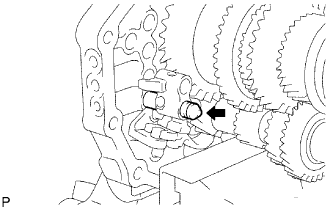 |
Apply gear oil to the sliding part of the 5th shift arm shaft.
Using a screwdriver, install the 5th shift arm shaft by pushing the reverse shift fork ball gently.
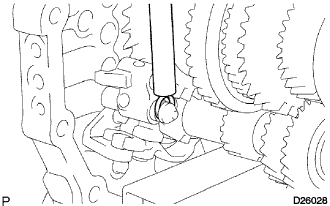 |
Using a brass bar and a hammer, install the shift fork shaft snap ring onto the 5th shift arm shaft.
| 24. INSTALL REVERSE SHIFT FORK SHAFT |
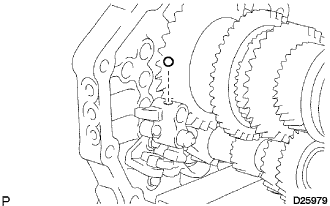 |
Install the reverse shift fork ball into the reverse shift fork.
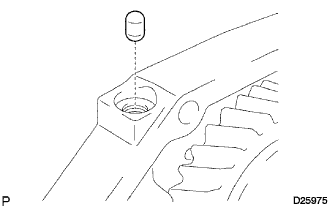 |
Install the shift interlock No. 1 roller onto the intermediate plate.
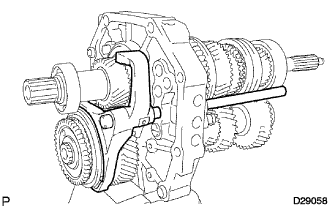 |
Install the shift fork No. 3 onto the transmission hub sleeve No. 3 and the reverse shift fork shaft onto the intermediate plate from the front side.
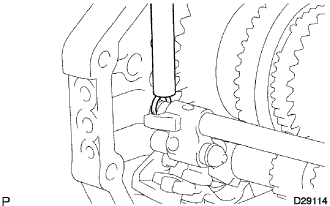 |
Using a brass bar and a hammer, install the shift fork shaft snap ring onto the reverse shift fork shaft.
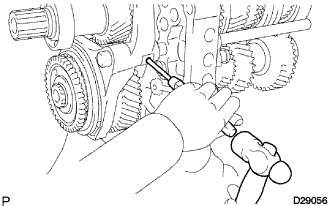 |
Using a pin punch (5 mm) and a hammer, install the shift fork set slotted spring pin into the gear shift fork No. 3.
| 25. INSTALL NO. 1 GEAR SHIFT FORK SHAFT |
|
Install the shift interlock No. 1 roller onto the intermediate plate.
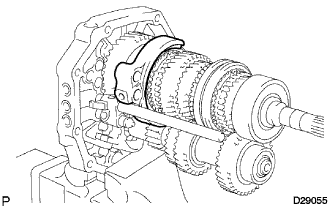 |
Install the gear shift fork No. 1 onto the reverse gear.
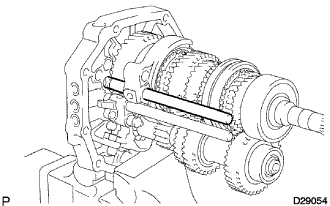 |
Install the gear shift fork shaft No. 1 onto the intermediate plate from the rear side.
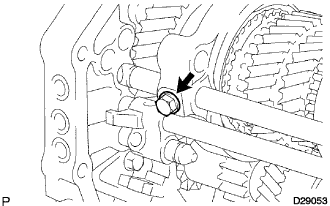 |
Install the new shift fork set bolt onto the gear shift fork No. 1.
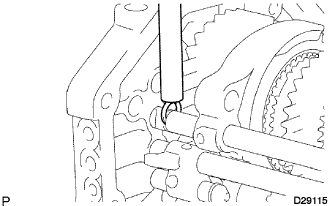 |
Using a brass bar and a hammer, install the shift fork shaft snap ring onto the gear shift fork shaft No. 1.
| 26. INSTALL NO. 2 GEAR SHIFT FORK SHAFT |
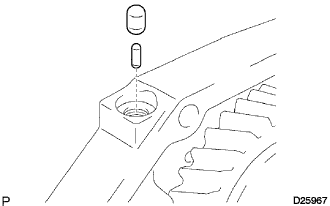 |
Install the shift interlock pin (ball) and shift interlock No. 1 roller into the intermediate plate.
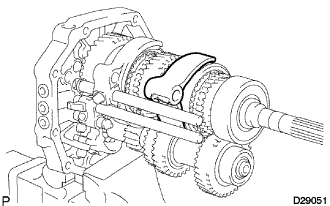 |
Install the gear shift fork No. 2 onto the transmission hub sleeve No. 2.
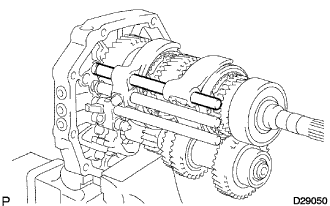 |
Apply gear oil to the gear shift fork shaft No. 2, and install it onto the intermediate plate from the rear side.
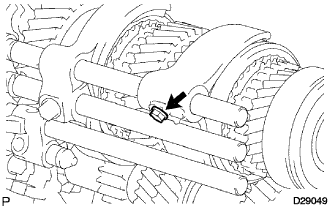 |
Install the new shift fork set bolt onto the gear shift fork No. 2.
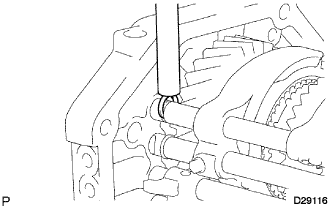 |
Using a brass bar and a hammer, install the shift fork shaft snap ring onto the gear shift fork shaft No. 2.
| 27. INSTALL NO. 1 SHIFT DETENT BALL SPRING SEAT |
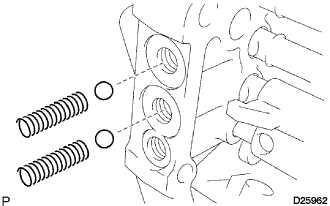 |
Install the 2 shift detent ball low side compression springs and 2 shift detent balls into the intermediate plate.
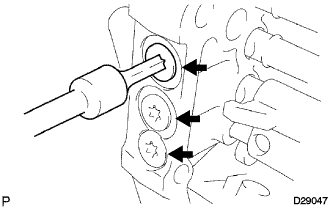 |
Using a "Torx" socket wrench T40, install the 3 shift detent ball spring seats No. 1 onto the intermediate plate.
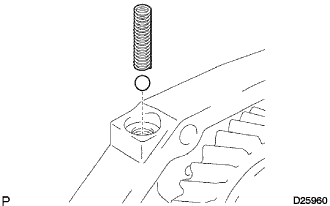 |
Install the shift detent ball and the shift detent ball low side compression spring into the intermediate plate.
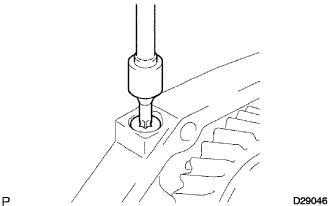 |
Using a "Torx" socket wrench T40, install the shift detent ball spring seat No. 1 onto the intermediate plate.
| 28. INSTALL TRANSMISSION MAGNET |
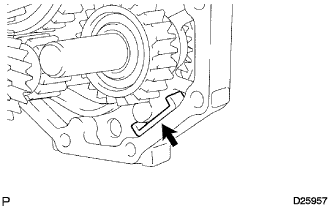 |
Clean the transmission magnet, and install it onto the intermediate plate.
| 29. INSTALL MANUAL TRANSMISSION CASE |
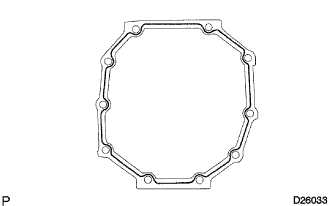 |
Apply seal packing to the manual transmission case as shown in the illustration.
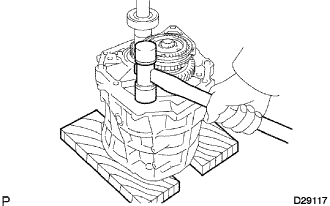 |
Using a plastic hammer, tap the manual transmission case to attach it to the intermediate plate.
| 30. INSTALL NO. 1 COUNTER GEAR FRONT BEARING SNAP RING |
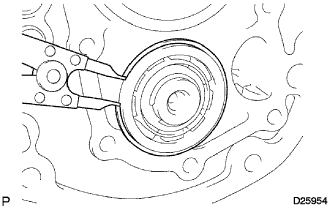 |
Using a snap ring expander, install the counter gear front bearing snap ring No. 1 onto the transmission case.
| 31. INSTALL FRONT BEARING SHAFT SNAP RING |
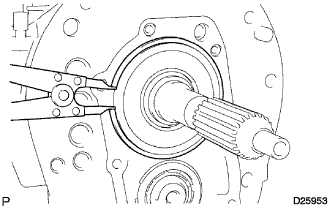 |
Using a snap ring expander, install the front bearing shaft snap ring onto the transmission case.
| 32. INSTALL TRANSMISSION FRONT BEARING RETAINER OIL SEAL |
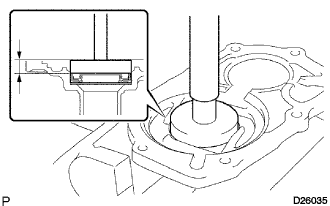 |
Using SST and a hammer, install the new transmission front bearing retainer oil seal onto the transmission front bearing retainer.
Coat the lip of the oil seal with MP grease.
| 33. INSTALL FRONT BEARING RETAINER |
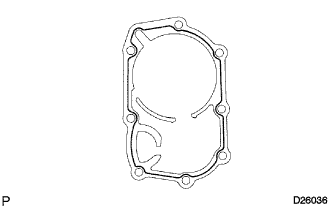 |
Apply seal packing to the bearing retainer front as shown in the illustration.
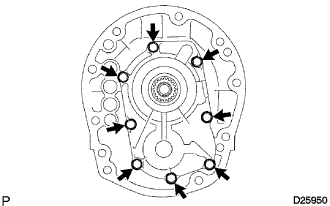 |
Install the front bearing retainer onto the transmission case with the 8 bolts.
Check that the input shaft and output shaft rotate smoothly.
| 34. INSTALL MANUAL TRANSMISSION EXTENSION HOUSING OIL SEAL |
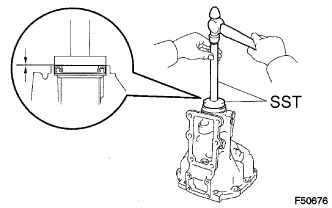 |
Using SST and a hammer, install the new extension housing oil seal onto the extension housing.
Lightly apply MP grease to the tip of the oil seal.
| 35. INSTALL REVERSE RESTRICT PIN ASSEMBLY |
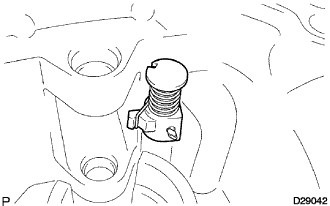 |
Install the reverse restrict pin into the extension housing.
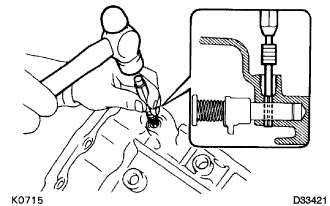 |
Using a pin punch (5 mm) and a hammer, install the reverse restrict slotted pin into the extension housing.
Using a "Torx" socket wrench T40, install the reverse restrict pin plug onto the extension housing.
| 36. INSTALL EXTENSION HOUSING OIL RECEIVER PIPE |
Install the oil receiver pipe with the bolt.
| 37. INSTALL OIL RECEIVER |
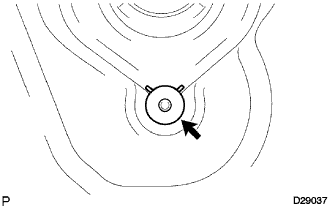 |
Install the oil receiver onto the extension housing.
| 38. INSTALL EXTENSION HOUSING SUB-ASSEMBLY |
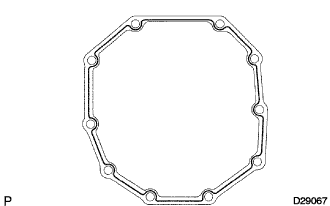 |
Apply seal packing to the extension housing as shown in the illustration.
Insert the shift and select lever to the extension housing.
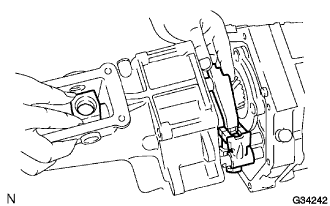 |
Connect the shift and select lever to the fork shaft and put in the shift lever housing.
Align shift and select lever to the extension housing installation hole and push in the extension housing.
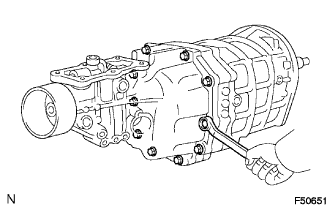 |
Install the extension housing, onto the transmission case with the 10 bolts.
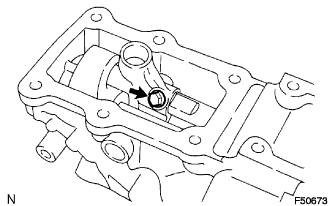 |
Install the shift lever housing set bolt.
| 39. INSTALL FLOOR SHIFT CONTROL SHIFT LEVER RETAINER SUB-ASSEMBLY |
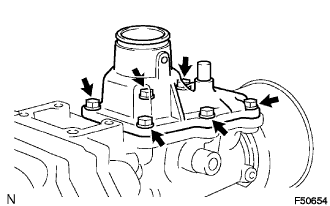 |
Install the floor shift control shift lever retainer and the extension housing oil deflector onto the transfer adapter with the 6 bolts.
| 40. INSTALL REVERSE RESTRICT PIN ASSEMBLY |
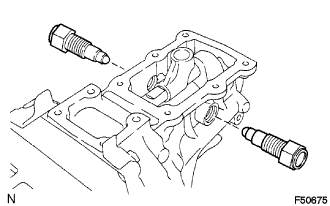 |
Install the 2 reverse restrict pins into the extension housing or transfer adapter.
| 41. INSTALL SPEEDOMETER SENSOR |
Install a new O-ring onto the speedometer sensor.
Install the speedometer sensor with the bolt.
| 42. INSTALL BACK-UP LIGHT SWITCH ASSEMBLY |
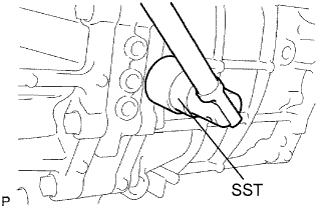 |
Using SST, install the back-up light switch assembly and the gasket onto the transmission case.
| 43. INSTALL CLUTCH HOUSING |
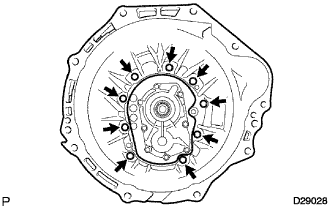 |
Install the clutch housing onto the transmission case with the 9 bolts.
| 44. INSTALL CLUTCH RELEASE FORK BOOT |
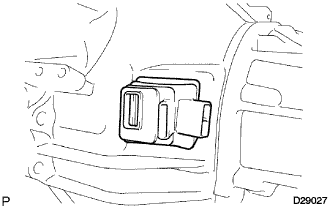 |
Install the clutch release fork boot onto the clutch housing.
| 45. INSTALL RELEASE FORK SUPPORT |
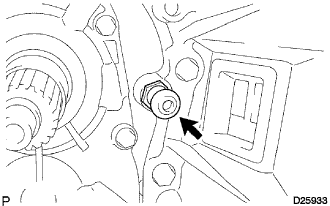 |
Install the clutch release fork support onto the clutch housing.
| 46. INSTALL CLUTCH RELEASE BEARING ASSEMBLY |
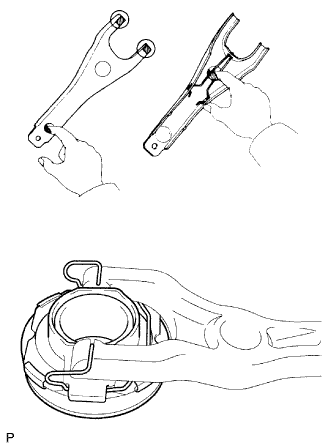 |
Apply clutch release hub grease to the clutch release bearing, and install it onto the clutch release fork.
| 47. INSTALL CLUTCH RELEASE FORK SUB-ASSEMBLY |
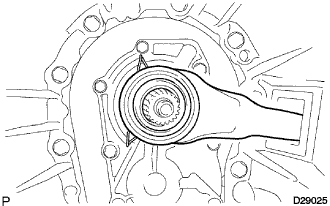 |
Install the clutch release fork.
Apply the clutch spline grease to the spline of the input shaft.
| 48. INSTALL DRAIN PLUG SUB-ASSEMBLY |
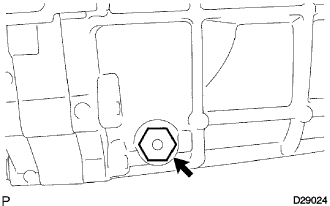 |
Install the drain plug onto the transmission case through a new gasket.
| 49. INSTALL MANUAL TRANSMISSION FILLER PLUG |
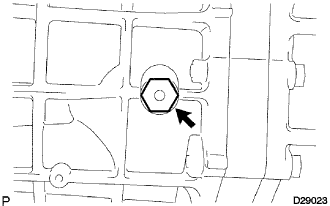 |
Install the filler plug onto the transmission case through a new gasket.