MANUAL TRANSMISSION UNIT > DISASSEMBLY |
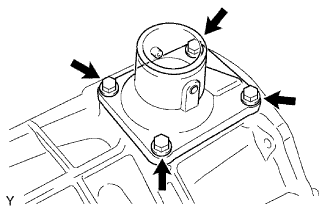
| 1. REMOVE FLOOR SHIFT CONTROL SHIFT LEVER RETAINER SUB-ASSEMBLY |
|
Remove the 4 bolts, then remove the floor shift control shift lever retainer.
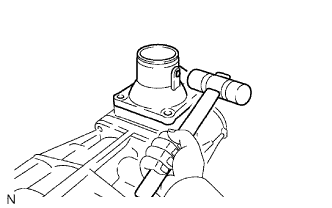 |
Using a plastic hammer, remove the floor shift control shift lever retainer.
| 2. REMOVE SHIFT LEVER HOUSING |
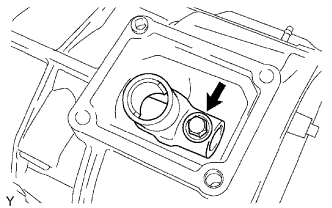 |
Remove the bolt, then separate the shift lever housing.
| 3. REMOVE SPEEDOMETER SENSOR |
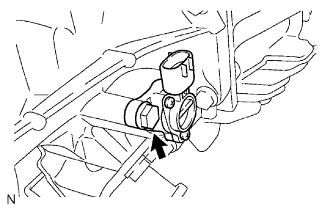 |
Remove the bolt and speedometer sensor.
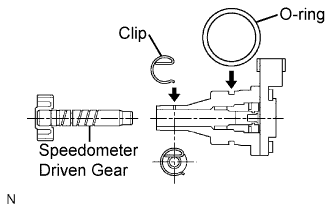 |
Remove the clip from the speedometer sensor.
Remove the driven gear from the speedometer sensor.
Remove the O-ring from the speedometer sensor.
Check the speedometer driven gear teeth.
If the driven gear is damaged, replace it.
| 4. REMOVE EXTENSION HOUSING SUB-ASSEMBLY |
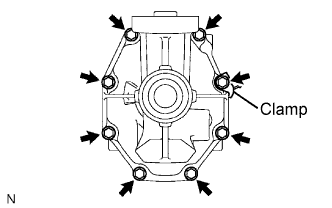 |
Remove the 8 bolts and clamp, then remove the extension housing sub-assembly.
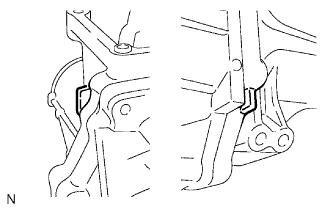 |
Using a plastic hammer, carefully tap out the extension housing.
Remove the shift lever housing.
| 5. REMOVE MANUAL TRANSMISSION EXTENSION HOUSING OIL SEAL |
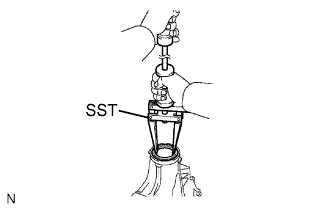 |
Using SST, remove the extension housing oil seal.
| 6. REMOVE SPEEDOMETER DRIVE GEAR |
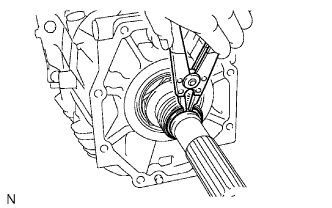 |
Using a snap ring expander, remove the snap ring.
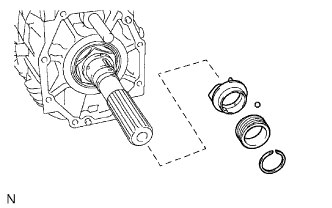 |
Remove the speedometer drive gear, ball and oil receiver pipe.
| 7. REMOVE SHIFT DETENT BALL PLUG |
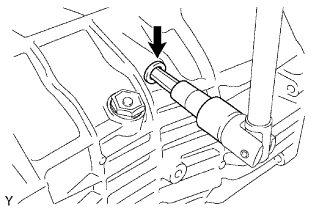 |
Using a socket hexagon wrench (10 mm), remove the shift detent ball plug from the transmission rear case.
Remove the ball and compression spring from the transmission rear case.
| 8. REMOVE OUTPUT SHAFT ADJUST NUT |
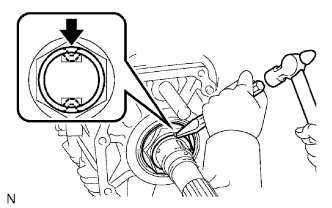 |
Using a chisel and hammer, unstake the nut.
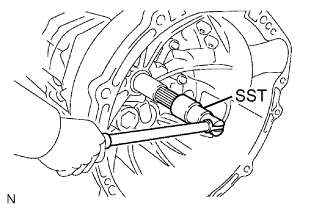 |
Place the gearshift into 5th gear, and then fix the input shaft using SST.
Using a belt and wooden block, fasten the transmission to the workbench.
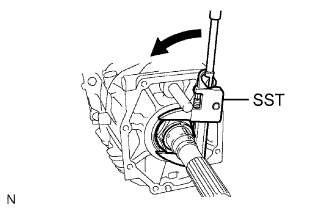 |
Using SST, remove the nut from the output shaft.
Remove the belt and wooden block from the transmission.
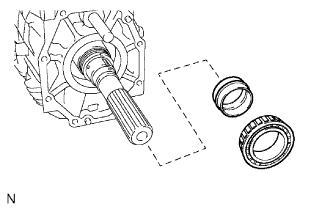 |
Remove the taper roller bearing No. 2 and spacer.
| 9. REMOVE TRANSMISSION REAR CASE |
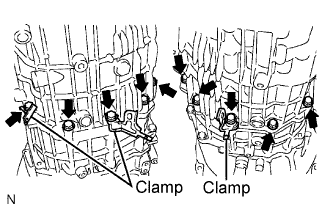 |
Remove the 10 bolts and 3 clamps.
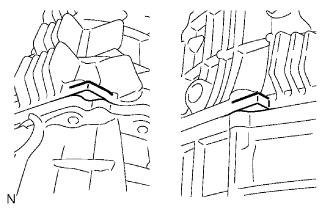 |
Using a plastic hammer, carefully tap out the rear case.
| 10. REMOVE MANUAL TRANSMISSION FILLER PLUG |
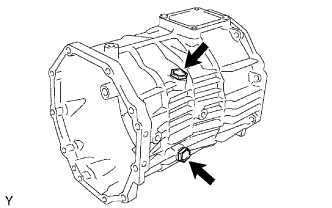 |
Remove the 2 transmission filler plugs and 2 gaskets from the transmission rear case.
| 11. REMOVE EXTENSION HOUSING OIL RECEIVER PIPE |
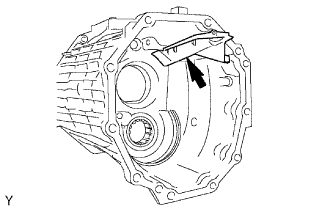 |
Remove the extension housing oil receiver pipe from the transmission rear case.
| 12. REMOVE OIL SEPARATOR PACKING SEAL |
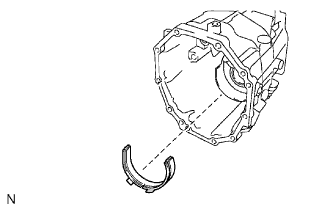 |
Remove the oil separator packing seal from the transmission rear case.
| 13. REMOVE OUTPUT SHAFT REAR BEARING OUTER RACE |
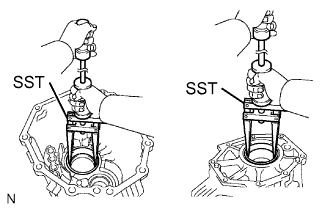 |
Using SST, remove the 2 bearing outer races.
| 14. REMOVE COUNTER GEAR REAR RADIAL BALL BEARING |
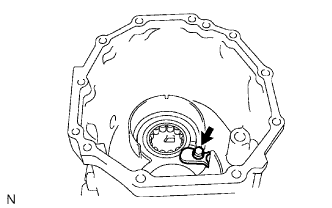 |
Remove the bolt, then remove the bearing lock plate.
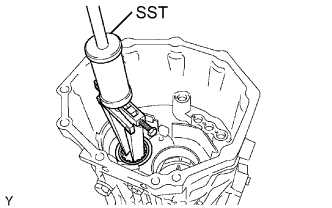 |
Using SST, remove the counter gear rear radial ball bearing from the transmission rear case.
| 15. REMOVE TRANSMISSION OIL SEPARATOR |
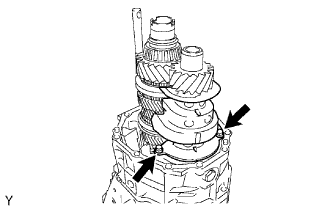 |
Remove the 2 bolts, then remove the oil separator.
| 16. REMOVE REVERSE IDLER GEAR SHAFT BOLT |
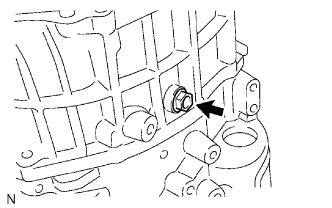 |
Remove the reverse idler gear shaft bolt from the transmission middle case.
| 17. REMOVE TRANSMISSION MIDDLE CASE |
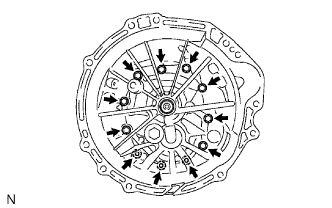 |
Remove the 11 bolts, then remove the transmission middle case.
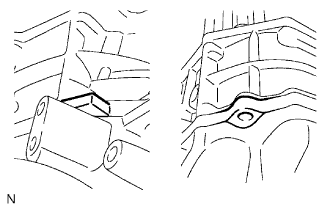 |
Using a plastic hammer, carefully tap out the middle case.
| 18. REMOVE DRAIN PLUG SUB-ASSEMBLY |
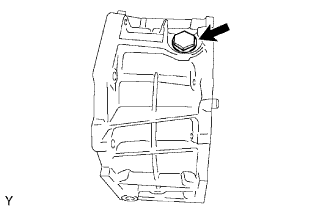 |
Remove the drain plug and gasket from the transmission middle case.
| 19. REMOVE NO. 2 OIL RECEIVER PIPE |
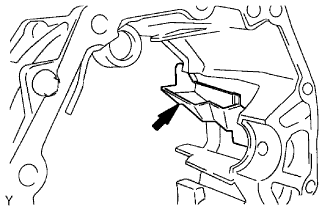 |
Remove the oil receiver pipe No. 2 from the transmission middle case.
| 20. REMOVE SHIFT AND SELECT LEVER SHAFT |
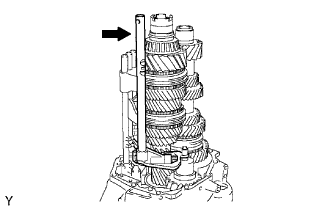 |
Remove the shift and select lever shaft from the reverse gear shaft.
| 21. REMOVE SHIFT AND SELECT LEVER |
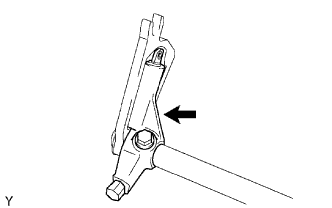 |
Remove the bolt, then remove the shift and select lever.
Remove the lock ball pin and spring from the shift and select lever.
| 22. REMOVE SHIFT AND SELECT LEVER CAM |
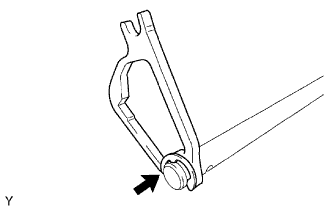 |
Using a screwdriver, remove the E ring and the shift and select lever cam from the shift and select lever shaft.
| 23. REMOVE BACK-UP LIGHT SWITCH ASSEMBLY |
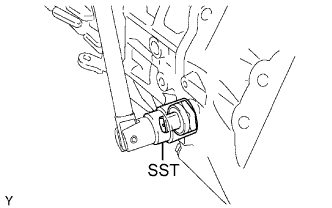 |
Using SST, remove the back-up light switch and gasket.
| 24. INSPECT REVERSE IDLER GEAR THRUST CLEARANCE |
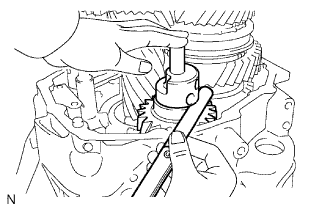 |
Using a feeler gauge, measure the thrust clearance.
| 25. REMOVE REVERSE IDLER GEAR |
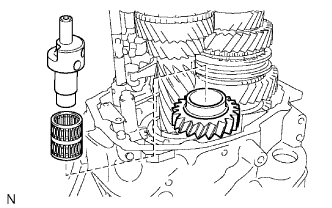 |
Remove the reverse idle gear shaft, needle roller bearing and reverse idler gear.
| 26. INSPECT REVERSE IDLER GEAR RADIAL CLEARANCE |
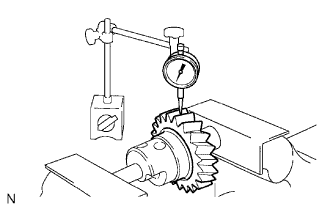 |
Using a dial indicator, measure the radial clearance.
| 27. REMOVE TRANSMISSION FRONT CASE |
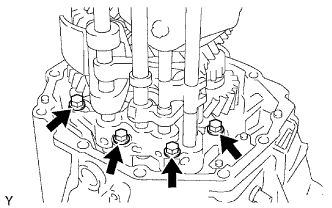 |
Remove the 4 bolts from the interlock bracket.
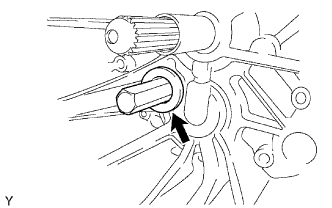 |
Using a hexagon wrench (24 mm), remove the plug.
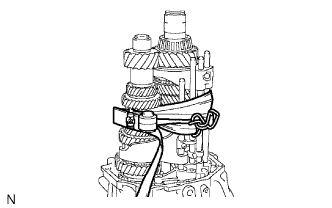 |
Tie the input shaft, counter gear and control assembly with a rope or string.
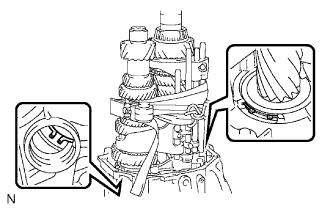 |
Expand the 2 snap rings, and lift up the output shaft, input shaft, counter gear and control assembly.
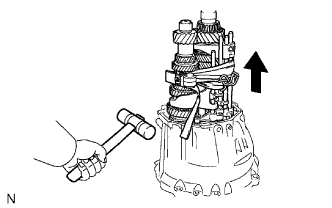 |
Remove the output shaft, input shaft, counter gear shaft and control assembly while gently tapping the clutch housing with a plastic hammer.
Separate the output shaft, input shaft, counter gear shaft and control assembly.
| 28. REMOVE NO. 1 OIL RECEIVER PIPE |
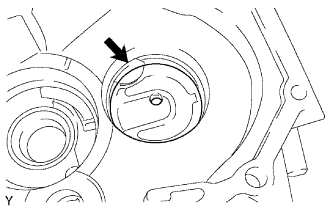 |
Remove the oil receiver pipe No. 1 from the transmission front case.
| 29. REMOVE FRONT BEARING SHAFT SNAP RING |
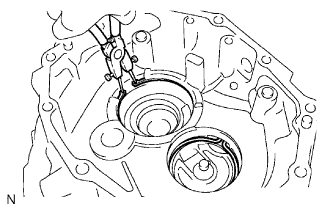 |
Using a snap ring plier, remove the 2 snap rings.
| 30. REMOVE TRANSMISSION CASE OIL SEAL |
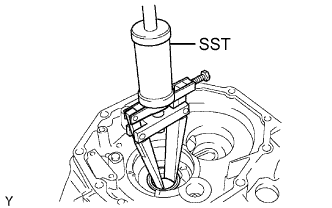 |
Using SST, remove the transmission case oil seal from the transmission front case.
| 31. REMOVE NO. 3 GEAR SHIFT FORK |
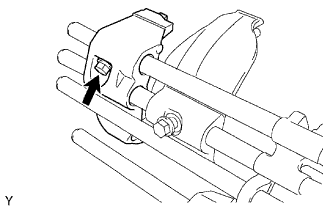 |
Remove the bolt, then remove the gear shift fork No. 3.
| 32. REMOVE NO. 3 GEAR SHIFT FORK SHAFT |
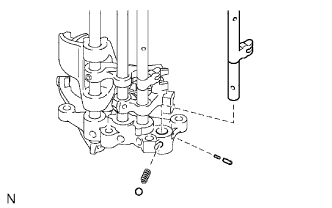 |
Remove the shift fork shaft No. 3, boll, spring, interlock pin No. 2 and interlock pin No. 3.
| 33. REMOVE NO. 2 GEAR SHIFT FORK |
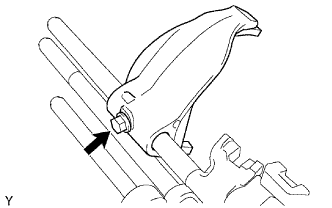 |
Remove the bolt, then remove the gear shift fork No. 2.
| 34. REMOVE NO. 2 GEAR SHIFT FORK SHAFT |
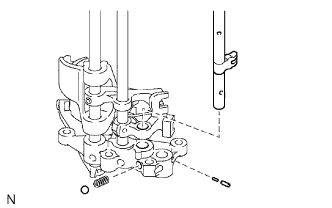 |
Remove the shift fork shaft No. 2, ball, spring, interlock pin No. 2 and interlock pin No. 3.
| 35. REMOVE NO. 1 GEAR SHIFT HEAD |
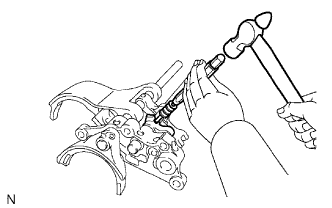 |
Using a pin punch (5 mm (0.20 in.)) and hammer, tap out the slotted pin.
| 36. REMOVE NO. 1 GEAR SHIFT FORK SHAFT |
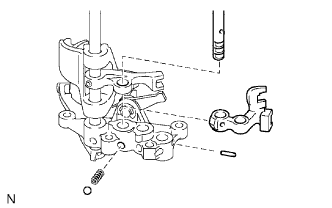 |
Remove the shift fork shaft No. 1, ball, spring, shift head No. 1 and interlock pin No. 1.
| 37. REMOVE NO. 1 GEAR SHIFT FORK |
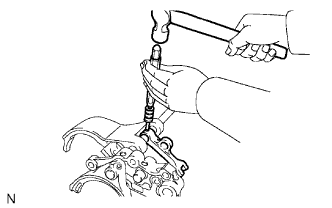 |
Using a pin punch (5 mm (0.20 in.)) and hammer, tap out the slotted pin.
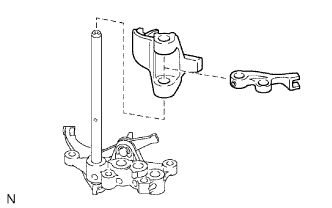 |
Remove the shift head No. 2 and shift fork No. 1.
| 38. REMOVE NO. 4 GEAR SHIFT FORK |
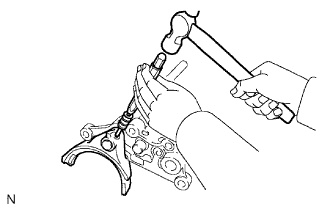 |
Using a pin punch (5 mm (0.20 in.)) and hammer, tap out the slotted pin.
Remove the shift fork No. 4.
| 39. REMOVE NO. 4 GEAR SHIFT FORK SHAFT |
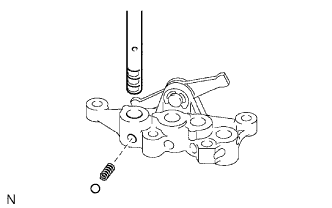 |
Remove the shift fork shaft No. 4, ball and spring.
| 40. REMOVE 1ST AND REVERSE SHIFT ARM |
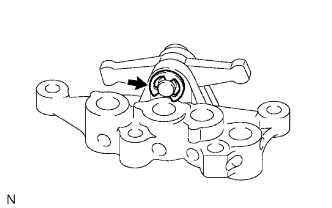 |
Using a screwdriver, remove the E-ring.
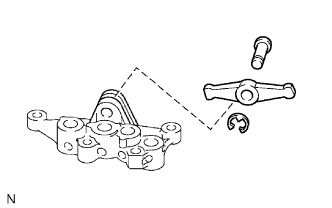 |
Remove the shift arm pivot and shift arm.