 |
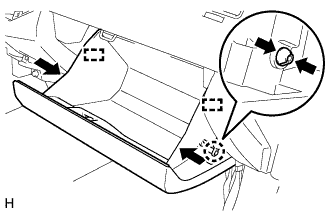
Disengage the claw and separate the glove compartment door stopper from the glove compartment door assembly.
ECM > REMOVAL |
| 1. REMOVE GLOVE COMPARTMENT DOOR ASSEMBLY |
|
Disengage the claw and separate the glove compartment door stopper from the glove compartment door assembly.
Slightly deform the upper part of the glove compartment door assembly to release the 2 stoppers and open the glove compartment door assembly until it becomes horizontal.
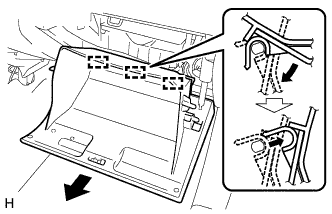 |
Pull the glove compartment door assembly toward the rear of the vehicle to release the 3 hinges and remove the glove compartment door assembly.
Remove the glove compartment door stopper.
| 2. REMOVE INSTRUMENT PANEL FINISH PANEL SUB-ASSEMBLY LOWER RH |
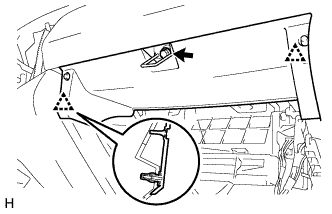 |
Remove the bolt <B>.
Disengage the 2 clips and remove the instrument panel lower finish panel sub-assembly RH.
| 3. REMOVE ECM |
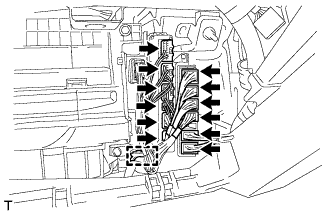 |
Disconnect the 6 ECM connectors, 6 No. 2 junction block connectors and wire harness clamp.
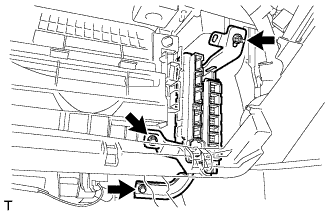 |
Remove the 2 bolts and nut and the ECM.
| 4. REMOVE NO. 2 JUNCTION BLOCK |
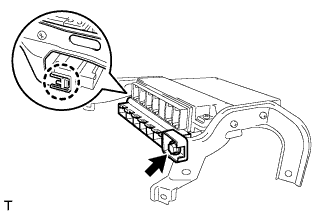 |
Remove the bolt.
Disengage the claw and remove the No. 2 junction block.
| 5. REMOVE NO. 2 ECM BRACKET |
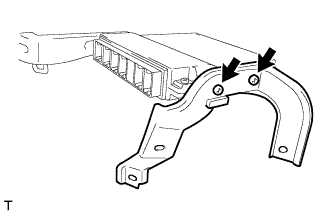 |
Remove the 2 screws and the No. 2 ECM bracket .
| 6. REMOVE ECM BRACKET |
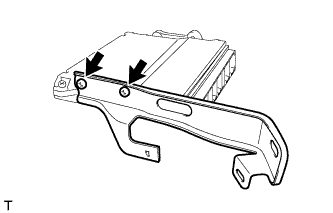 |
Remove the 2 screws and the ECM bracket.