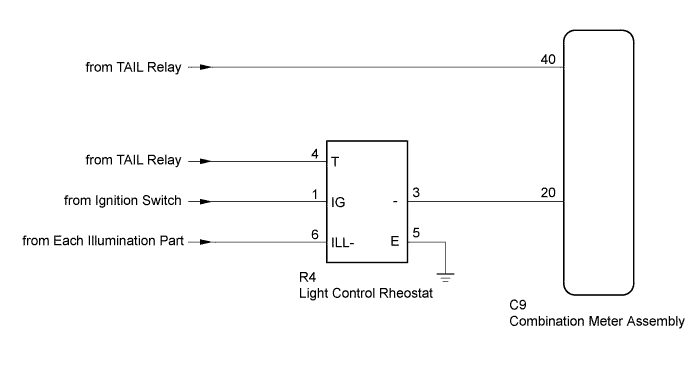
METER / GAUGE SYSTEM > Operating Light Control Rheostat does not Change Light Brightness |
| 1.INSPECT LIGHT CONTROL RHEOSTAT |
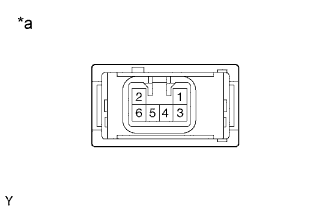 |
Disconnect the R4 light control rheostat connector.
Measure the voltage according to the value(s) in the table below.
| Tester Connection | Switch Condition | Specified Condition |
| 4 (T) - Body ground | Ignition switch ON, Taillight switch OFF | Below 1 V |
| 4 (T) - Body ground | Ignition switch ON, Taillight switch ON | 11 to 14 V |
| 1 (IG) - Body ground | Ignition switch ON | 11 to 14 V |
| 1 (IG) - Body ground | Ignition switch OFF | Below 1 V |
| *a | Component without harness connected (Light Control Rheostat) |
Measure the resistance according to the value(s) in the table below.
| Tester Connection | Condition | Specified Condition |
| 3 (-) - Body ground | Always | Below 1 Ω |
Reconnect the light control rheostat connector.
|
| ||||
| OK | |
 |
| 2.INSPECT COMBINATION METER ASSEMBLY |
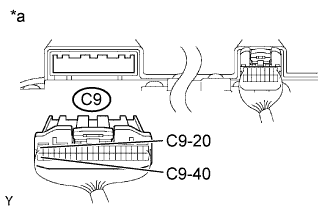 |
Disconnect the C9 combination meter assembly connector.
Measure the voltage according to the value(s) in the table below.
| Tester Connection | Switch Condition | Specified Condition |
| C9-20 - C9-40 | Ignition switch ON | 11 to 14 V |
| *a | Rear view of wire harness connector (to Combination Meter Assembly) |
Reconnect the combination meter assembly connector.
|
| ||||
| OK | ||
 | ||
| ||
