 |
Install a vinyl hose onto the radiator side.
CONDENSER > REMOVAL |
| 1. DISCHARGE REFRIGERANT FROM REFRIGERATION SYSTEM |
Start up the engine.
Turn the A/C switch to ON.
Operate the cooler compressor with an engine speed of approximately 1,000 rpm for 5 to 6 minutes to circulate the refrigerant and collect the compressor oil remaining in each component into the cooler compressor.
Stop the engine.
Recover the refrigerant from the A/C system using a refrigerant recovery unit.
| 2. DISCONNECT CABLE FROM NEGATIVE BATTERY TERMINAL |
| 3. DRAIN ENGINE COOLANT (for 2TR-FE) |
Remove the 4 bolts, then remove the engine under cover No. 1. (PRE RUNNER AND 4WD TYPE)
|
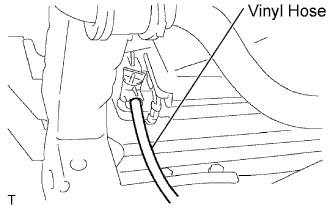
Install a vinyl hose onto the radiator side.
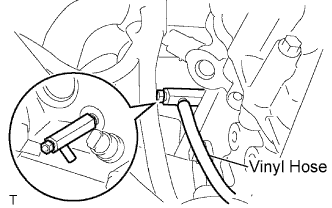 |
Install a vinyl hose onto the engine side.
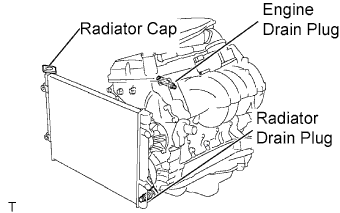 |
Loosen the engine drain plug.
Loosen the radiator drain plug.
Remove the radiator cap and drain coolant.
Drain the coolant from the reservoir tank.
| 4. DRAIN ENGINE COOLANT (for 1GR-FE) |
 |
Remove the service hole cover from the engine under cover.
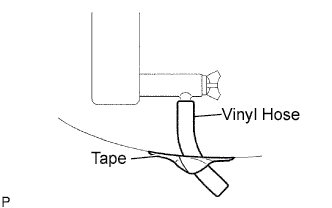
Install a vinyl hose onto the drain on the radiator side.
Fix the vinyl hose with tape.
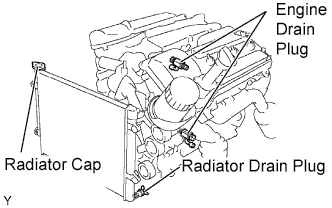 |
Loosen the 3 drain plugs on the engine and radiator, and drain the coolant.
Remove the radiator cap.
Drain the coolant from the reservoir tank.
Tighten the 3 drain plugs.
Remove the vinyl hose from the radiator.
| 5. REMOVE RADIATOR GRILLE |
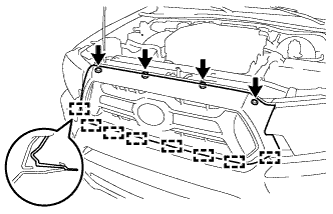 |
Remove the 2 screws.
Using a clip remover, remove the 2 clips.
Disengage the 8 guides and remove the radiator grille.
| 6. REMOVE RADIATOR SUPPORT TO FRAME SEAL LH (for 2TR-FE) |
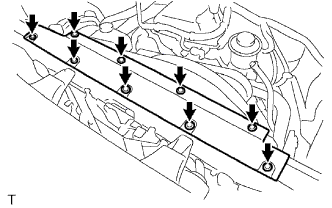 |
Disengage the 9 clips, then remove the radiator support to frame seal LH.
| 7. REMOVE RADIATOR SUPPORT TO FRAME SEAL LH (for 1GR-FE) |
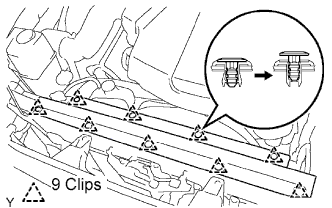 |
Disengage the 9 clips, then remove the radiator support to frame seal.
| 8. REMOVE FAN SHROUD (for 2TR-FE) |
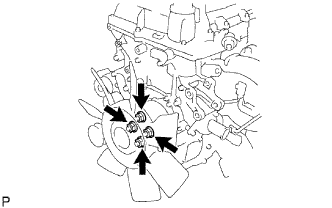 |
Loosen the 4 nuts shown in the illustration.
Remove the fan and generator V belt.
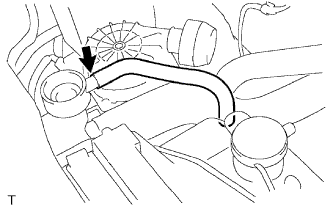 |
Disconnect the radiator reserve tank hose from the radiator.
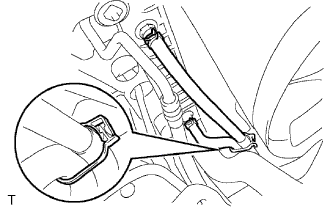 |
Disconnect the oil cooler inlet and outlet hoses from the fan shroud. (for Automatic Transmission)
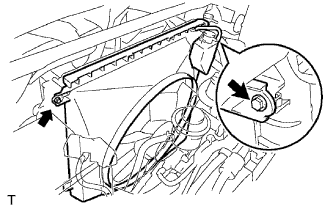 |
Remove the 2 bolts shown in the illustration.
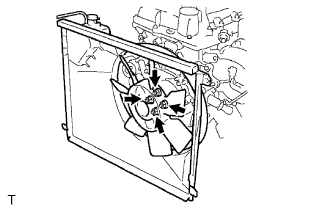 |
Remove the 4 nuts, then remove the fan shroud and fan with fluid coupling together.
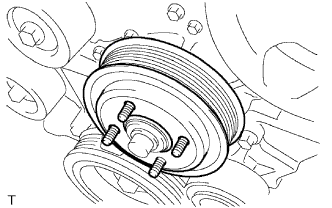 |
Remove the fan pulley.
| 9. REMOVE FAN SHROUD (for 1GR-FE) |
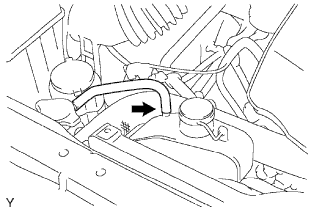 |
Disconnect the hose from the radiator reserve tank.
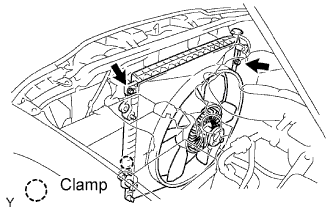 |
Remove the 2 cooler hoses from the clamp (with automatic transmission).
Remove the 4 nuts from the fan pulley.
Remove the fan and generator V belt .
Remove the 2 bolts from the fan shroud.
Remove the fan pulley and fan shroud.
| 10. REMOVE RADIATOR ASSEMBLY (for 2TR-FE) |
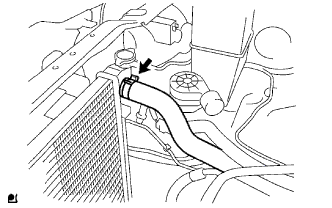 |
Disconnect the radiator hose inlet.
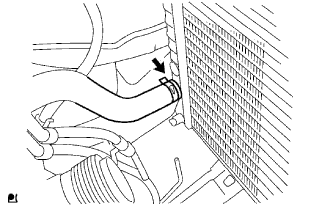 |
Disconnect the radiator hose No. 2.
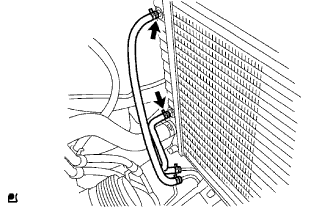 |
Disconnect the oil cooler inlet and outlet hoses. (for Automatic Transmission)
Remove the 4 bolts, then remove the radiator.
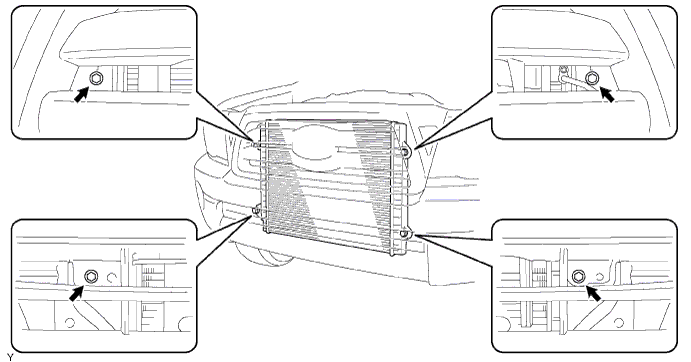
| 11. REMOVE RADIATOR ASSEMBLY (for 1GR-FE) |
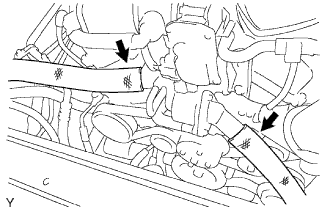 |
Disconnect the 2 radiator hoses.
Remove the 4 bolts, then remove the radiator.
Disconnect the 2 oil cooler hoses (with automatic transmission).
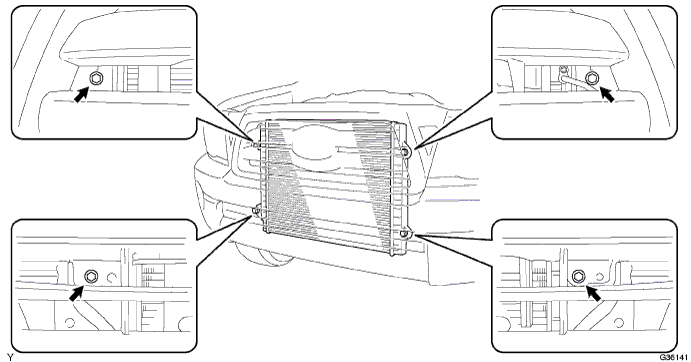
| 12. DISCONNECT DISCHARGE HOSE SUB-ASSEMBLY |
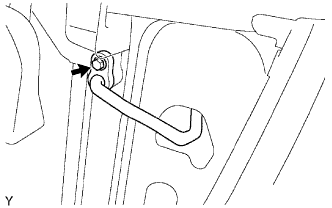 |
Remove the bolt and disconnect the discharge hose sub-assembly from the cooler condenser assembly.
Remove the seal washer from the discharge hose sub-assembly.
| 13. DISCONNECT AIR CONDITIONING TUBE ASSEMBLY |
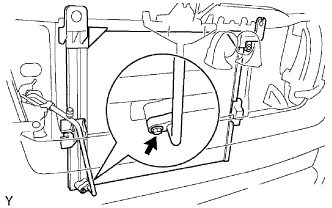 |
Remove the bolt and disconnect the air conditioning tube assembly from the cooler condenser assembly.
Remove the seal washer from the air conditioning tube assembly.
| 14. REMOVE COOLER CONDENSER ASSEMBLY |
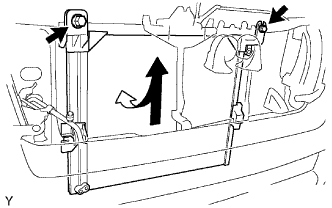 |
Remove the 2 bolts.
Lift the condenser up, disengage the fitting of the condenser lower bracket and remove the condenser from the rear side of the vehicle.
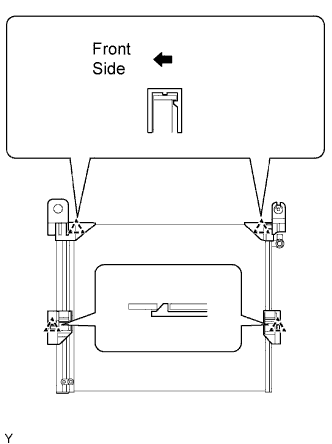 |
Using a screwdriver, disengage the claw and remove the condenser upper bracket LH.
Using a screwdriver, disengage the claw and remove the condenser upper bracket RH.
Using a screwdriver, disengage the claw and remove the condenser lower bracket LH.
Using a screwdriver, disengage the claw and remove the condenser lower bracket RH.
Remove the condenser.