 |
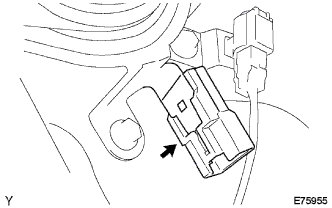
Engage the claw.
FRONT DOOR SPEAKER (except Regular Cab) > INSTALLATION |
| 1. INSTALL FRONT NO. 2 SPEAKER ASSEMBLY |
|
Engage the claw.
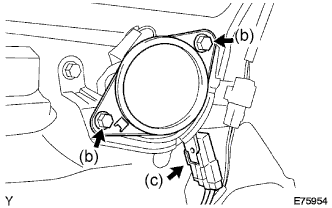 |
Install the front No. 2 speaker assembly with the 2 bolts.
Connect the connector.
| 2. INSTALL FRONT NO. 1 SPEAKER ASSEMBLY |
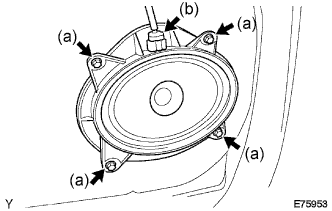 |
Install the front No. 1 speaker assembly with the 4 screws.
Connect the connector.
| 3. INSTALL FRONT DOOR TRIM PANEL ASSEMBLY LH |
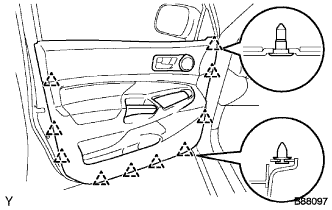 |
Engage the 10 clips and install the front door trim panel assembly LH.
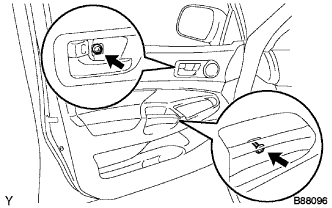 |
Install the 2 screws.
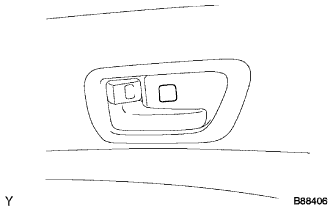 |
Close the cover.
| 4. INSTALL FRONT DOOR LOWER FRAME BRACKET GARNISH LH |
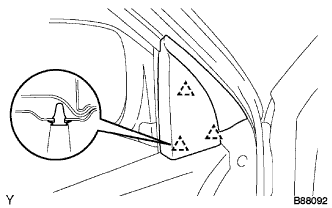 |
Engage the 3 clips and install the front lower frame bracket garnish LH.
| 5. INSTALL POWER WINDOW REGULATOR MASTER SWITCH ASSEMBLY (w/ Power Door Lock) |
for double cab:
Install the power window regulator master switch .
for access cab:
Install the power window regulator master switch .
| 6. INSTALL FRONT DOOR WINDOW REGULATOR HANDLE ASSEMBLY (w/o Power Door Lock) |
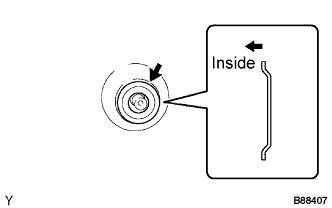 |
Install the window regulator handle plate.
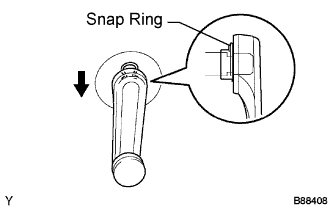 |
Install the front door window regulator handle assembly with the snap ring.
| 7. CONNECT CABLE TO NEGATIVE BATTERY TERMINAL |