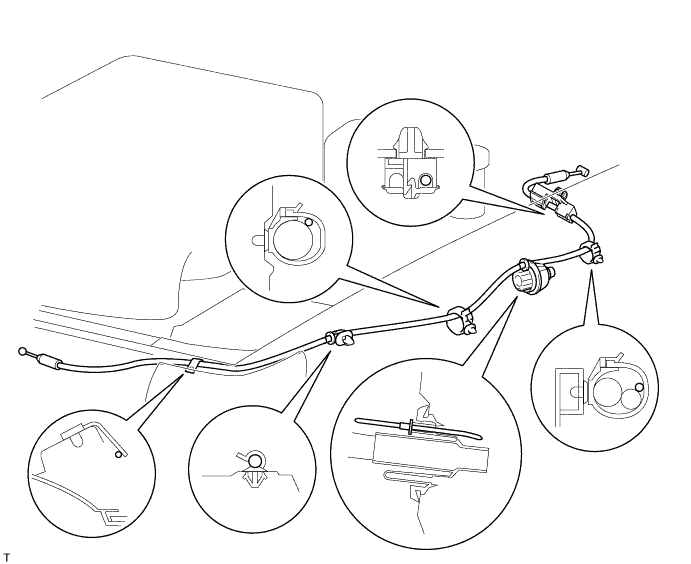
Tie the string inside the wire harness grommet to the hood lock control cable assembly.
HOOD > REASSEMBLY |
| Item | Temperature |
| Hood Bulge | 20 to 30°C (68 to 86°F) |
| 1. INSTALL HOOD LOCK CONTROL CABLE ASSEMBLY |
Tie the string inside the wire harness grommet to the hood lock control cable assembly.
Using the string, fit the hood lock control cable assembly into the wire harness grommet.
| 2. INSTALL HOOD LOCK CONTROL LEVER SUB-ASSEMBLY |
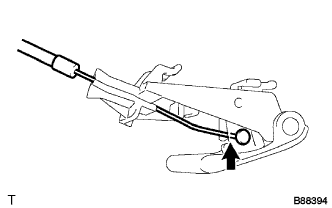 |
Connect the hood lock control cable assembly.
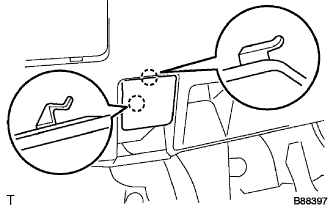 |
Engage the 2 claws and install the hood lock control lever sub-assembly.
| 3. INSTALL HOOD LOCK CONTROL CABLE PROTECTOR SUB-ASSEMBLY |
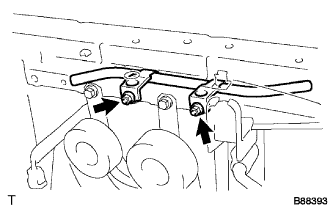 |
Install the hood lock control cable protector sub-assembly with the 2 nuts.
| 4. INSTALL HOOD SUPPORT |
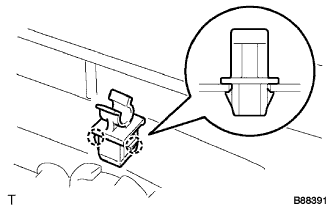 |
Engage the 2 claws and install the hood stay holder.
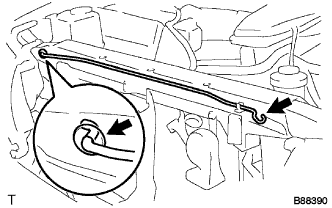 |
Install the grommet.
Install the hood support.
| 5. INSTALL HOOD LOCK ASSEMBLY |
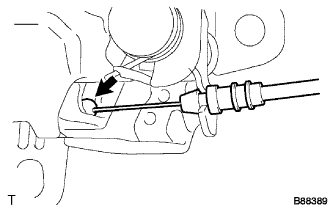 |
Connect the hood lock control cable assembly.
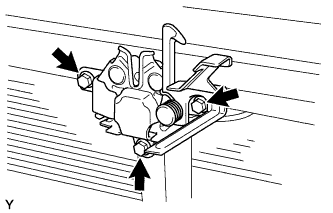 |
Install the hood lock assembly with the 3 bolts.
| 6. INSTALL NO. 2 HOOD LOCK RELEASE LEVER PROTECTOR |
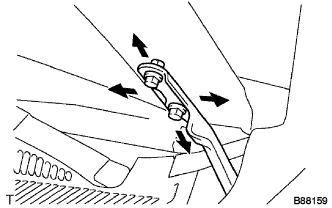 |
Adjust the hood position.
Loosen the 4 hinge bolts on the hood side.
Move the hood to adjust the clearance to within the standard range (Step 1).
Tighten the 4 hood side hinge bolts after the adjustment.
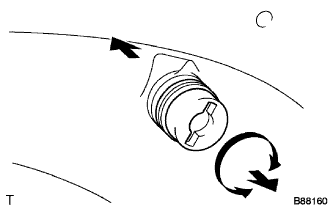 |
Adjust the cushion rubber so that the heights of the hood and the fender are aligned.
Raise or lower the hood front end by turning the cushion rubber. Make sure that the clearance is within the standard range.
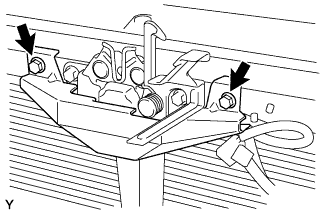 |
Adjust the hood lock.
Remove the 2 bolts and No. 2 hood lock release lever protector.
|
Loosen the 3 bolts.
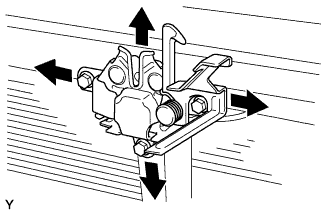 |
Adjust the hood lock position so that the striker can enter it smoothly.
|
Tighten the 3 bolts after the adjustment.
|
Install the No. 2 hood lock release lever protector.
| 7. INSTALL RADIATOR GRILLE |
Engage the 8 guides and install the radiator grille.
Install the 2 clips.
Tighten the 2 screws.
| 8. INSTALL WASHER HOSE ASSEMBLY |
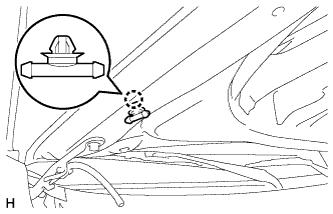 |
Engage the claw and install the windshield washer hose joint.
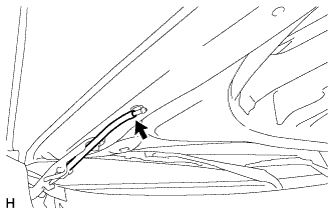 |
Connect the washer hose sub-assembly.
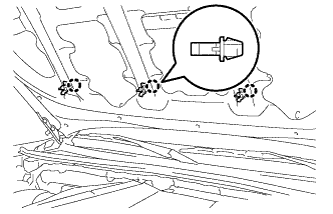 |
Engage the 3 claws and install the washer hose clamps.
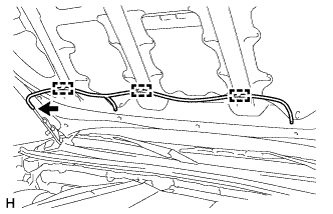 |
Engage the 3 guides and install the washer hose.
Connect the washer hose.
| 9. INSTALL WASHER NOZZLE SUB-ASSEMBLY |
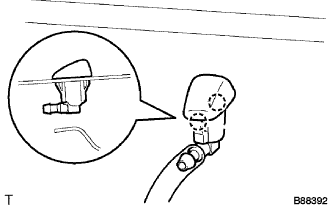 |
Connect the washer hose.
Engage the 2 claws and install the washer nozzle sub-assembly.
| 10. INSPECT WASHER NOZZLE SUB-ASSEMBLY |
With the engine running, check that the washer fluid hits in the range indicated by the hatched lines on the windshield.
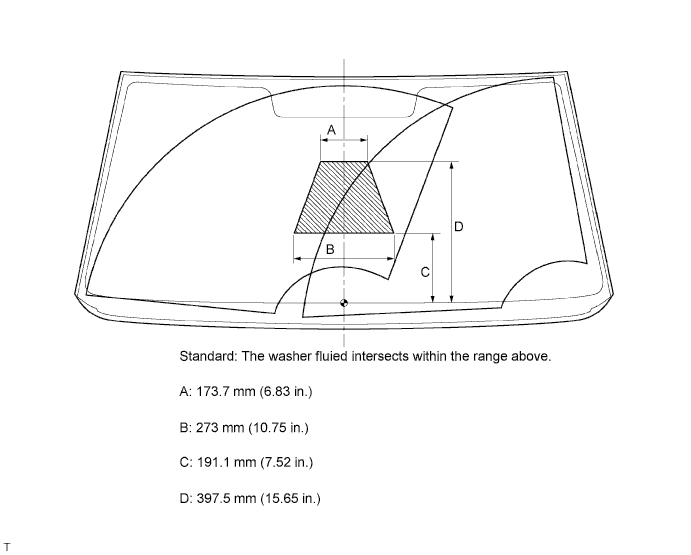
| 11. INSTALL NO. 3 HOOD BULGE PROTECTOR (w/ Hood Bulge) |
When using a new hood bulge:
Clean the hood bulge surface.
Using a heat light, heat the hood bulge surface.
When reusing the hood bulge:
Using a heat light, heat the hood bulge surface.
Remove the double-sided tape from the hood bulge.
Wipe off any tape adhesive residue with cleaner.
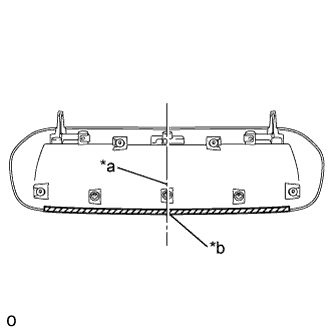 |
Install a new No. 3 hood bulge protector as shown in the illustration.
| *a | Hood Bulge at the Center |
| *b | No. 3 Hood Bulge Protector at the Center |
| 12. INSTALL NO. 2 HOOD BULGE PROTECTOR (w/ Hood Bulge) |
When using a new hood bulge:
Clean the hood bulge surface.
Using a heat light, heat the hood bulge surface.
When reusing the hood bulge:
Using a heat light, heat the hood bulge surface.
Remove the double-sided tape from the hood bulge.
Wipe off any tape adhesive residue with cleaner.
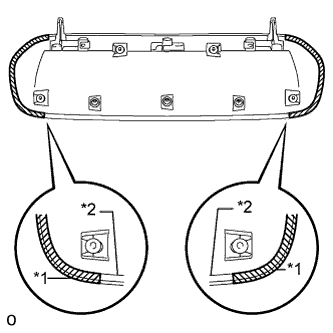 |
Install 2 new No. 2 hood bulge protectors as shown in the illustration.
| *1 | No. 2 Hood Bulge Protector |
| *2 | No. 3 Hood Bulge Protector |
| 13. INSTALL NO. 1 HOOD BULGE PROTECTOR (w/ Hood Bulge) |
When using a new hood bulge:
Clean the hood bulge surface.
Using a heat light, heat the hood bulge surface.
When reusing the hood bulge:
Using a heat light, heat the hood bulge surface.
Remove the double-sided tape from the hood bulge.
Wipe off any tape adhesive residue with cleaner.
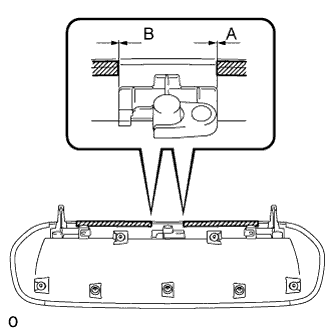 |
Install a new No. 1 hood bulge protector as shown in the illustration.
| Dimension | Measurement |
| A | Approximately 0 mm (0 in.) |
| B | Approximately 0 mm (0 in.) |
| 14. INSTALL HOOD AIR INTAKE GUIDE (w/ Hood Bulge) |
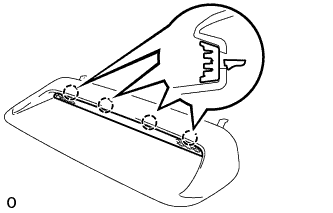 |
Engage the 4 claws to install the hood air intake guide to the bulge.
| 15. INSTALL HOOD BULGE (w/ Hood Bulge) |
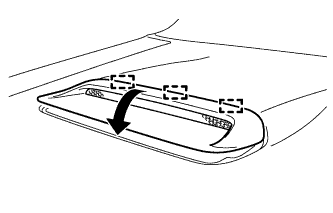 |
Engage the 3 guides to install the hood bulge together with the intake guide.
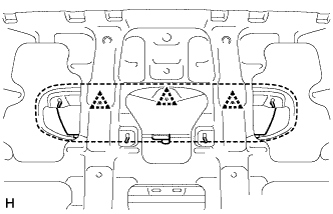 |
Engage the 3 clips.
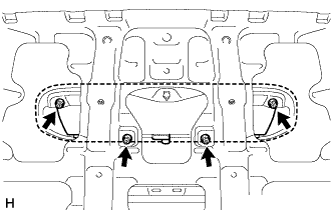 |
Install the 4 nuts.
| 16. INSTALL HOOD TO RADIATOR SUPPORT SEAL |
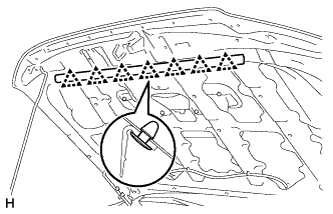 |
Engage the 7 clips to install the hood to radiator support seal.
| 17. INSTALL HOOD BUMPER CUSHION |
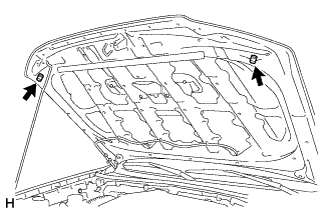 |
Rotate clockwise and install the 2 hood bumper cushions.
| 18. INSTALL CENTER HOOD CUSHION |
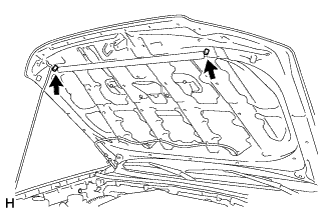 |
Engage the 2 center hood cushions.