WINDSHIELD GLASS > REMOVAL |
| 1. DISCONNECT CABLE FROM NEGATIVE BATTERY TERMINAL |
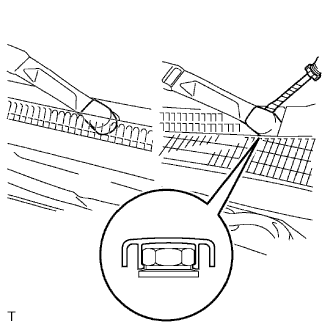
| 2. REMOVE FRONT WIPER ARM HEAD CAP |
|
Using a screwdriver wrapped with protective tape, remove the 2 front wiper arm head caps.
| 3. REMOVE FRONT WIPER ARM LH |
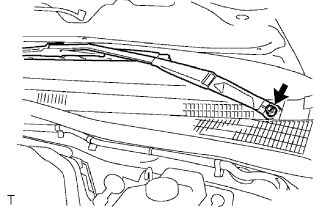 |
Operate the wiper, then stop the windshield wiper motor assembly at the automatic stop position.
Remove the nut and front wiper arm LH.
| 4. REMOVE FRONT WIPER ARM RH |
| 5. REMOVE FRONT FENDER TO COWL SIDE SEAL LH |
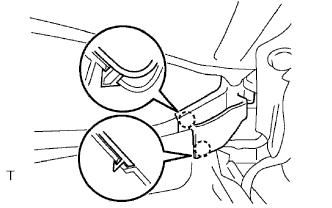 |
Disengage the 2 claws and remove the front fender to cowl side seal LH.
| 6. REMOVE FRONT FENDER TO COWL SIDE SEAL RH |
| 7. REMOVE COWL TOP VENTILATOR LOUVER SUB-ASSEMBLY |
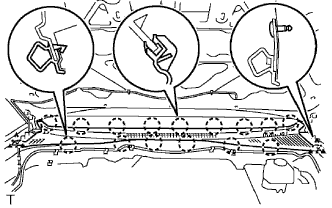 |
Disengage the 2 clips.
Disengage the 15 claws, then remove the cowl top ventilator louver sub-assembly.
| 8. REMOVE INNER REAR VIEW MIRROR ASSEMBLY |
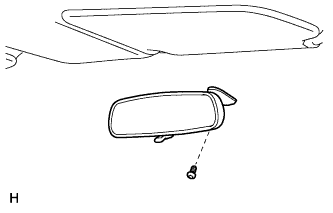 |
Using a T20 "TORX" socket wrench, remove the screw and inner rear view mirror assembly.
| 9. REMOVE FRONT DOOR OPENING TRIM WEATHERSTRIP LH |
Separate the front door opening trim weatherstrip to the extent which allows the removal of the front pillar garnish.
| 10. REMOVE FRONT DOOR OPENING TRIM WEATHERSTRIP RH |
| 11. REMOVE FRONT PILLAR GARNISH LH (for Regular Cab) |
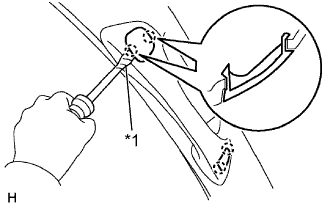 |
Using a screwdriver with its tip taped in protective tape, disengage the 2 claws and remove the assist grip plug.
| *1 | Protective Tape |
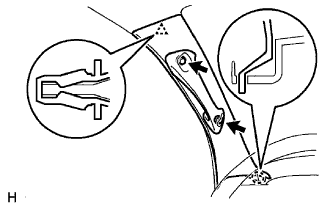 |
Remove the 2 screws.
Disengage the clip and claw and remove the front pillar garnish.
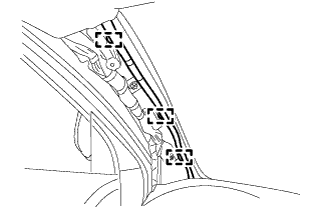 |
for LH Side:
Using a clip remover, remove the 3 wire harness clamps.
| 12. REMOVE FRONT PILLAR GARNISH LH (for Access Cab) |
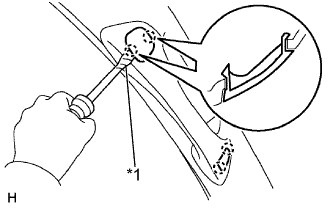 |
Using a screwdriver with its tip taped in protective tape, disengage the 2 claws and remove the assist grip plug.
| *1 | Protective Tape |
|
Remove the 2 screws.
Disengage the claw and clip, and remove the front pillar garnish.
|
for LH Side:
Using a clip remover, remove the 3 wire harness clamps.
| 13. REMOVE FRONT PILLAR GARNISH LH (for Double Cab) |
|
Using a screwdriver with its tip taped in protective tape, disengage the 2 claws and remove the assist grip plug.
| *1 | Protective Tape |
|
Remove the 2 screws.
Disengage the clip and claw and remove the front pillar garnish.
|
for LH side:
Using a clip remover, remove the 3 wire harness clamps.
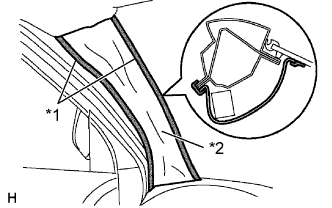 |
w/ Curtain Shield Airbag:
| *1 | Adhesive Tape |
| *2 | Cloth or Nylon |
Thoroughly cover the airbag with cloth or nylon of 700 mm (27.56 in.) x 120 mm (4.72 in.) and fix the ends of the cover with adhesive tape, as shown in the illustration.
| 14. REMOVE FRONT PILLAR GARNISH RH (for Regular Cab) |
| 15. REMOVE FRONT PILLAR GARNISH RH (for Access Cab) |
| 16. REMOVE FRONT PILLAR GARNISH RH (for Double Cab) |
| 17. REMOVE ROOF CONSOLE BOX ASSEMBLY (for Access Cab) |
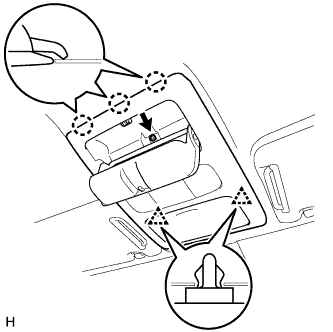 |
Remove the screw.
Disengage the 2 clips and 3 claws.
Disconnect the connectors and remove the roof console box assembly.
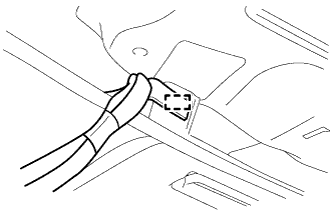 |
Using a clip remover, remove the wire harness clamp.
| 18. REMOVE ROOF CONSOLE BOX ASSEMBLY (for Double Cab) |
|
Remove the screw.
Disengage the 2 clips and 3 claws.
Disconnect the connectors and remove the roof console box assembly.
|
Using a clip remover, remove the wire harness clamp.
| 19. REMOVE ASSIST GRIP PLUG (w/ Curtain Shield Airbag) |
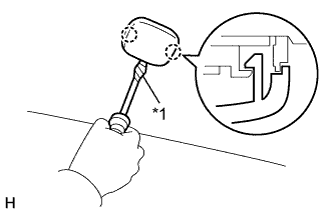 |
Using a screwdriver with its tip taped in protective tape, disengage the 2 claws and open the cover.
| *1 | Protective Tape |
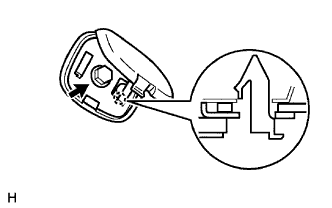 |
Remove the screw.
Disengage the claw and remove the assist grip plug.
| 20. REMOVE ASSIST GRIP SUB-ASSEMBLY (for Double Cab) |
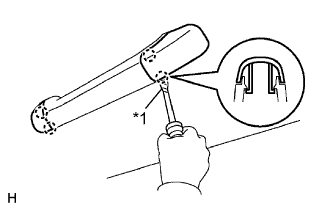 |
Using a screwdriver with its tip taped in protective tape, disengage the 2 claws and open the cover.
| *1 | Protective Tape |
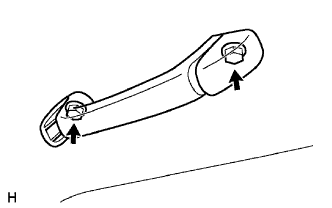 |
Remove the 2 screws and assist grip.
| 21. REMOVE VISOR ASSEMBLY LH (for Regular Cab) |
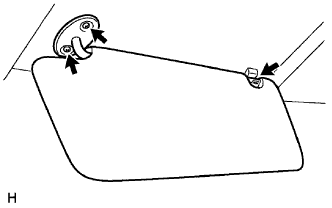 |
Remove the 2 screws.
Remove the visor from the visor holder.
| 22. REMOVE VISOR ASSEMBLY LH (for Access Cab) |
|
Remove the 2 screws.
Remove the visor from the visor holder.
| 23. REMOVE VISOR ASSEMBLY LH (for Double Cab) |
|
Remove the 2 screws.
Remove the visor from the visor holder.
| 24. REMOVE VISOR ASSEMBLY RH (for Regular Cab) |
| 25. REMOVE VISOR ASSEMBLY RH (for Access Cab) |
| 26. REMOVE VISOR ASSEMBLY RH (for Double Cab) |
| 27. REMOVE VISOR HOLDER (for Regular Cab) |
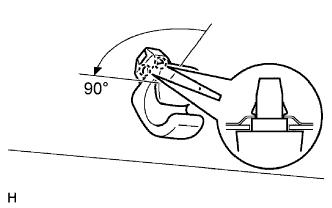 |
Turn the visor holder 90° counterclockwise and remove it.
| 28. REMOVE VISOR HOLDER (for Access Cab) |
|
Turn the visor holder 90° counterclockwise and remove it.
| 29. REMOVE VISOR HOLDER (for Double Cab) |
|
Turn the visor holder 90° counterclockwise and remove it.
| 30. REMOVE WINDSHIELD UPPER MOLDING OUTER |
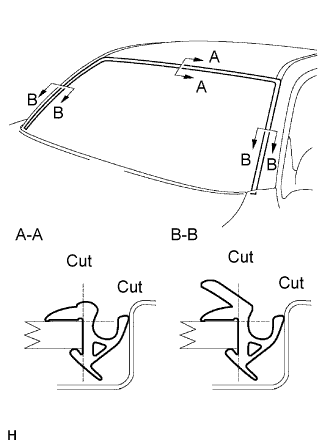 |
Using a knife, cut off the windshield upper moulding outer, as shown in the illustration.
Remove the windshield upper moulding outer.
| 31. REMOVE WINDSHIELD GLASS |
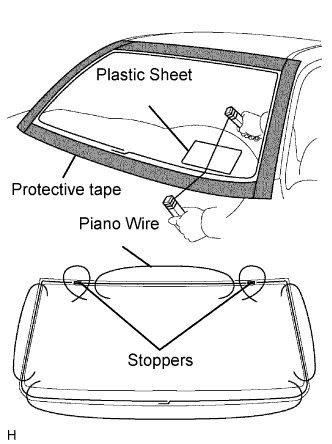 |
Apply protective tape to the outer circumference of the windshield glass, as shown in the illustration.
From the interior, insert piano wires between the vehicle body and windshield glass, as shown in the illustration.
Tie objects that can serve as handles (for example, wooden blocks) to all wire ends.
Cut through the adhesive by pulling the piano wire around the windshield glass.
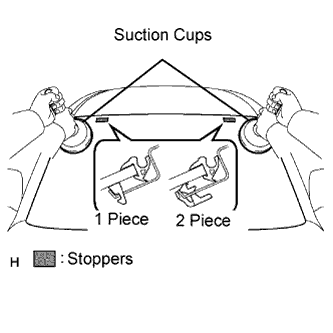 |
Disengage the 2 stoppers.
Using suction cups, remove the windshield glass.