 |
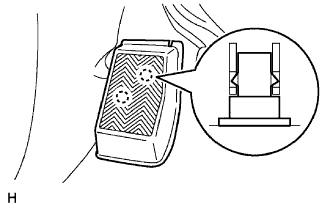
Disengage the 2 clips and remove the front floor footrest.
BRAKE BOOSTER > REMOVAL |
| 1. DISCONNECT CABLE FROM NEGATIVE BATTERY TERMINAL |
| 2. DRAIN BRAKE FLUID |
| 3. REMOVE FRONT FLOOR FOOTREST |
|
Disengage the 2 clips and remove the front floor footrest.
| 4. REMOVE FRONT DOOR SCUFF PLATE LH (for Regular Cab) |
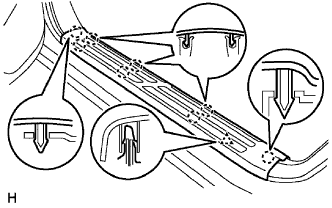 |
Disengage the 8 claws and clip, and remove the front door scuff plate.
| 5. REMOVE FRONT DOOR SCUFF PLATE LH (for Access Cab) |
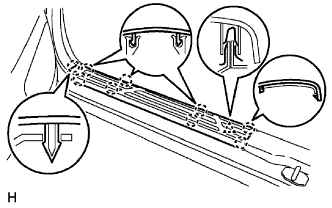 |
Disengage the 9 claws and clip, and remove the front door scuff plate.
| 6. REMOVE FRONT DOOR SCUFF PLATE LH (for Double Cab) |
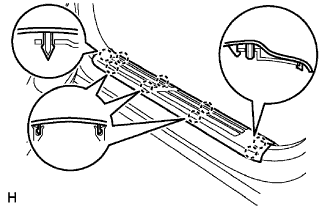 |
Disengage the 9 claws and remove the front door scuff plate.
| 7. REMOVE COWL SIDE TRIM BOARD LH (for Regular Cab) |
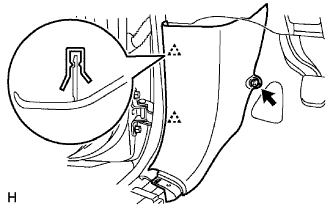 |
Remove the clip.
Disengage the 2 clips and remove the cowl side trim board.
| 8. REMOVE COWL SIDE TRIM BOARD LH (for Access Cab) |
|
Remove the clip.
Disengage the 2 clips and remove the cowl side trim board.
| 9. REMOVE COWL SIDE TRIM BOARD LH (for Double Cab) |
|
Remove the clip.
Disengage the 2 clips and remove the cowl side trim board.
| 10. REMOVE INSTRUMENT PANEL UNDER TRAY (for Automatic Transmission) |
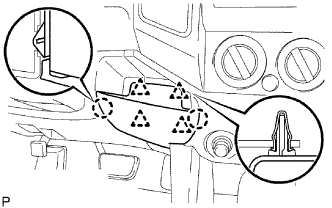 |
Disengage the 4 clips and 2 claws, and remove the instrument panel under tray.
| 11. REMOVE INSTRUMENT PANEL HOLE COVER (for Manual Transmission) |
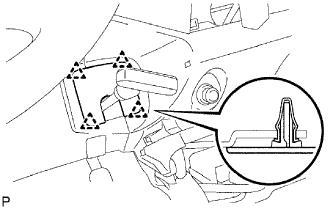 |
Disengage the 4 clips and remove the instrument panel hole cover.
| 12. REMOVE LOWER NO. 1 INSTRUMENT PANEL FINISH PANEL |
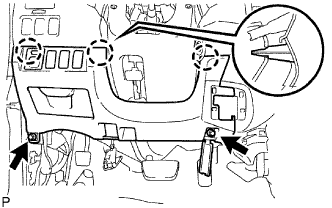 |
Remove the 2 bolts <B>.
Disengage the 3 clips and remove the lower No. 1 instrument panel finish panel.
Disconnect the connectors.
| 13. SEPARATE DRIVER SIDE JUNCTION BLOCK |
| 14. REMOVE CLUTCH RESERVOIR TUBE (for Manual Transmission) |
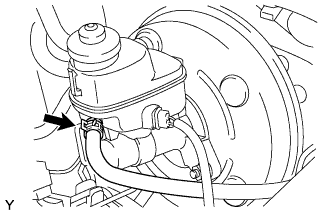 |
Disconnect the clutch reservoir tube from the reservoir.
| 15. REMOVE BRAKE MASTER CYLINDER SUB-ASSEMBLY |
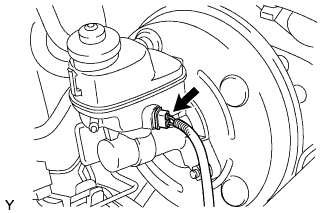 |
Disconnect the brake fluid level warning switch connector.
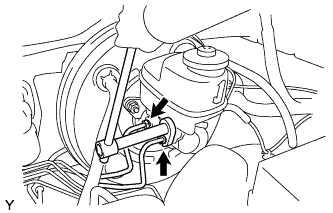 |
Using a union nut wrench, disconnect the 2 brake lines from the brake master cylinder sub-assembly.
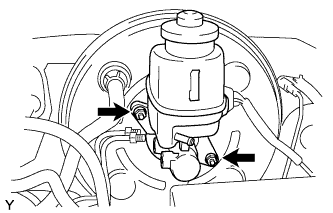 |
Remove the 2 nuts, and then pull the brake master cylinder sub-assembly out of the brake booster.
Remove the O-ring from the brake master cylinder sub-assembly.
| 16. SEPARATE MASTER CYLINDER PUSH ROD CLEVIS |
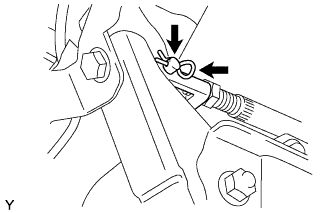 |
Remove the clip and push rod pin, and then separate the push rod clevis.
| 17. REMOVE BRAKE BOOSTER ASSEMBLY |
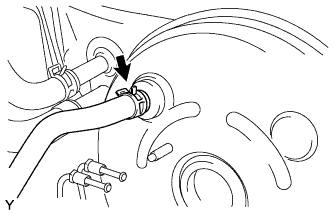 |
Disconnect the vacuum hose from the brake booster assembly.
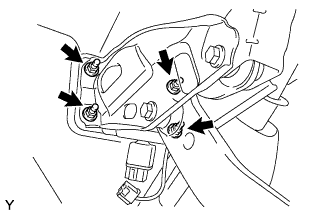 |
Remove the 4 nuts, and pull out the brake booster assembly.
Remove the gasket from the brake booster assembly.
Loosen the lock nut and then remove the push rod clevis.
| 18. REMOVE BRAKE VACUUM CHECK VALVE ASSEMBLY |
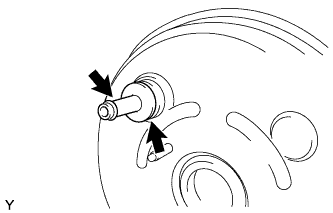 |
Remove the vacuum check valve from the brake booster assembly.
Remove the grommet from the brake booster assembly.