CANISTER > INSPECTION |
| 1. INSPECT CHARCOAL CANISTER ASSEMBLY |
|
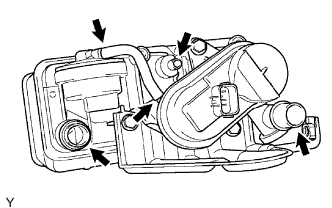
Visually check the charcoal canister for cracks and damage.
If cracks and damage are found, replace the charcoal canister assembly.
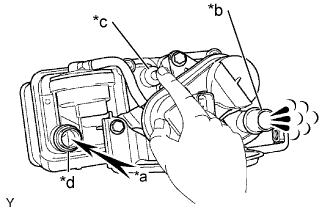 |
Check the charcoal canister operation.
While holding the purge port closed, blow air at 1.67 kPa (17.0 gf/cm2, 0.24 psi) into the vent port, and check that the air flows from the air inlet port.
| *a | Air |
| *b | Air Inlet Port |
| *c | Purge Port |
| *d | Vent Port |
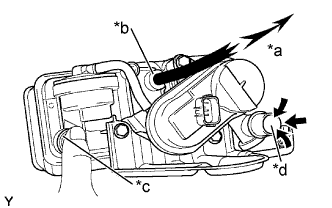 |
While holding the vent port closed, apply a vacuum of 1.10 kPa (11.2 mmHg, 0.16 in.Hg) into the purge port, and check that the air flows from the air inlet port.
| *a | Vacuum |
| *b | Purge Port |
| *c | Vent Port |
| *d | Air Inlet Port |
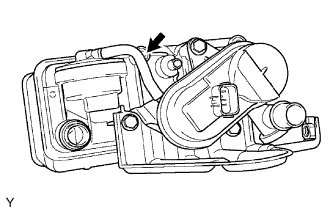 |
Check for air leakage.
Remove the air hose between ports A and B.
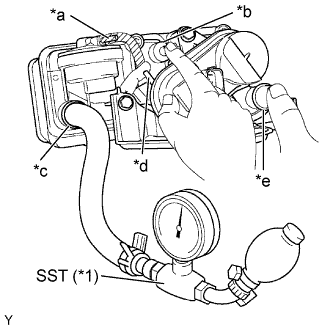 |
Connect the SST (pressure gauge) to the vent port of the charcoal canister.
While holding port B, the purge port and air inlet port closed with your fingers, leave port A open and apply pressurized air at 19.6 kPa (0.2 kgf*cm2, 2.81 psi) into the vent port. Check that the pressure is retained.
| *1 | Pressure Gauge |
| *a | Port A |
| *b | Purge Port |
| *c | Vent Port |
| *d | Port B |
| *e | Air Inlet Port |
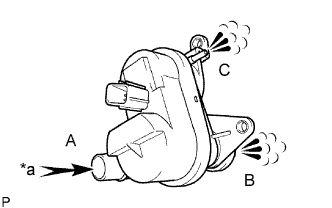 |
Check the leak detection pump.
Check that air flows from port A to ports B and C.
| *a | Air |
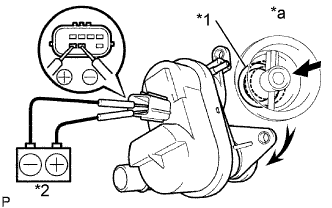 |
Apply battery positive voltage across the terminals.
| *1 | Valve |
| *2 | Battery |
| *a | Closed |
Check that the valve is closed.
If the result is not as specified, replace the pump module.