MANUAL TRANSMISSION UNIT > DISASSEMBLY |
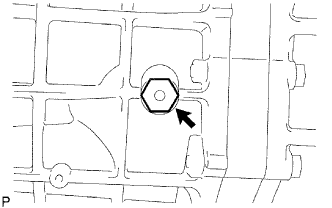
| 1. REMOVE FILLER PLUG |
|
Remove the filler plug and gasket from the manual transmission case.
| 2. REMOVE DRAIN PLUG |
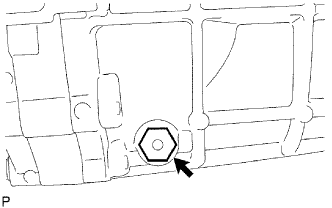 |
Remove the drain plug and gasket from the manual transmission case.
| 3. REMOVE CLUTCH RELEASE FORK SUB-ASSEMBLY |
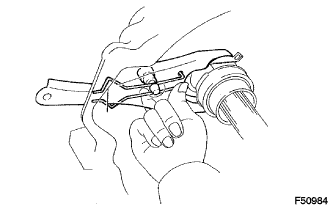 |
Remove the clutch release fork together with the clutch release bearing from the transmission assembly.
| 4. REMOVE CLUTCH RELEASE BEARING ASSEMBLY |
Remove the clutch release bearing assembly from the clutch release fork.
| 5. REMOVE RELEASE FORK SUPPORT |
Remove the release fork support from the transaxle assembly.
| 6. REMOVE CLUTCH RELEASE FORK BOOT |
| 7. REMOVE CLUTCH HOUSING |
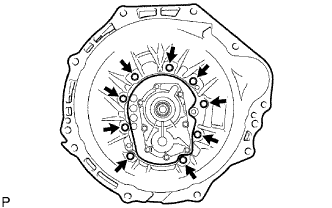 |
Remove the 9 bolts.
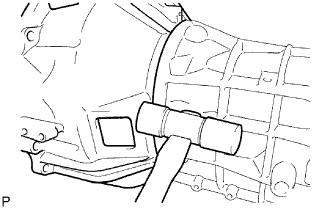 |
Using a plastic hammer, remove the clutch housing from the manual transmission case.
| 8. REMOVE BACK-UP LIGHT SWITCH ASSEMBLY |
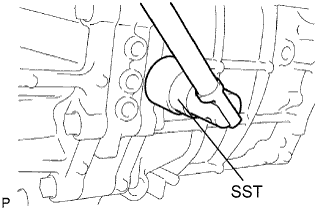 |
Using SST, remove the back-up light switch assembly and gasket from the manual transmission case.
| 9. REMOVE SPEEDOMETER DRIVEN GEAR SUB-ASSEMBLY |
Remove the bolt and the speedometer driven gear sub-assembly from the extension housing sub-assembly.
Remove the O-ring from the speedometer driven gear sub-assembly.
| 10. REMOVE FLOOR SHIFT CONTROL SHIFT LEVER RETAINER SUB-ASSEMBLY |
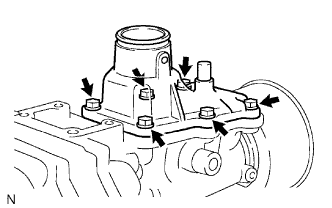 |
Remove the 6 bolts.
Remove the floor shift control shift lever retainer sub-assembly from the extension housing sub-assembly.
Remove the control shift lever retainer gasket from the extension housing sub-assembly.
| 11. REMOVE REVERSE RESTRICT PIN ASSEMBLY |
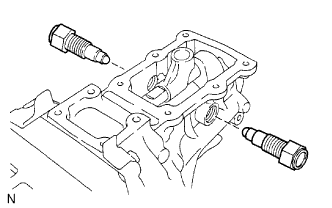 |
Remove the 2 reverse restrict pin assemblies from the extension housing sub-assembly.
| 12. REMOVE EXTENSION HOUSING SUB-ASSEMBLY |
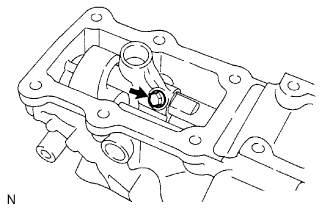 |
Remove the bolt from the shift lever housing.
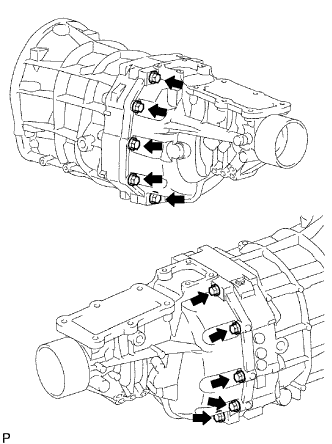 |
Remove the 10 bolts.
Using a plastic hammer, remove the extension housing sub-assembly, shift lever housing and the shift and select lever.
| 13. REMOVE OIL RECEIVER PIPE |
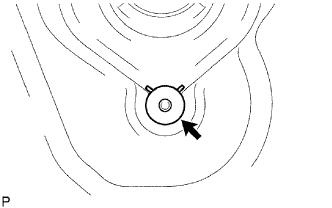 |
Remove the oil receiver pipe from the extension housing sub-assembly.
| 14. REMOVE EXTENSION HOUSING OIL RECEIVER PIPE |
Remove the bolt and the extension housing oil receiver pipe from the extension housing sub-assembly.
| 15. REMOVE REVERSE RESTRICT PIN |
Using "TORX" socket wrench T40, remove the 2 plugs from the extension housing sub-assembly.
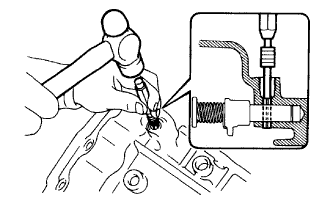 |
Using a pin punch (5 mm) and hammer, remove the reverse restrict slotted pin from the extension housing sub-assembly.
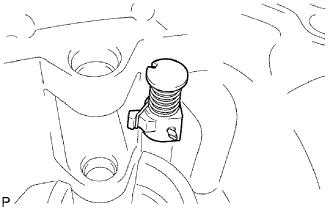 |
Remove the reverse restrict pin from the extension housing sub-assembly.
| 16. REMOVE MANUAL TRANSMISSION EXTENSION HOUSING OIL SEAL |
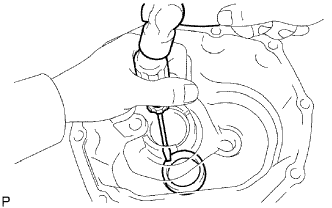 |
Using a screwdriver, remove the manual transmission extension housing oil seal from the extension housing sub-assembly.
| 17. REMOVE FRONT BEARING RETAINER |
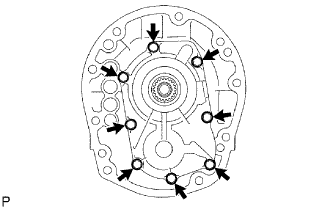 |
Remove the 8 bolts.
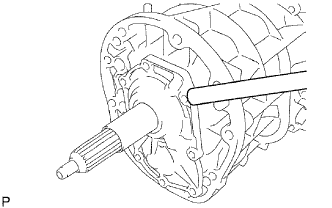 |
Using a brass bar and hammer, remove the front bearing retainer from the manual transmission case.
| 18. REMOVE TRANSMISSION FRONT BEARING RETAINER OIL SEAL |
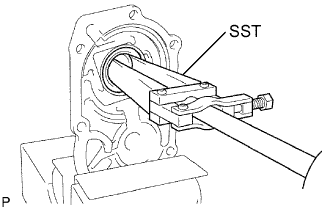 |
Fix the front bearing retainer in a vise, between aluminum plate.
Using SST, remove the transmission front bearing retainer oil seal.
| 19. REMOVE FRONT BEARING SHAFT SNAP RING |
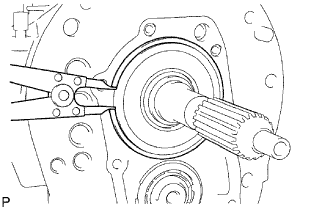 |
Using a snap ring expander, remove the front bearing shaft snap ring from the manual transmission case.
| 20. REMOVE NO. 1 COUNTER GEAR FRONT BEARING SNAP RING |
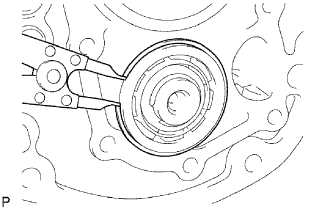 |
Using a snap ring expander, remove the No. 1 counter gear front bearing snap ring from the manual transmission case.
| 21. REMOVE MANUAL TRANSMISSION CASE |
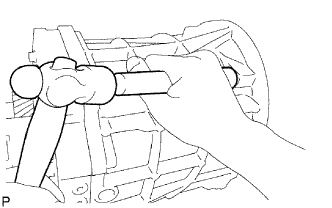 |
Using a brass bar and hammer, remove the manual transmission case from the intermediate plate.
| 22. REMOVE TRANSMISSION MAGNET |
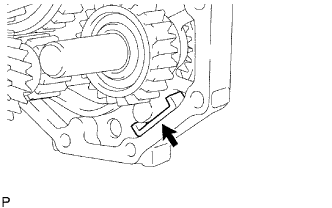 |
Remove the transmission magnet from the intermediate plate.
| 23. FIX INTERMEDIATE PLATE |
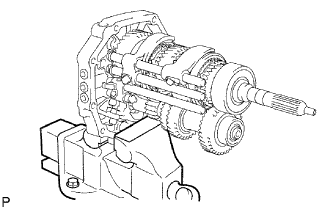 |
Fix the intermediate plate in a vise between aluminum plates.
| 24. REMOVE NO. 1 SHIFT DETENT BALL SPRING SEAT |
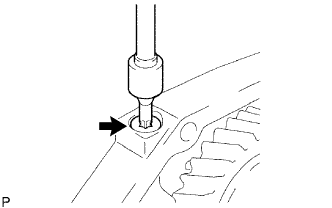 |
Using "TORX" socket wrench T40, remove the No. 1 shift detent ball spring seat from the intermediate plate.
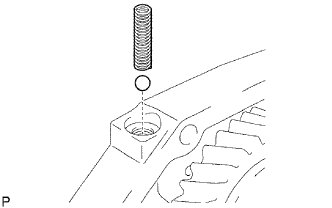 |
Using a magnetic finger, remove the shift detent ball low side compression spring and the shift detent ball from the intermediate plate.
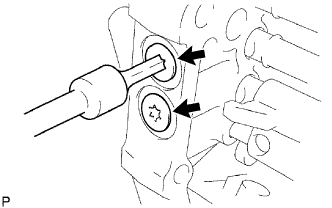 |
Using "TORX" socket wrench T40, remove the 2 No. 1 shift detent ball spring seats from the intermediate plate.
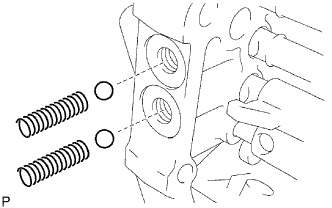 |
Using a magnetic finger, remove the 2 shift detent ball low side compression springs and the 2 shift detent balls from the intermediate plate.
| 25. REMOVE NO. 2 GEAR SHIFT FORK SHAFT |
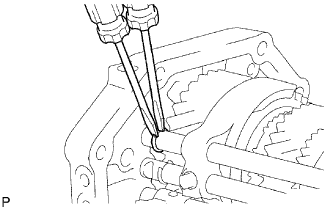 |
Using 2 screwdrivers and a hammer, remove the shift fork shaft snap ring from the No. 2 gear shift fork shaft.
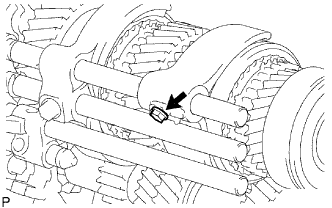 |
Remove the bolt from the No. 2 shift fork.
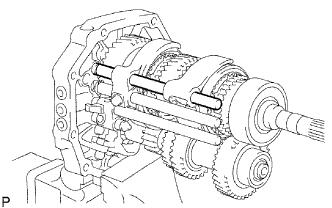 |
Remove the No. 2 gear shift fork shaft from the intermediate plate.
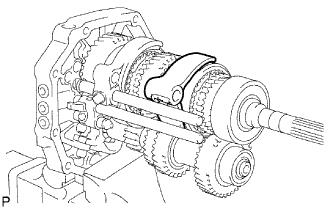 |
Remove the No. 2 shift fork from the No. 2 transmission hub sleeve.
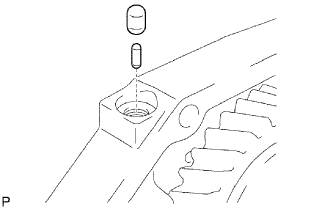 |
Using a magnetic finger, remove the No. 1 shift interlock roller and the shift interlock pin from the intermediate plate.
| 26. REMOVE NO. 1 GEAR SHIFT FORK SHAFT |
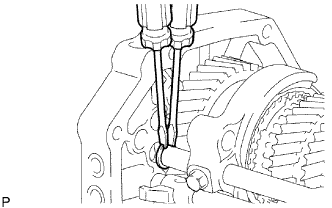 |
Using 2 screwdrivers and a hammer, remove the shift fork shaft snap ring from the No. 1 gear shift fork shaft.
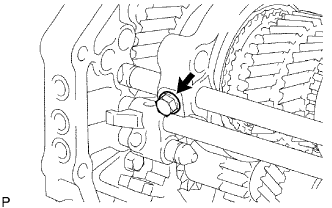 |
Remove the bolt from the No. 1 shift fork.
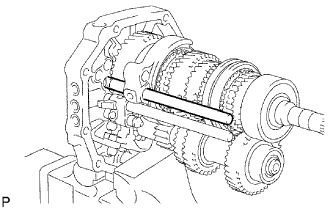 |
Remove the No. 1 gear shift fork shaft from the intermediate plate.
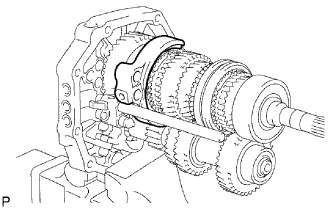 |
Remove the No. 1 shift fork from the reverse gear.
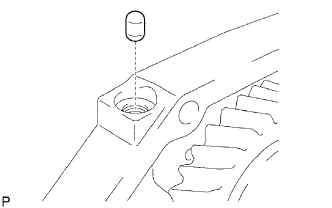 |
Using a magnetic finger, remove the No. 1 shift interlock roller from the intermediate plate.
| 27. REMOVE REVERSE SHIFT FORK SHAFT |
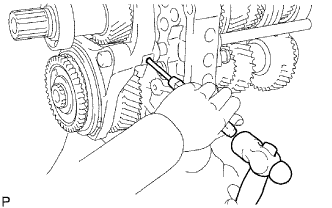 |
Using a pin punch (5 mm) and hammer, remove the shift fork set slotted spring pin from the No. 3 shift fork.
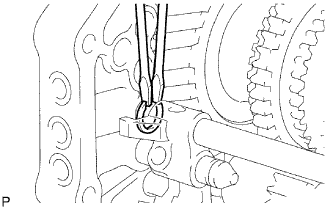 |
Using 2 screwdrivers and a hammer, remove the shift fork shaft snap ring from the reverse shift fork shaft.
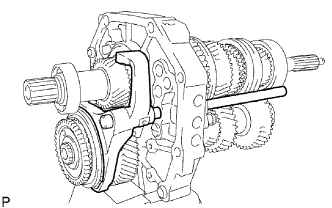 |
Remove the No. 3 shift fork and the reverse shift fork shaft from the intermediate plate.
|
Using a magnetic finger, remove the No. 1 shift interlock roller from the intermediate plate.
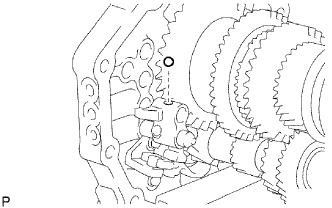 |
Using a magnetic finger, remove the reverse shift fork ball from the reverse shift fork.
| 28. REMOVE NO. 4 GEAR SHIFT FORK SHAFT |
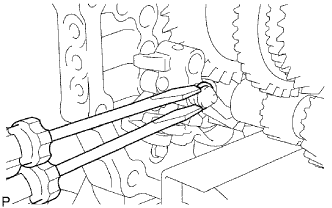 |
Using 2 screwdrivers and a hammer, remove the shift fork shaft snap ring from the No. 4 gear shift fork shaft.
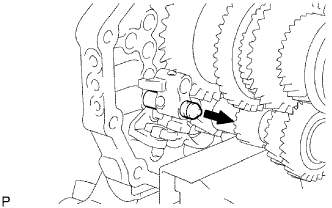 |
Remove the No. 4 gear shift fork shaft from the intermediate plate.
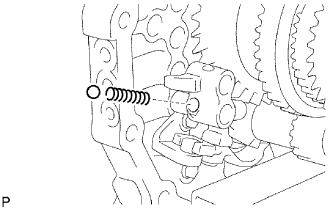 |
Using a magnetic finger, remove the reverse shift fork ball and the reverse shift fork return compression spring from the reverse shift fork.
| 29. REMOVE REVERSE SHIFT FORK |
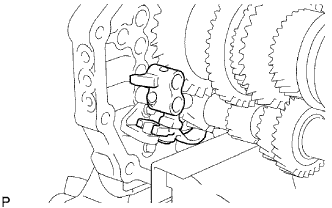 |
Remove the reverse shift fork with the reverse shift arm from the intermediate plate.
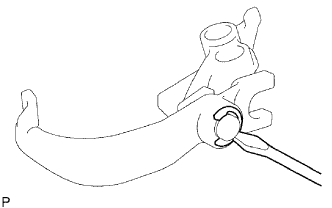 |
Using a screwdriver, remove the E-ring and the reverse shift arm from the reverse shift fork.
| 30. REMOVE REVERSE SHIFT ARM BRACKET |
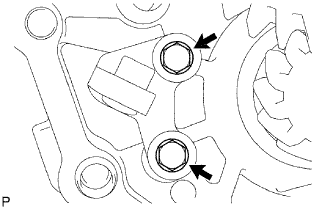 |
Remove the 2 bolts and the reverse shift arm bracket from the intermediate plate.
| 31. REMOVE SPEEDOMETER DRIVE GEAR |
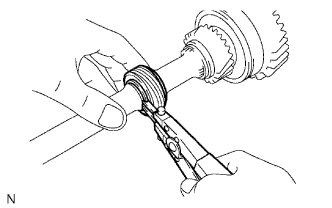 |
Using a snap ring expander, remove the snap ring.
Remove the speedometer drive gear.
Using a magnetic finger, remove the ball.
Using a snap ring expander, remove the snap ring.
| 32. REMOVE OUTPUT SHAFT BEARING SHAFT SNAP RING |
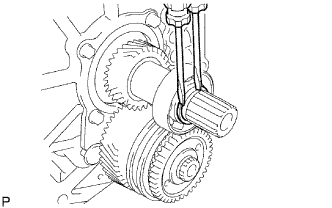 |
Using 2 screwdrivers and a hammer, remove the output shaft bearing shaft snap ring from the output shaft assembly.
| 33. REMOVE OUTPUT SHAFT REAR BEARING |
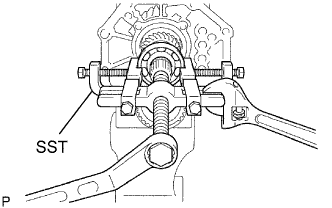 |
Using SST, remove the output shaft rear bearing and the output shaft spacer from the output shaft assembly.
| 34. INSPECT COUNTER SHAFT 5TH GEAR THRUST CLEARANCE |
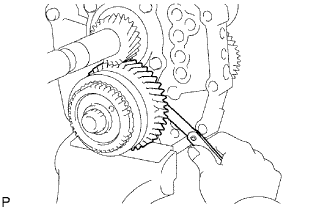 |
Using a feeler gauge, measure the thrust clearance.
| 35. INSPECT COUNTER SHAFT 5TH GEAR RADIAL CLEARANCE |
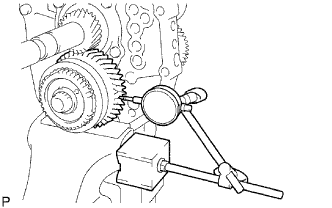 |
Using a dial indicator, measure the radial clearance.
| 36. REMOVE COUNTER GEAR REAR SHAFT SNAP RING |
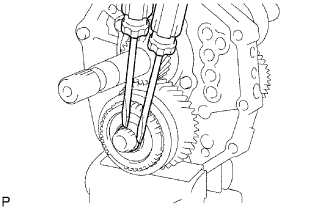 |
Using 2 screwdrivers and a hammer, remove the counter gear rear shaft snap ring from the counter gear assembly.
| 37. REMOVE NO. 5 GEAR SPLINE PIECE |
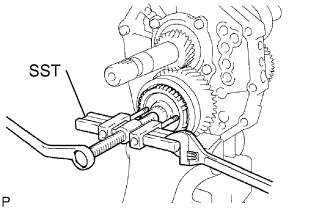 |
Using SST, remove the No. 5 gear spline piece from the counter gear assembly.
| 38. REMOVE NO. 3 SYNCHRONIZER RING |
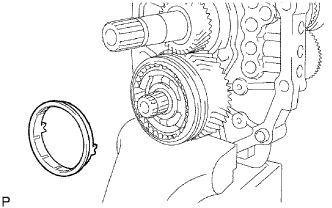 |
Remove the No. 3 synchronizer ring from the counter gear assembly.
| 39. REMOVE COUNTER SHAFT 5TH GEAR |
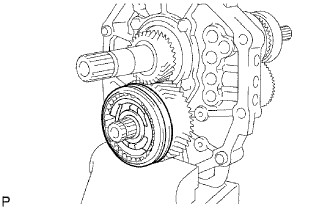 |
Remove the counter shaft 5th gear and the No. 3 transmission hub sleeve assembly from the counter gear assembly.
| 40. REMOVE COUNTER 5TH GEAR BEARING |
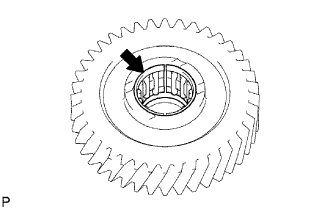 |
Remove the counter 5th gear bearing from the counter shaft 5th gear.
| 41. REMOVE NO. 3 TRANSMISSION HUB SLEEVE |
1-piece Type Key Spring:
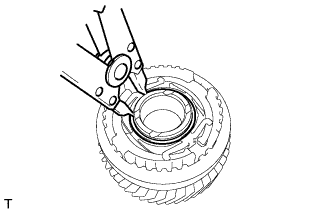 |
Using a snap ring expander, remove the snap ring.
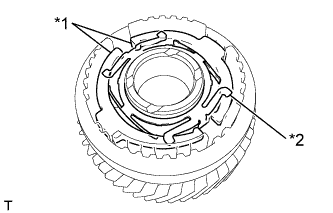 |
Remove the No. 3 transmission hub sleeve, 2 No. 3 synchromesh shifting keys and the No. 3 synchromesh shifting key spring from the counter shaft 5th gear.
| *1 | No. 3 Synchromesh Shifting Key |
| *2 | No. 3 Synchromesh Shifting Key Spring |
2-piece Type Key Spring:
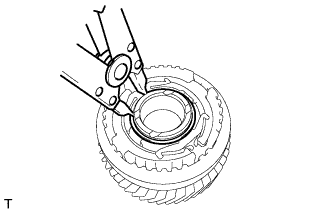 |
Using a snap ring expander, remove the snap ring.
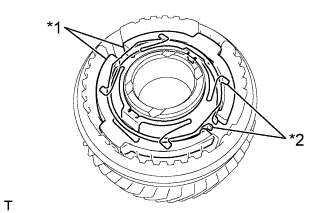 |
Remove the No. 3 transmission hub sleeve, 2 No. 3 synchromesh shifting keys and the 2 No. 3 synchromesh shifting key springs from the counter shaft 5th gear.
| *1 | No. 3 Synchromesh Shifting Key |
| *2 | No. 3 Synchromesh Shifting Key Spring |
| 42. REMOVE 5TH GEAR THRUST WASHER |
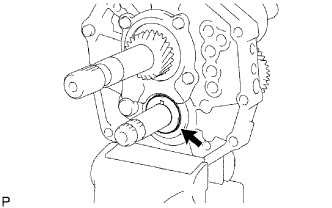 |
Remove the 5th gear thrust washer from the counter gear assembly.
| 43. REMOVE 5TH GEAR THRUST WASHER PIN |
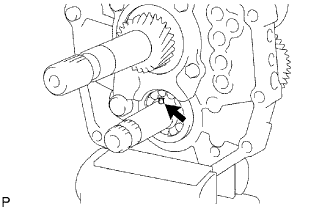 |
Remove the 5th gear thrust washer pin from the counter gear assembly.
| 44. REMOVE OUTPUT SHAFT REAR BEARING RETAINER |
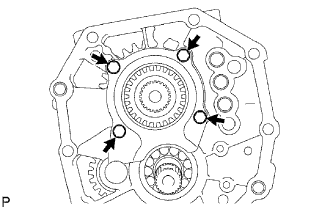 |
Remove the 4 bolts and the output shaft rear bearing retainer from the intermediate plate.
| 45. REMOVE REVERSE IDLER GEAR SUB-ASSEMBLY |
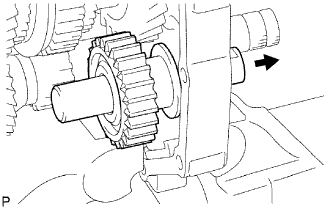 |
Pull out the reverse idler gear shaft to the rear side and remove the reverse idler gear sub-assembly from the intermediate plate.
| 46. REMOVE COUNTER SHAFT CENTER BEARING |
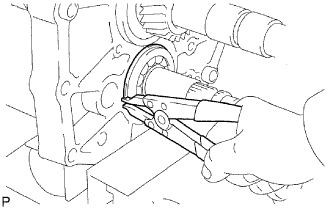 |
Using a snap ring expander, remove the snap ring.
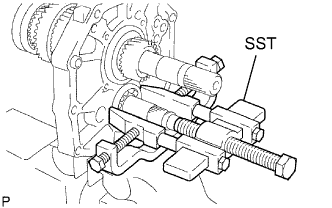 |
Using SST, remove the counter shaft center bearing from the intermediate plate.
| 47. REMOVE COUNTER GEAR ASSEMBLY |
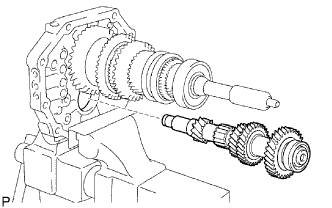 |
Remove the counter gear assembly from the intermediate plate.
| 48. REMOVE INPUT SHAFT ASSEMBLY |
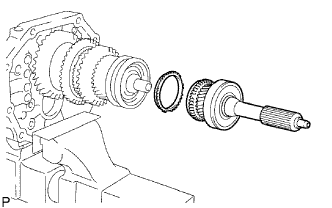 |
Remove the input shaft assembly and the No. 2 synchronizer ring from the output shaft assembly.
| 49. REMOVE OUTPUT SHAFT BEARING SHAFT SNAP RING |
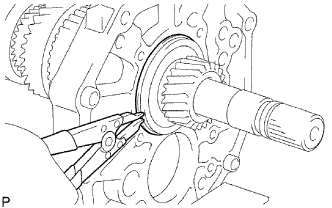 |
Using a snap ring expander, remove the output shaft bearing shaft snap ring from the output shaft assembly.
| 50. REMOVE OUTPUT SHAFT ASSEMBLY |
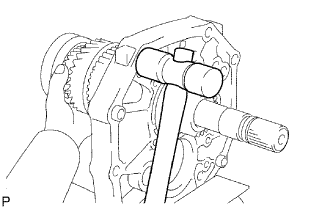 |
Using a plastic hammer, remove the output shaft assembly by tapping the intermediate plate.