 |
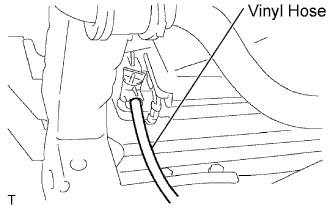
Install a vinyl hose onto the radiator side.
FRONT CRANKSHAFT OIL SEAL > REMOVAL |
| 1. REMOVE ENGINE UNDER COVER SUB-ASSEMBLY NO.1 (for Pre Runner and 4WD Type) |
Remove the 4 bolts, then remove the No. 1 engine under cover.
| 2. DRAIN ENGINE COOLANT |
Remove the 4 bolts, then remove the engine under cover No. 1. (PRE RUNNER AND 4WD TYPE)
|
Install a vinyl hose onto the radiator side.
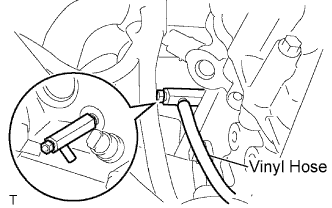 |
Install a vinyl hose onto the engine side.
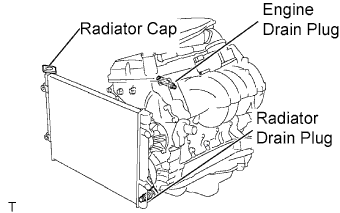 |
Loosen the engine drain plug.
Loosen the radiator drain plug.
Remove the radiator cap and drain coolant.
Drain the coolant from the reservoir tank.
| 3. REMOVE RADIATOR SUPPORT TO FRAME SEAL LH |
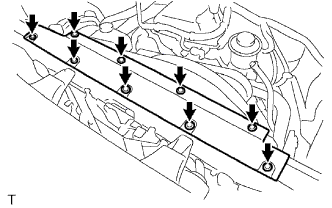 |
Disengage the 9 clips, then remove the radiator support to frame seal LH.
| 4. REMOVE FAN SHROUD |
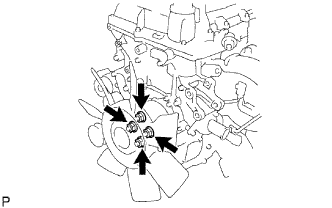 |
Loosen the 4 nuts shown in the illustration.
Remove the fan and generator V belt.
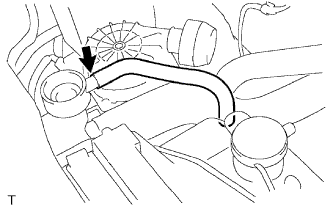 |
Disconnect the radiator reserve tank hose from the radiator.
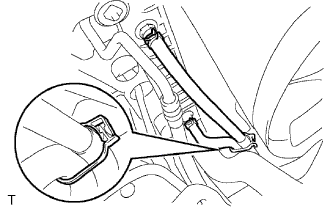 |
Disconnect the oil cooler inlet and outlet hoses from the fan shroud. (for Automatic Transmission)
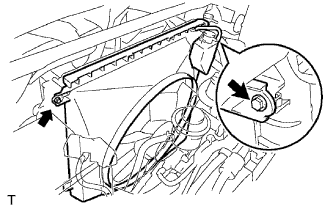 |
Remove the 2 bolts shown in the illustration.
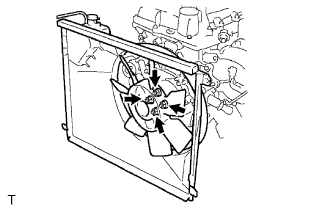 |
Remove the 4 nuts, then remove the fan shroud and fan with fluid coupling together.
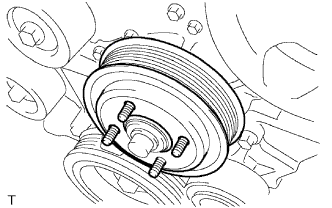 |
Remove the fan pulley.
| 5. REMOVE CRANKSHAFT PULLEY |
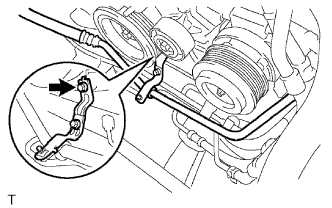 |
Remove the bolt, then separate the bracket. (w/ AIR CONDITIONING)
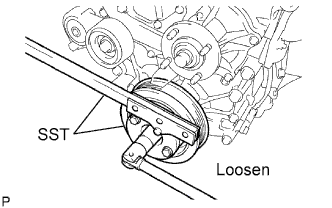 |
Using SST, loosen the crankshaft pulley bolt.
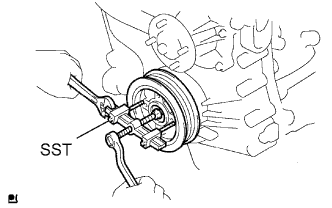 |
Using SST, remove the crankshaft pulley and crankshaft pulley bolt.
| 6. REMOVE TIMING GEAR CASE OR TIMING CHAIN CASE OIL SEAL |
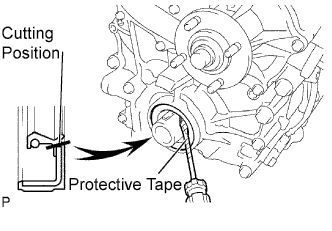 |
Using a cutter knife, cut off the lip of the oil seal.
Using a screwdriver with its tip wrapped in tape, pry out the oil seal and remove it.