 |
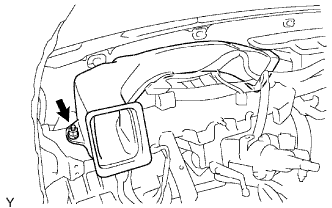
Remove the nut and heater to register duct.
TRANSPONDER KEY ECU > REMOVAL |
| 1. REMOVE INSTRUMENT PANEL SAFETY PAD |
Remove the instrument panel safety pad (Click here).
| 2. REMOVE NO. 1 HEATER TO REGISTER DUCT |
|
Remove the nut and heater to register duct.
| 3. REMOVE NO. 3 HEATER TO REGISTER DUCT (w/ Bracket) |
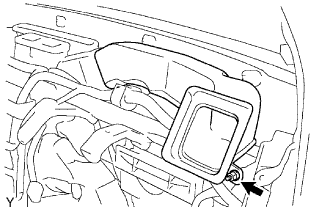 |
Remove the nut and heater to register duct.
| 4. REMOVE NO. 2 REAR AIR DUCT (for Double Cab w/ Bracket) |
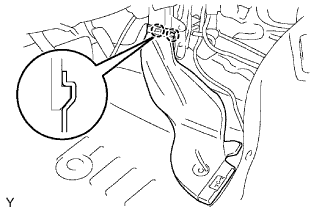 |
Fold back the floor carpet.
Disengage the 2 claws and remove the air duct rear.
| 5. REMOVE NO. 1 REAR AIR DUCT (for Double Cab w/ Bracket) |
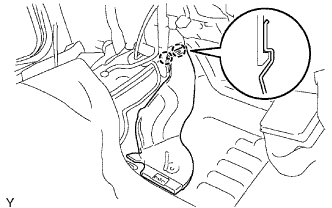 |
Fold back the floor carpet.
Disengage the 2 claws and remove the air duct rear.
| 6. REMOVE AIR DUCT ASSEMBLY LH (w/ Bracket) |
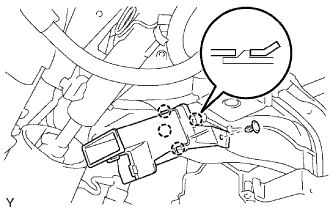 |
Remove the clip.
Disengage the 4 claws and remove the air duct assembly heater.
| 7. REMOVE AIR DUCT ASSEMBLY RH (w/ Bracket) |
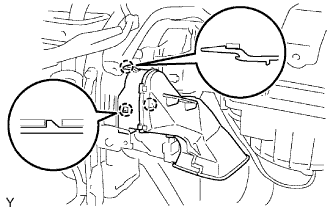 |
Disengage the 3 claws and remove the air duct assembly.
| 8. REMOVE NO. 1 INSTRUMENT PANEL BRACE MOUNTING BRACKET (w/ Bracket) |
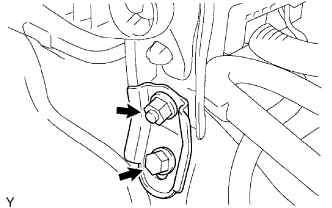 |
Remove the bolt, nut and instrument panel brace mounting bracket LH.
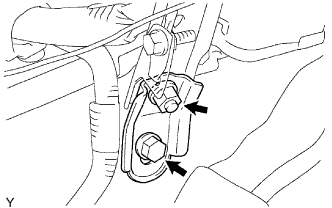 |
Remove the bolt, nut and instrument panel brace mounting bracket RH.
| 9. REMOVE STEERING COLUMN HOLE COVER (w/ Bracket) |
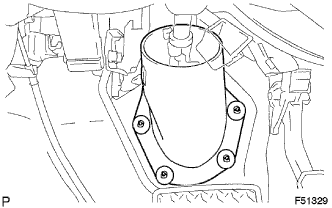 |
Disengage the 4 clips and remove the steering column hole cover.
| 10. SEPARATE STEERING SLIDING YOKE (w/ Bracket) |
Mark matchmarks on the steering sliding yoke, steering intermediate shaft sub-assembly No. 2 and steering intermediate shaft assembly.
Remove bolts A and B from the steering sliding yoke.
Slide the steering sliding yoke up and separate it from the steering intermediate shaft sub-assembly No. 2.
Pull down the steering sliding yoke from the steering intermediate shaft assembly to remove.
| 11. REMOVE STEERING COLUMN ASSEMBLY (w/ Bracket) |
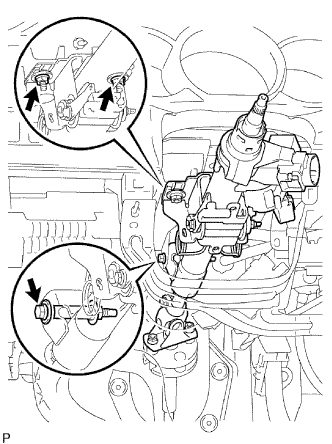 |
Disconnect the connectors and wire harness clamps.
Remove the bolt and 2 nuts, then remove the steering column assembly from the instrument panel reinforcement assembly.
| 12. REMOVE PARKING BRAKE CONTROL LEVER ASSEMBLY (for Manual Transmission w/ Bracket) |
Release the parking brake lever.
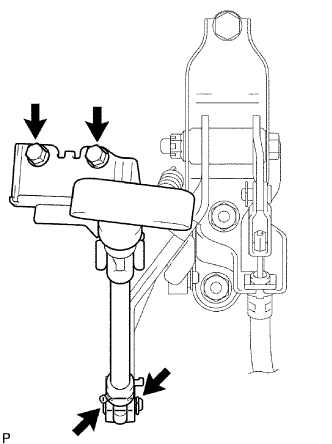 |
Remove the clip and pin and separate the sleeve.
Remove the 2 bolts and parking brake lever assembly.
| 13. REMOVE ECM (for 2TR-FE w/ Bracket) |
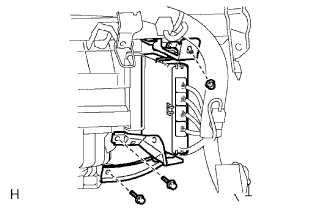 |
Disconnect the 4 connectors.
Remove the 2 bolts and nut, then remove the ECM.
| 14. REMOVE ECM (for 1GR-FE w/ Bracket) |
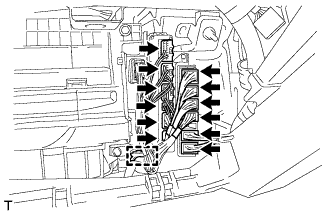 |
Disconnect the 6 ECM connectors, 6 No. 2 junction block connectors and wire harness clamp.
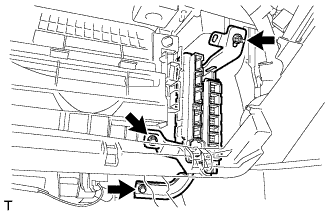 |
Remove the 2 bolts and nut and the ECM.
| 15. REMOVE DRIVER SIDE JUNCTION BLOCK (w/ Bracket) |
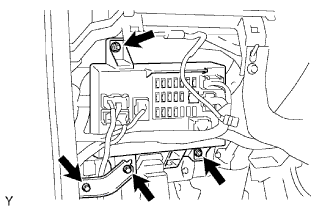 |
Remove the 2 bolts and bracket.
Remove the 2 nuts and separate the driver side junction block assembly.
| 16. REMOVE AIR CONDITIONING AMPLIFIER ASSEMBLY (w/ Bracket) |
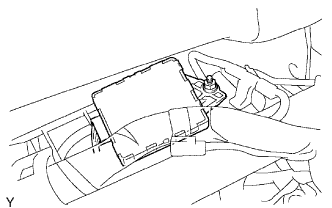 |
Disconnect the connector.
Remove the nut and the air conditioner amplifier assembly.
| 17. REMOVE REINFORCEMENT ASSEMBLY (w/ Bracket) |
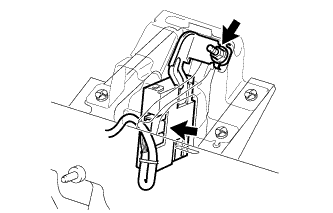 |
Disconnect the transponder key ECU connector.
Disengage the 4 clamps and disconnect the 6 connectors from the air conditioning unit assembly.
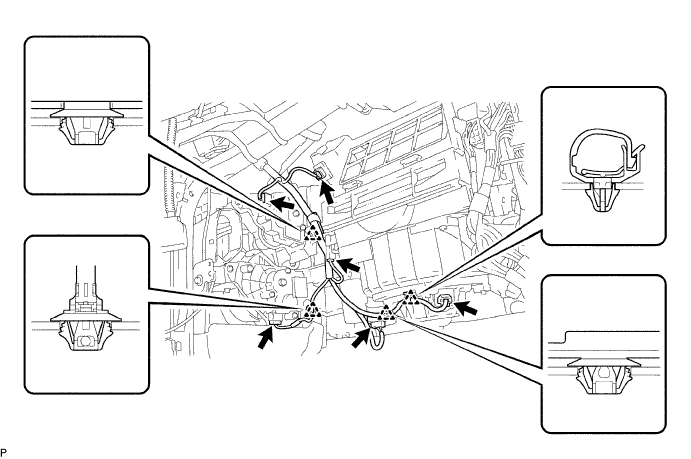
Remove the 3 bolts.
Disconnect the connector.
Disconnect the 2 airbag connectors (Click here).
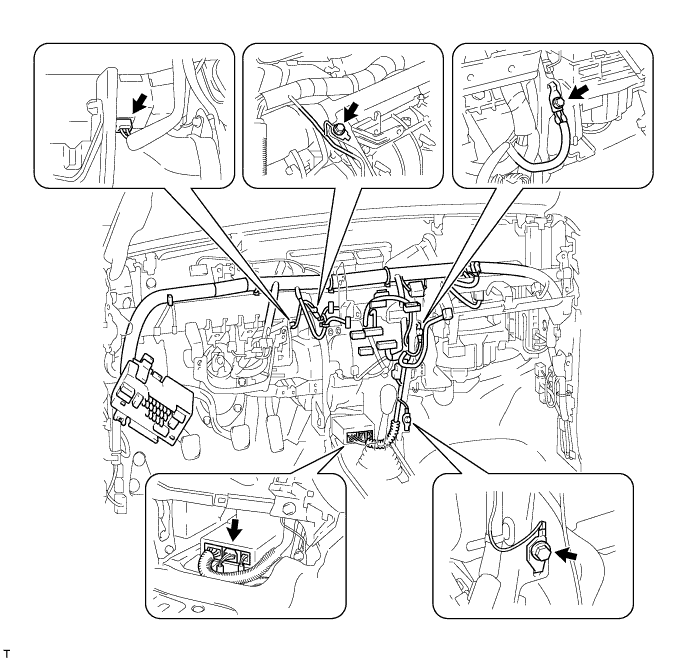
Disengage the 20 clamps.
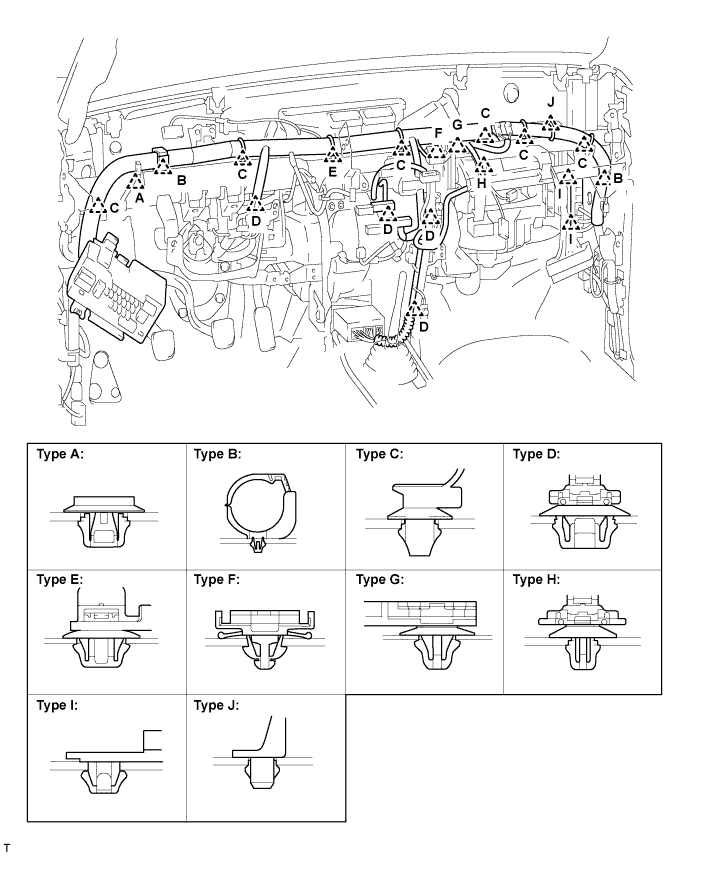
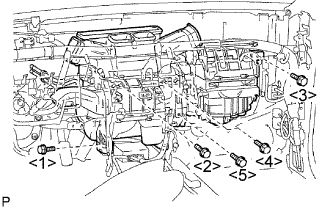 |
Remove the 5 bolts.
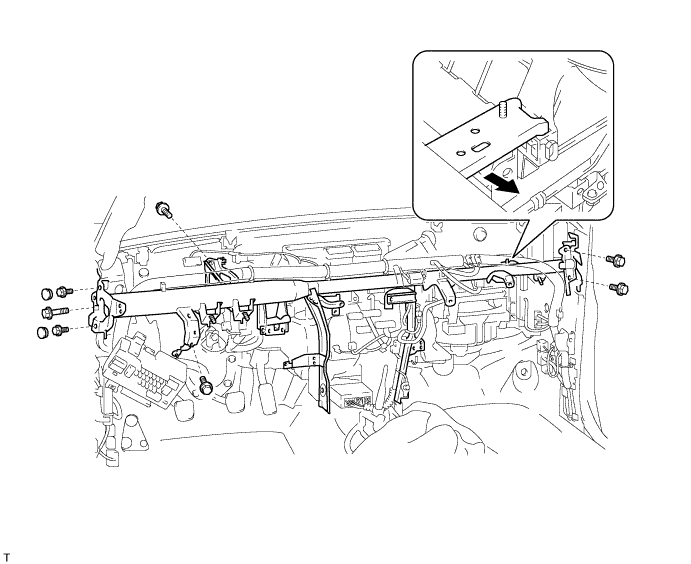
Remove the 2 caps and 7 bolts.
Disengage the reinforcement hook from the air conditioning unit, and remove the reinforcement.
| 18. REMOVE TRANSPONDER KEY BRACKET (w/ Bracket) |
Using a 3 to 4 mm (0.118 to 0.157 in.) drill, drill a hole in the 3 screws.
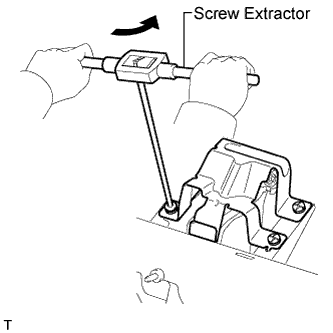 |
Using a screw extractor, remove the 3 screws and the transponder key bracket from the reinforcement.
| 19. REMOVE TRANSPONDER KEY ECU (w/ Bracket) |
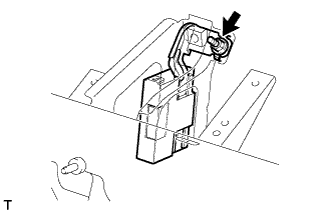 |
Remove the nut and transponder key ECU.
| 20. REMOVE TRANSPONDER KEY ECU (w/o Bracket) |
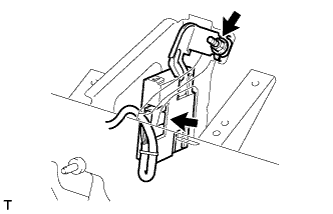 |
Disconnect the connector.
Remove the nut and transponder key ECU.