Home › ENGINE ยท 3UR-FBE › FUEL › FUEL PUMP

FUEL PUMP > REMOVAL

for Preparation Click here


1. REMOVE FUEL TANK ASSEMBLY
  1. Remove the fuel tank (Click here).


2. REMOVE FUEL PRESSURE SWITCHING VALVE ASSEMBLY


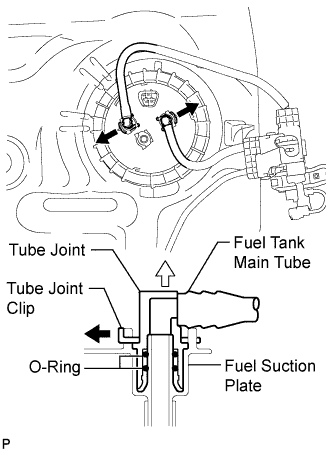
    A194622E01
  1. Remove the 2 tube joint clips and pull out the 2 fuel tank main tubes. Then remove the fuel pressure switching valve assembly.

    NOTICE:
    1. Remove any dirt and foreign matter on the fuel tube joint before performing this work.
    2. Do not allow any scratches or foreign matter on the parts when disconnecting them, as the fuel tube joint contains the O-rings that seal the plug.
    3. Perform this work by hand. Do not use any tools.
    4. Do not forcibly bend, twist or turn the nylon tube.
    5. Protect the disconnected part by covering it with a plastic bag and tape after disconnecting the fuel tubes.
3. REMOVE FUEL SUCTION WITH PUMP AND GAUGE TUBE ASSEMBLY


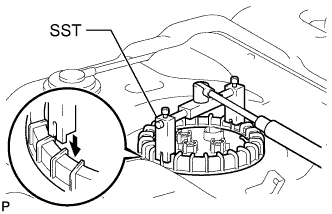
    A194623E01
  1. Using SST, loosen the retainer.

    SST
    09808-14020  

    HINT:
    Fit the tips of SST onto the ribs of the retainer.

    NOTICE:
    1. When the retainer is loosened, be careful as the fuel suction with pump and gauge tube assembly will spring upward from the force of the spring.
    2. Remove foreign matter around the fuel suction with pump and gauge tube assembly before this operation.

  1. Remove the retainer.

  1. Remove the fuel suction with pump and gauge tube assembly from the fuel tank.

    NOTICE:
    Be careful not to bend the arm of the fuel sender gauge.

  1. Remove the gasket from the fuel tank.


4. REMOVE FUEL PRESSURE REGULATOR ASSEMBLY


    A194668
  1. Using a screwdriver, detach the 2 claws and remove the fuel pressure regulator.

    HINT:
    Tape the screwdriver tip before use.


5. REMOVE FUEL SENDER GAUGE ASSEMBLY


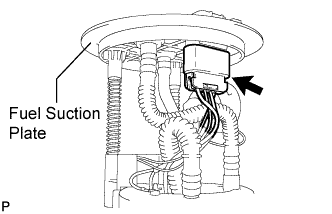
    A194625E01
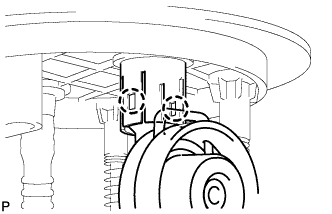
  1. Disconnect the connector from the fuel suction plate.


    A194626
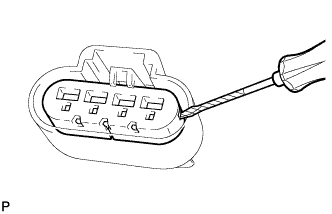
  1. Using a screwdriver, remove the cap from the connector.

    HINT:
    Tape the screwdriver tip before use.


    A194627
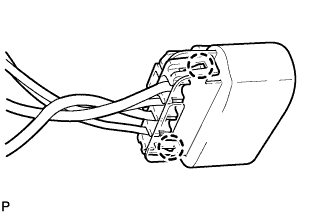
  1. Detach the 2 claws and remove the cover from the connector.


    A194660E01
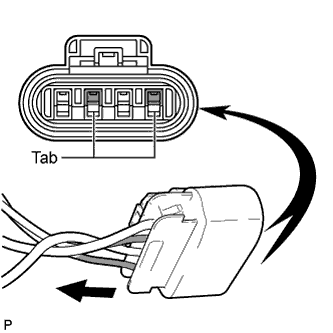
  1. As shown in the illustration, unlatch the tabs of the 2 terminals and pull out the 2 wires (blue) from the connector.


    A201437
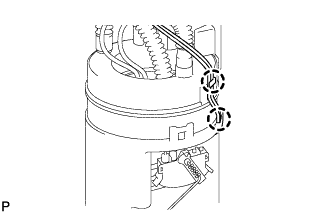
  1. Detach the 2 claws and disconnect the wire harness.


    A201438E01
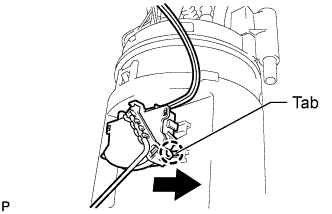
  1. Push the tab to release the lock of the fuel sender gauge, and slide the fuel sender gauge to remove it.