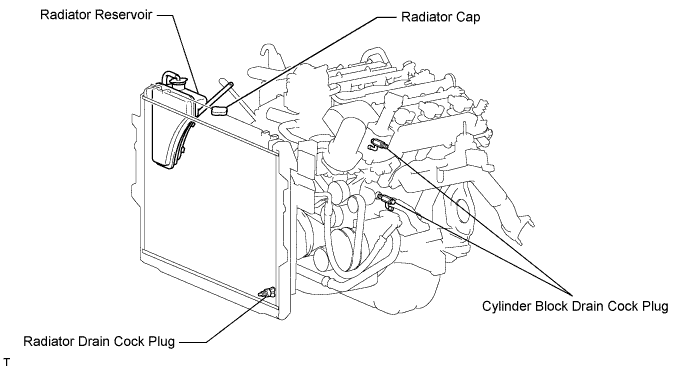
Tighten the 2 cylinder block drain cock plugs.
- Torque:
- 13 N*m{ 133 kgf*cm , 10 ft.*lbf }
WATER PUMP > REMOVAL |
| 1. REMOVE NO. 1 ENGINE UNDER COVER |
Remove the 5 bolts, 3 screws and engine under cover.
| 2. DRAIN ENGINE COOLANT |
Loosen the radiator drain cock plug and 2 cylinder block drain cock plugs.
Remove the radiator cap. Then drain the coolant.
Tighten the 2 cylinder block drain cock plugs.
Tighten the radiator drain cock plug by hand.
| 3. REMOVE V-BANK COVER |
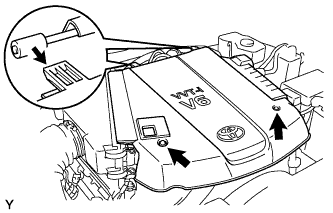 |
Remove the 2 nuts and V-bank cover.
| 4. DISCONNECT RADIATOR HOSE INLET |
| 5. DISCONNECT RADIATOR HOSE OUTLET |
| 6. REMOVE FAN SHROUD |
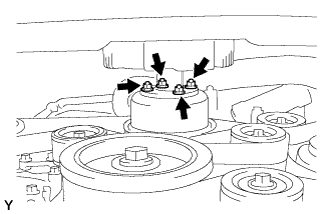 |
Loosen the 4 nuts holding the fluid coupling fan.
Remove the fan and generator V-belt (Click here).
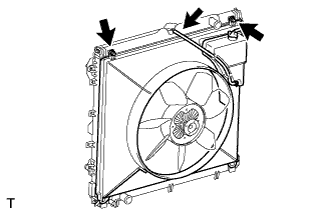 |
Disconnect the reservoir hose from the radiator tank upper.
Remove the 2 bolts holding the fan shroud.
Remove the 4 nuts of the fluid coupling fan, and then remove the shroud together with the coupling fan.
Remove the fan pulley from the water pump.
| 7. REMOVE NO. 2 AIR CLEANER HOSE |
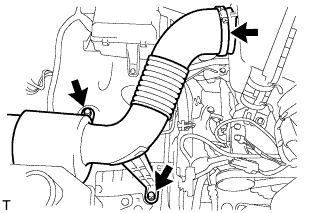 |
Loosen the hose clamp.
Remove the 2 bolts and air cleaner hose.
| 8. REMOVE AIR CLEANER ASSEMBLY WITH ELEMENT |
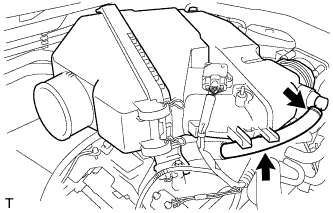 |
Disconnect the No. 2 ventilation hose.
Detach the hose clamp.
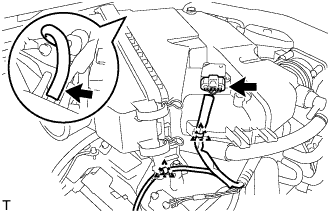 |
Disconnect the vacuum hose.
Disconnect the MAF meter connector.
Using a clip remover, detach the 2 wire harness clamps.
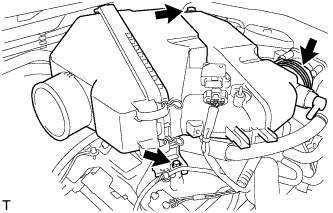 |
Loosen the hose clamp.
Remove the 2 bolts and air cleaner with element.
| 9. REMOVE WATER INLET HOUSING |
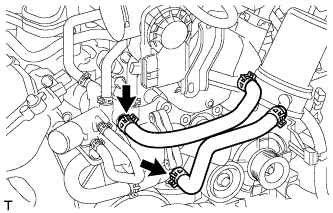 |
Disconnect the 2 oil cooler hoses.
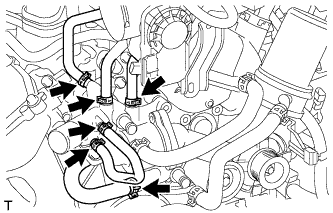 |
Disconnect the 5 water by-pass hoses.
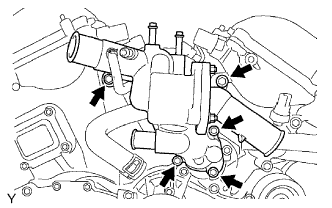 |
Remove the 5 bolts and water inlet.
Remove the gasket from the water outlet pipe.
Remove the gasket from the water pump.
| 10. REMOVE NO. 2 IDLER PULLEY SUB-ASSEMBLY |
w/ Idler Pulley Cover Plate:
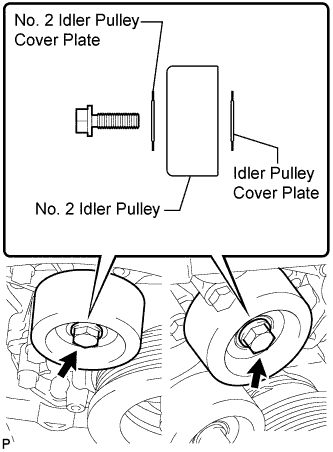 |
Remove the bolt, No. 2 idler pulley cover plate, idler pulley and idler pulley cover plate.
w/o Idler Pulley Cover Plate:
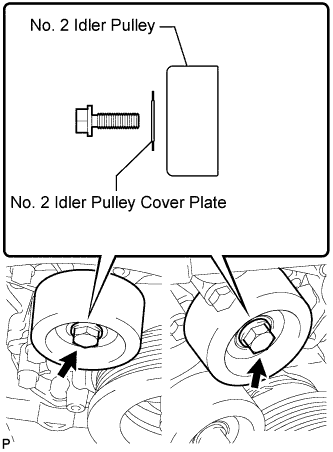 |
Remove the bolt, No. 2 idler pulley cover plate and idler pulley.
| 11. REMOVE V-RIBBED BELT TENSIONER ASSEMBLY |
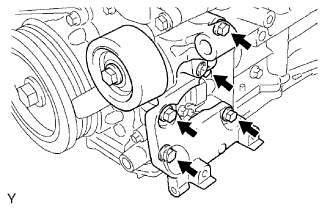 |
Remove the 5 bolts and V-ribbed belt tensioner.
| 12. REMOVE GENERATOR ASSEMBLY |
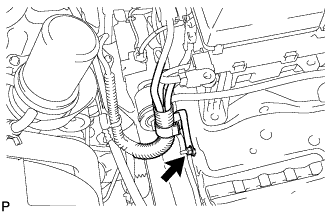 |
Remove the nut and disconnect the wire harness clamp bracket.
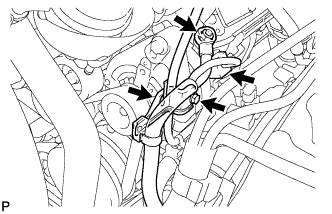 |
Disconnect the generator connector.
Remove the terminal cap.
Remove the nut and disconnect the generator wire.
Remove the wire harness clamp.
Remove the bolt and disconnect the wire harness clamp bracket.
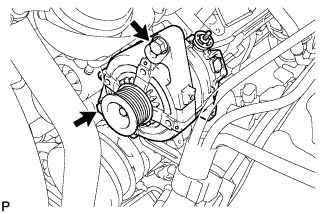 |
Remove the 2 bolts and generator.
| 13. REMOVE WATER PUMP ASSEMBLY |
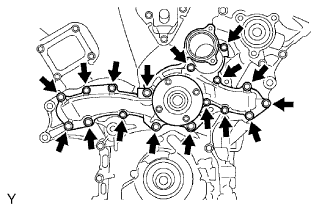 |
Remove the 17 bolts, water pump and gasket.