 |
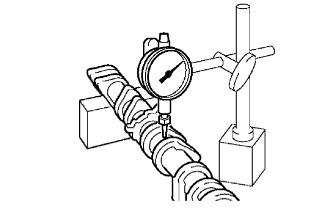
Inspect the camshaft for runout.
Place the camshaft on V-blocks.
Using a dial indicator, measure the runout at the center journal.
- Maximum runout:
- 0.06 mm (0.00236 in.)
CYLINDER HEAD > INSPECTION |
| 1. INSPECT CAMSHAFTS |
|
Inspect the camshaft for runout.
Place the camshaft on V-blocks.
Using a dial indicator, measure the runout at the center journal.
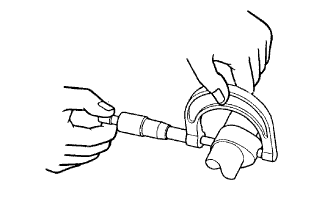 |
Inspect the cam lobes.
Using a micrometer, measure the cam lobe height.
| Item | Specified Condition |
| Intake | 44.168 to 44.268 mm (1.739 to 1.742 in.) |
| Exhaust | 44.580 to 44.680 mm (1.755 to 1.759 in. |
| Item | Specified Condition |
| Intake | 44.018 mm (1.73 in.) |
| Exhaust | 44.430 mm (1.75 in.) |
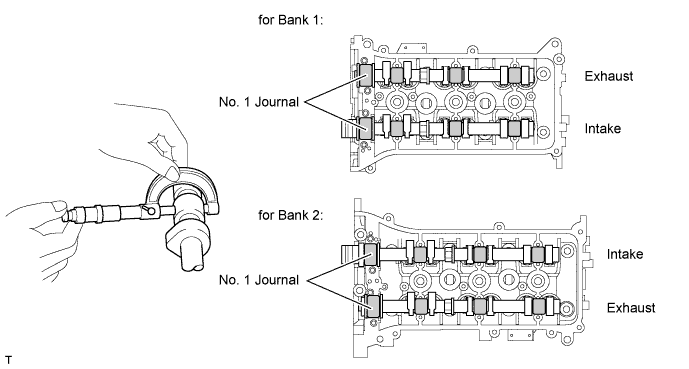
Inspect the camshaft journals.
Using a micrometer, measure the journal diameter.
| Item | Specified Condition |
| No. 1 | 35.971 to 35.985 mm (1.416 to 1.417 in.) |
| Other | 22.959 to 22.975 mm (0.904 to 0.905 in.) |
| 2. INSPECT CAMSHAFT OIL CLEARANCE |
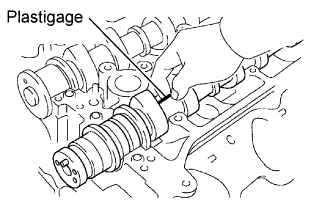 |
Clean the camshaft bearing caps, camshaft bearings and camshaft journals.
Install the camshaft bearing .
Place the camshafts on the cylinder head.
Lay a strip of Plastigage across each of the camshaft journals.
Install the camshaft bearing caps .
Remove the camshaft bearing caps .
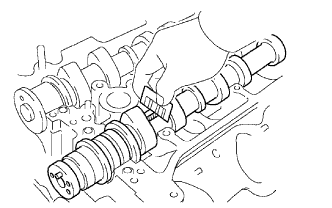 |
Measure the Plastigage at its widest point.
| Item | Specified Condition |
| No. 1 (Intake) | 0.008 to 0.038 mm (0.000315 to 0.00150 in.) |
| No. 1 (Exhaust) | 0.040 to 0.079 mm (0.00157 to 0.00311 in.) |
| Others | 0.025 to 0.062 mm (0.000984 to 0.00244 in.) |
| Item | Specified Condition |
| No. 1 | 0.040 to 0.079 mm (0.00157 to 0.00311 in.) |
| Others | 0.025 to 0.062 mm (0.000984 to 0.00244 in.) |
| Item | Specified Condition |
| No. 1 (Intake) | 0.07 mm (0.00276 in.) |
| Others | 0.10 mm (0.00394 in.) |
| Item | Specified Condition |
| - | 0.10 mm (0.00394 in.) |
| Item | Specified Condition |
| Cylinder head journal bore diameter | 40.009 to 40.017 mm (1.5752 to 1.5755 in.) |
| Camshaft bearing center wall thickness (Mark "2") | 2.004 to 2.008 mm (0.0789 to 0.0791 in.) |
| Camshaft journal diameter | 35.971 to 35.985 mm (1.4162 to 1.4167 in.) |
Remove the Plastigage completely.
Remove the camshafts.
Remove the camshaft bearing.
| 3. INSPECT CAMSHAFT THRUST CLEARANCE |
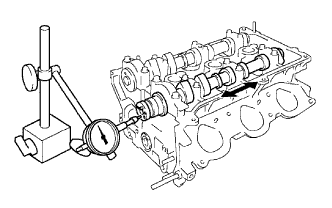 |
Install the camshafts .
Using a dial indicator, measure the thrust clearance while moving the camshaft back and forth.
| 4. INSPECT CAMSHAFT TIMING GEAR ASSEMBLY |
Fix the intake camshaft with a vise.
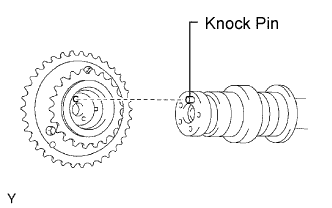 |
Align the knock pin hole in the camshaft timing gear with the knock pin of the camshaft, and install the camshaft timing gear with the bolt.
Confirm the camshaft timing gear is locked.
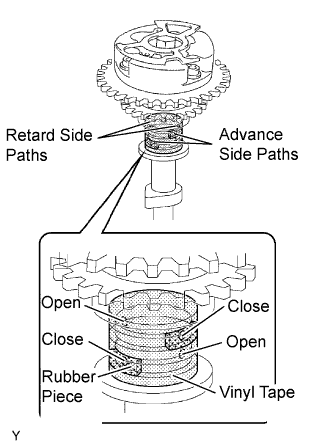 |
Release the lock pin.
Cover 4 oil paths of the cam journal with vinyl tape as shown in the illustration.
Prick a hole in the tape placed on the advance side path. Prick a hole in the retard side path on the opposite side of that advance side path, as shown in the illustration.
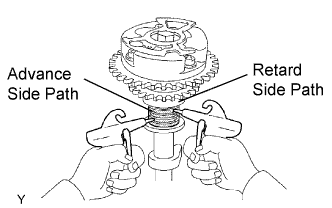 |
Apply about 200 kPa (2.0 kgf/cm2, 28 psi) of air pressure to the two broken paths (the advance side path and the retard side path).
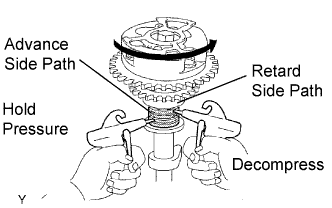 |
Confirm that the camshaft timing gear rotates in the advance direction when reducing the air pressure applied to the retard path.
When the camshaft timing gear comes to the most advanced position, release the air pressure from the retard side path, and then release the air pressure from the advance side path.
Check for smooth rotation.
Except the position where the lock pin meets at the most retard angle, turn the camshaft timing gear back and forth and check the movable range and that there is no disturbance.
Check the lock in the most retarded position.
Confirm that the camshaft timing gear is locked at the most retarded position.
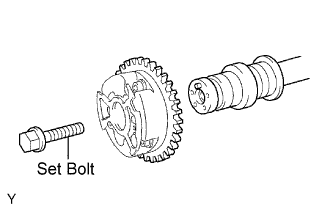 |
Remove the set bolt and camshaft timing gear.
| 5. INSPECT CAMSHAFT TIMING GEAR ASSEMBLY |
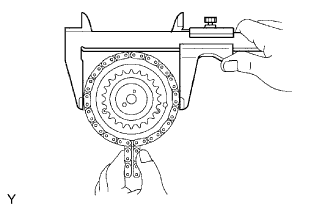 |
Wrap the No. 1 chain around the gear place for the No. 1 chain.
Using a vernier caliper, measure the timing gear with the No. 1 chain.
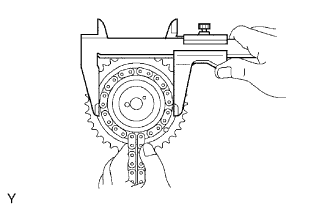 |
Wrap the No. 2 chain around the gear place for the No. 2 chain.
Using a vernier caliper, measure the timing gear with the No. 2 chain.
| 6. INSPECT CAMSHAFT TIMING SPROCKET |
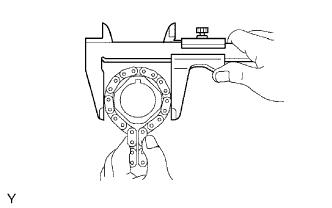 |
Wrap the No. 1 chain around the sprocket.
Using a vernier caliper, measure the crankshaft timing sprocket diameter with the No. 1 chain.
| 7. INSPECT INNER COMPRESSION SPRING |
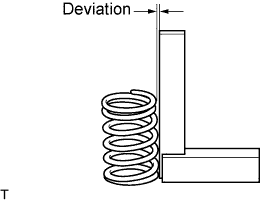 |
Using a steel square, measure the deviation of the inner compression spring.
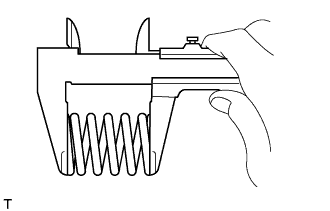 |
Using a vernier caliper, measure the free length of the inner compression spring.
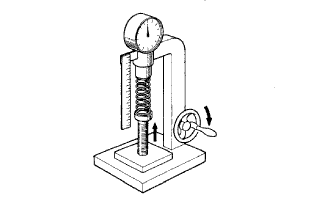 |
Using a spring tester, measure the tension of the inner compression spring at the standard installed length.
| 8. CLEAN VALVE |
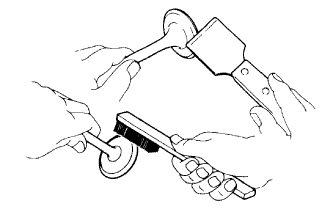 |
Using a gasket scraper, chip off any carbon from the valve head.
Using a wire brush, thoroughly clean the valve.
| 9. INSPECT VALVE |
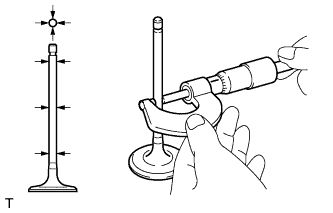 |
Using a micrometer, measure the diameter of the valve stem.
Using a micrometer, measure the diameter of the valve stem.
| Item | Specified Condition |
| Intake | 5.470 to 5.485 mm (0.2154 to 0.2159 in.) |
| Exhaust | 5.465 to 5.480 mm (0.2152 to 0.2156 in.) |
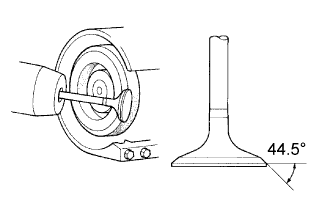 |
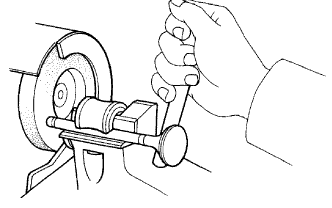
Inspect the valve face angle.
Grind the valve enough to remove pits and carbon.
Check that the valve is ground to the correct valve face angle.
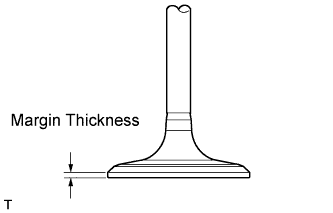 |
Using a vernier caliper, measure the valve head margin thickness.
Using a vernier caliper, check the valve head margin thickness.
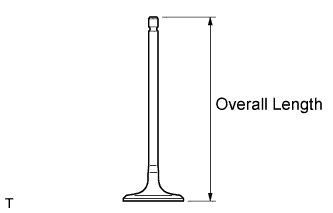 |
Using a vernier caliper, measure the valve's overall length.
Using a vernier caliper, check the overall length.
| Item | Specified Condition |
| Intake | 106.95 mm (4.21 in.) |
| Exhaust | 105.80 mm (4.15 in.) |
| Item | Specified Condition |
| Intake | 106.40 mm (4.19 in.) |
| Exhaust | 105.30 mm (4.15 in.) |
 |
Inspect the valve stem tip.
Check the surface of the valve stem tip for wear.
| 10. INSPECT VALVE GUIDE BUSH OIL CLEARANCE |
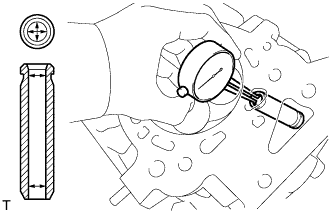 |
Using a caliper gauge, measure the inside diameter of the guide bush.
Subtract the valve stem diameter measurement from the guide bush inside diameter measurement.
| Item | Specified Condition |
| Intake | 0.025 to 0.060 mm (0.000984 to 0.00236 in.) |
| Exhaust | 0.030 to 0.065 mm (0.00118 to 0.00256 in.) |
| Item | Specified Condition |
| Intake | 0.08 mm (0.00315 in.) |
| Exhaust | 0.10 mm (0.00394 in.) |
| 11. INSPECT VALVE LIFTER |
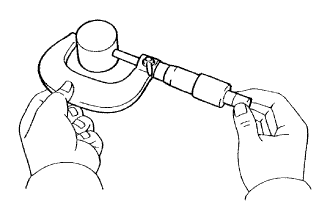 |
Using a micrometer, measure the valve lifter diameter.
| 12. INSPECT VALVE LIFTER OIL CLEARANCE |
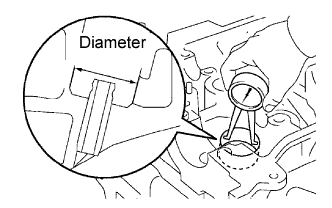 |
Using a caliper gauge, measure the lifter bore diameter of the cylinder head.
Subtract the valve lifter diameter measurement (see "INSPECT VALVE LIFTER" procedure) from the lifter bore diameter measurement.
| 13. CLEAN CYLINDER HEAD SUB-ASSEMBLY |
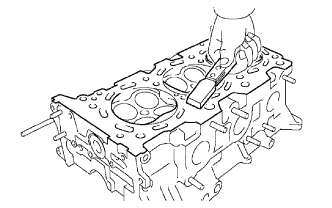 |
Using a gasket scraper, remove all the gasket material from the cylinder block contact surface.
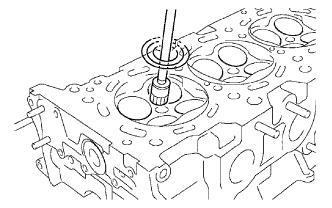 |
Using a wire brush, remove all the carbon from the combustion chambers.
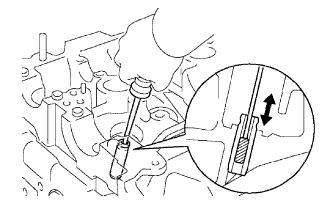 |
Using a valve guide bushing brush and solvent, clean all the valve guide bushes.
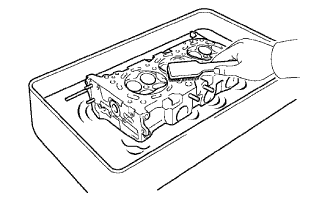 |
Using a soft brush and solvent, thoroughly clean the cylinder head.
| 14. INSPECT CYLINDER HEAD SUB-ASSEMBLY |
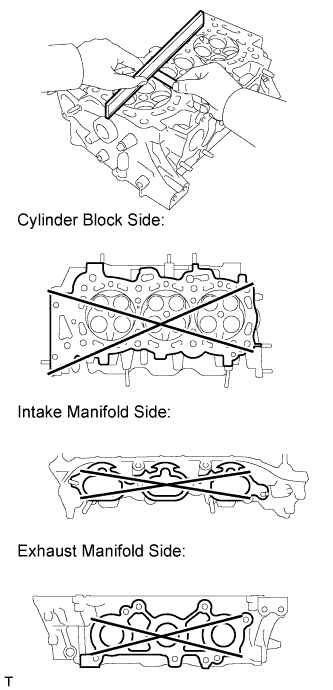 |
Using a precision straightedge and feeler gauge, measure the warpage of the contact surfaces of the cylinder block and manifolds.
| Item | Specified Condition |
| Cylinder block side | 0.05 mm (0.00197 in.) |
| Intake manifold side | 0.08 mm (0.00315 in.) |
| Exhaust manifold side | 0.08 mm (0.00315 in.) |
| Item | Specified Condition |
| Cylinder block side | 0.10 mm (0.00394 in.) |
| Intake manifold side | 0.10 mm (0.00394 in.) |
| Exhaust manifold side | 0.10 mm (0.00394 in.) |
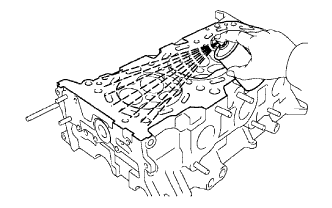 |
Using a dye penetrant, check the intake ports, exhaust ports and cylinder surface for cracks.
If there are cracks, replace the cylinder head sub-assembly.
| 15. CLEAN VALVE SEAT |
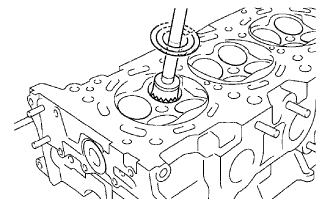 |
Using a 45° carbide cutter, resurface the valve seats.
Clean the valve seats.
| 16. INSPECT VALVE SEAT |
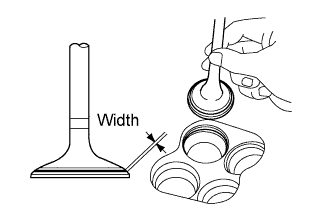 |
Apply a light coat of Prussian blue to the valve face.
Lightly press the valve face against the valve seat.
Check the valve face and valve seat by using the following procedure.
If Prussian blue appears around the entire valve face, the valve face is concentric. If not, replace the valve.
If Prussian blue appears around the entire valve seat, the guide and valve face are concentric. If not, resurface the valve seat.
Check that the seat contacts the middle of the valve face with the width below.