 |
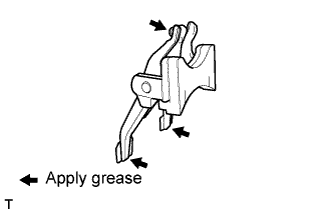
Apply high-temperature grease to the drive lever set pin, as shown in the illustration.
STARTER (for 1.6 kW Type) > REASSEMBLY |
| 1. INSTALL STARTER CENTER BEARING CLUTCH SUB-ASSEMBLY |
|
Apply high-temperature grease to the drive lever set pin, as shown in the illustration.
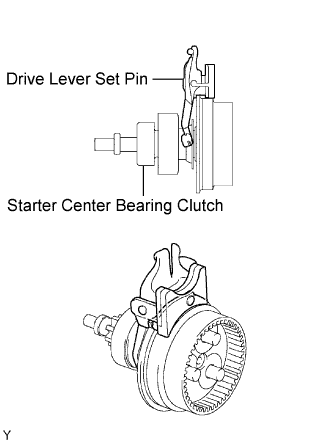 |
Install the drive lever set pin to the starter center bearing clutch.
Install the starter center bearing clutch and drive lever set pin together to the starter drive housing.
| 2. INSTALL PLANETARY GEAR |
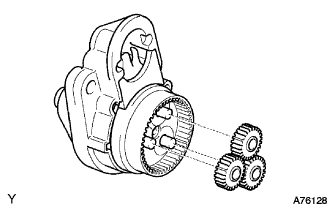 |
Apply grease to the planetary gears and pin parts of the planetary shaft.
Install the 3 planetary gears into the pins of the starter center bearing clutch.
| 3. INSTALL STARTER ARMATURE ASSEMBLY |
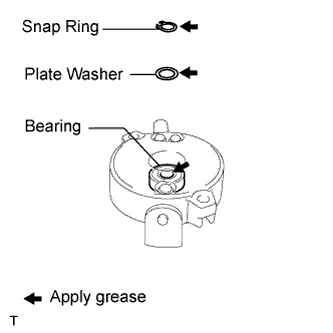 |
Apply grease to the plate washer, armature shaft and a new snap ring.
Install the starter armature and plate washer into the starter commutator end frame.
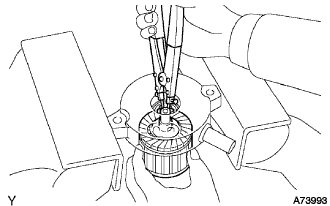 |
Using snap ring pliers, install the snap ring.
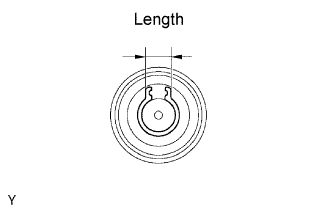 |
Check the snap ring length.
Using a vernier caliper, measure the snap ring length.
| 4. INSTALL STARTER COMMUTATOR END FRAME COVER |
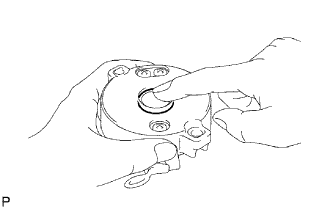 |
Install the starter commutator end frame cover into the starter commutator end frame.
| 5. INSTALL STARTER ARMATURE PLATE |
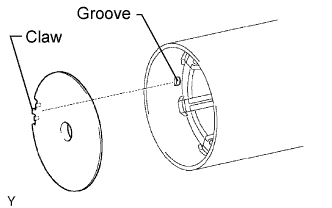 |
Align the claw of the armature plate with the groove inside the starter yoke, and install the starter armature plate.
| 6. INSTALL STARTER COMMUTATOR END FRAME ASSEMBLY |
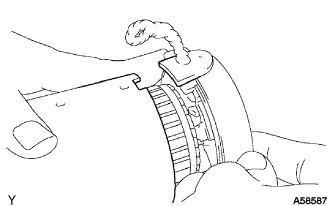 |
Align the starter commutator end frame rubber with the groove of the starter yoke.
Install the starter commutator end frame to starter yoke.
| 7. INSTALL STARTER YOKE ASSEMBLY |
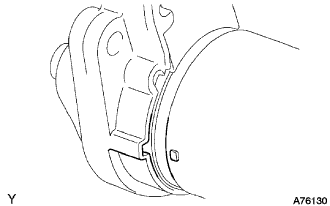 |
Align the claw of the starter yoke with the groove inside the starter drive housing.
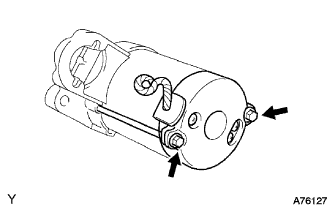 |
Install the starter yoke with the 2 bolts.
| 8. INSTALL REPAIR SERVICE STARTER KIT |
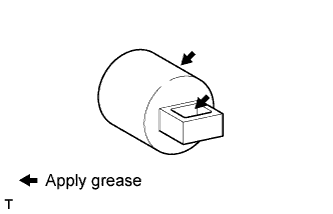 |
Apply grease to the plunger and hook.
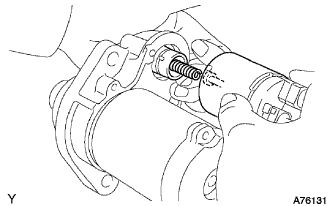 |
Hang the plunger hook of the repair service starter kit to the drive lever.
Install the plunger and return spring.
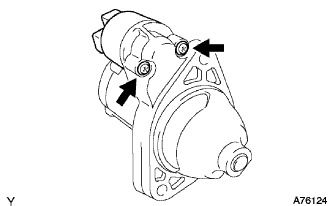 |
Install the repair service starter kit with the 2 screws.
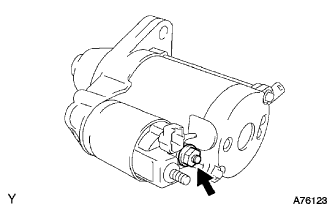 |
Connect the lead wire to the terminal with the nut.