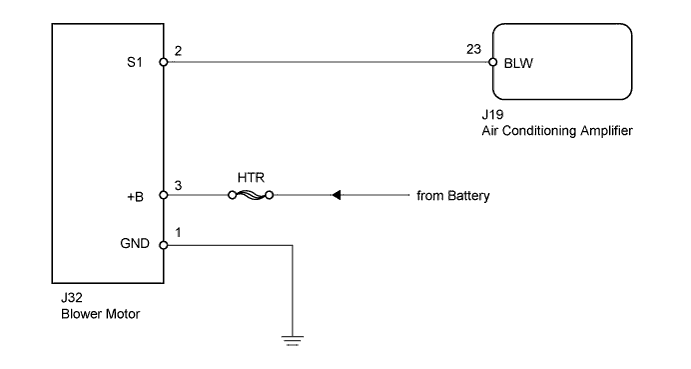
AIR CONDITIONING SYSTEM (for Automatic Air Conditioning System) > Blower Motor Circuit |
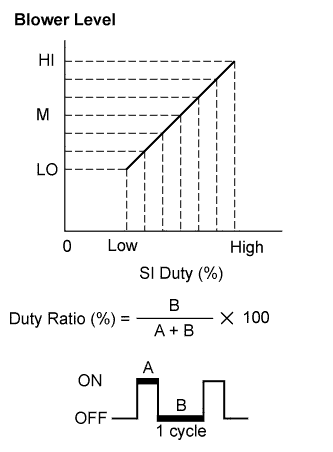
| 1.PERFORM ACTIVE TEST USING TECHSTREAM (BLOWER MOTOR) |
Select the Active Test, using the Techstream to generate a control command, and then check that the blower motor operates.
| Tester Display | Test Part | Control Range | Diagnostic Note |
| Blower Motor | Blower motor | Min.: 0, Max.: 31 | - |
| Result | Proceed to |
| NG (blower motor does not operate) | A |
| NG (blower motor operates but does not change speed) | B |
| OK | C |
|
| ||||
|
| ||||
| A | |
 |
| 2.INSPECT FUSE (HTR) |
Remove the HTR H-fuse from the engine room relay block.
Measure the resistance according to the value(s) in the table below.
| Tester Connection | Condition | Specified Condition |
| HTR H-fuse | Always | Below 1 Ω |
|
| ||||
| OK | |
|
| 3.CHECK HARNESS AND CONNECTOR (BLOWER MOTOR - BATTERY AND BODY GROUND) |
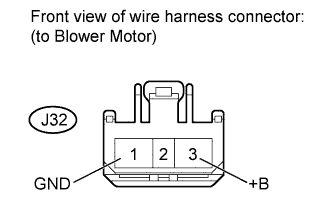 |
Disconnect the J32 blower motor connector.
Measure the resistance and voltage according to the value(s) in the table below.
| Tester Connection | Condition | Specified Condition |
| J32-1 (GND) - Body ground | Always | Below 1 Ω |
| Tester Connection | Condition | Specified Condition |
| J32-3 (+B) - Body ground | Always | 11 to 14 V |
|
| ||||
| OK | |
|
| 4.CHECK HARNESS AND CONNECTOR (AIR CONDITIONING AMPLIFIER - BLOWER MOTOR) |
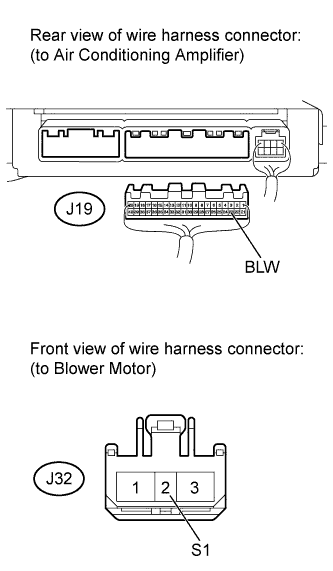 |
Disconnect the J19 air conditioning amplifier connector.
Disconnect the J32 blower motor connector.
Measure the resistance according to the value(s) in the table below.
| Tester Connection | Condition | Specified Condition |
| J19-23 (BLW) - J32-2 (S1) | Always | Below 1 Ω |
| J19-23 (BLW) or J32-2 (S1) - Body ground | Always | 10 kΩ or higher |
|
| ||||
| OK | |
|
| 5.CHECK BLOWER MOTOR (S1 VOLTAGE) |
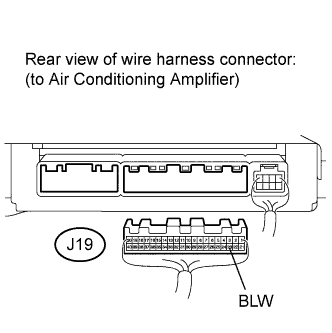 |
Disconnect the J19 air conditioning amplifier connector.
Reconnect the J32 blower motor connector.
Measure the voltage according to the value(s) in the table below.
| Tester Connection | Condition | Specified Condition |
| J19-23 (BLW) - Body ground | Ignition switch ON | 4.5 to 5.5 V |
|
| ||||
| OK | |
|
| 6.CHECK AIR CONDITIONING AMPLIFIER (BLW VOLTAGE) |
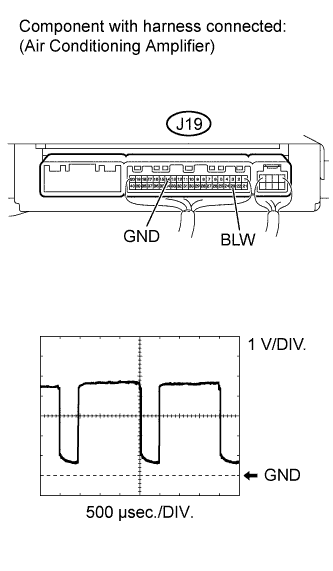 |
Remove the air conditioning amplifier with its connectors still connected (Click here).
Turn the ignition switch ON.
Turn the blower switch LO.
Using an oscilloscope, check the waveform.
| Tester Connection | Tool Setting | Condition | Specified Condition |
| J19-23 (BLW) - J19-14 (GND) | 1 V/DIV., 500 μsec./DIV. | Ignition switch ON Blower switch LO | Pulse generation |
|
| ||||
| OK | ||
 | ||
| ||

