 |
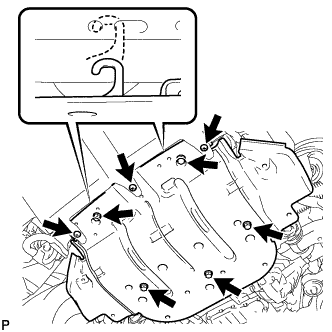
Remove the 3 screws and 5 bolts.
EXHAUST MANIFOLD > REMOVAL |
| 1. REMOVE NO. 1 ENGINE UNDER COVER |
|
Remove the 3 screws and 5 bolts.
Unhook the engine under cover from the vehicle body as shown in the illustration.
| 2. DRAIN ENGINE COOLANT |
Loosen the radiator drain cock plug and 2 cylinder block drain cock plugs.
Remove the radiator cap. Then drain the coolant.
Tighten the 2 cylinder block drain cock plugs.
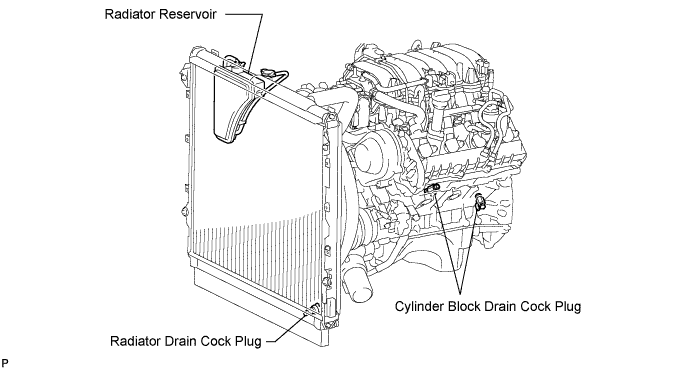
Tighten the radiator drain cock plug by hand.
| 3. REMOVE THROTTLE BODY COVER SUB-ASSEMBLY |
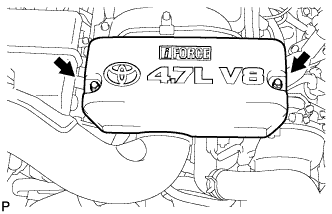 |
Remove the 2 cap nuts and throttle body cover.
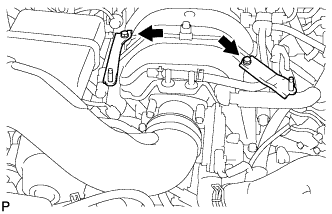 |
Remove the 2 bolts and 2 throttle body cover brackets from the intake manifold.
| 4. REMOVE AIR CLEANER HOSE ASSEMBLY |
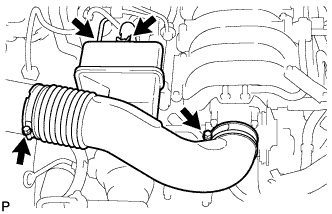 |
Disconnect the vacuum hose and No. 2 ventilation hose.
Loosen the 2 hose clamps.
Remove the air cleaner hose.
| 5. REMOVE AIR CLEANER ASSEMBLY |
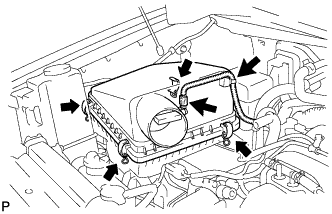 |
Remove the air cleaner cap.
Disconnect the MAF meter connector.
Using a clip remover, detach the wire harness clamp.
Unfasten the 4 hook clamps and then remove the air cleaner cap.
Remove the air cleaner element.
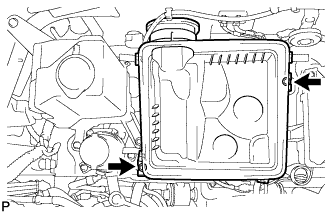 |
Remove the 2 bolts and air cleaner case.
| 6. REMOVE FRONT FENDER APRON SEAL REAR LH |
Remove the 5 clips and fender apron seal.
| 7. REMOVE FRONT FENDER APRON SEAL LH |
Remove the 6 clips and fender apron seal.
| 8. REMOVE NO. 2 AIR HOSE (for Bank 1) |
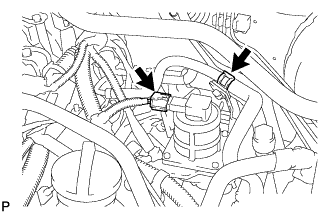 |
Disconnect the air switching valve connector.
Disconnect the fuel hose clamp.
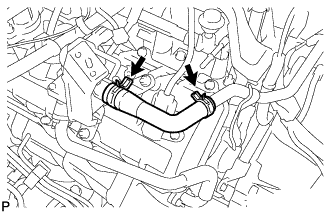 |
Remove the air hose.
| 9. REMOVE NO. 3 AIR TUBE (for Bank 1) |
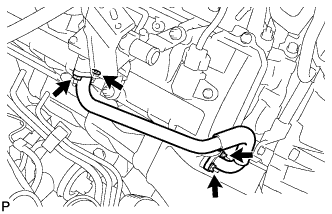 |
Remove the 4 nuts, air tube and 2 gaskets.
| 10. REMOVE AIR SWITCHING VALVE ASSEMBLY (for Bank 1) |
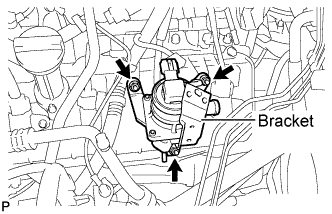 |
Remove the 3 nuts and air switching valve.
| 11. REMOVE FRONT FENDER APRON SEAL REAR RH |
Remove the 5 clips and fender apron seal.
| 12. REMOVE FRONT FENDER APRON SEAL RH |
Remove the 6 clips and fender apron seal.
| 13. REMOVE ENGINE OIL LEVEL DIPSTICK GUIDE |
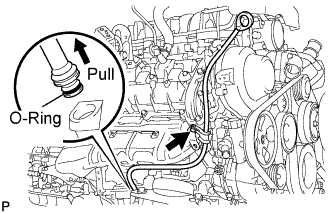 |
Remove the dipstick.
Remove the bolt and dipstick guide.
Remove the O-ring from the dipstick guide.
| 14. REMOVE HEATER OUTLET WATER HOSE |
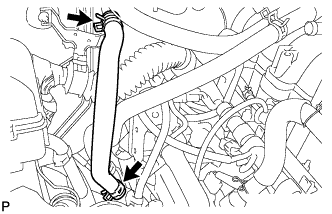 |
| 15. DISCONNECT NO. 5 WATER BY-PASS HOSE |
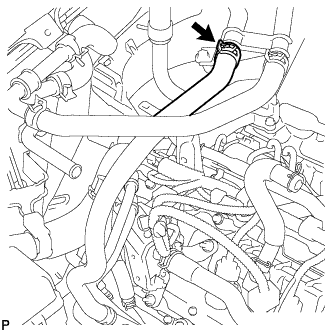 |
| 16. REMOVE WATER BY-PASS PIPE ASSEMBLY |
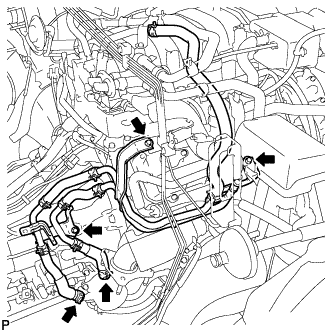 |
Disconnect the 2 water hoses from the transmission oil cooler.
Remove the 3 bolts and water by-pass pipe.
| 17. DISCONNECT NO. 2 AIR INJECTION SYSTEM HOSE (for Bank 2) |
Disconnect the air injection system hose from the air switching valve.
| 18. REMOVE NO. 2 AIR TUBE (for Bank 2) |
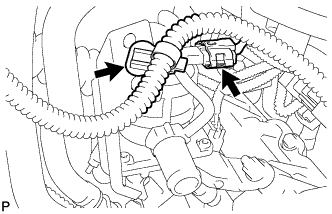 |
Disconnect the air pump connector.
Disconnect the wire harness clamp.
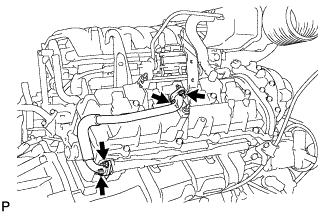 |
Remove the 4 nuts, No. 2 air tube and 2 gaskets.
| 19. REMOVE AIR SWITCHING VALVE ASSEMBLY (for Bank 2) |
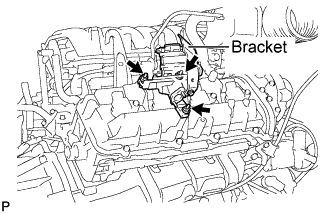 |
Remove the 3 nuts and air switching valve.
| 20. REMOVE FRONT EXHAUST PIPE ASSEMBLY |
Disconnect the fuel ratio sensor connector.
Disconnect the heated oxygen sensor connector and 2 clamps.
Remove the 2 bolts from the center exhaust pipe.
Remove the 3 nuts, front exhaust pipe and 2 gaskets.
| 21. REMOVE PROPELLER SHAFT HEAT INSULATOR (for 4WD) |
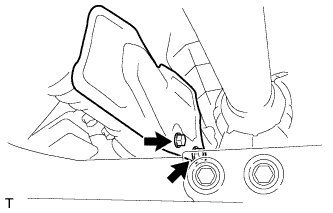 |
Remove the 2 bolts and heat insulator.
| 22. REMOVE FRONT PROPELLER SHAFT ASSEMBLY (for 4WD) |
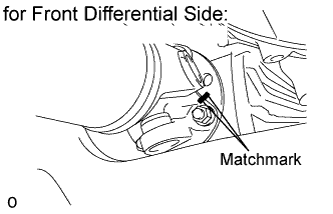 |
for Front Differential Side:
Place matchmarks on the differential and propeller shaft flange.
Remove the 4 nuts, 4 washers and disconnect the propeller shaft from the differential.
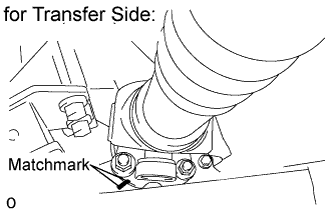 |
for Transfer Side:
Place matchmarks on the transfer and propeller shaft flanges.
Remove the 4 nuts and 4 washers.
Remove the propeller shaft from the transfer flange.
| 23. REMOVE FRONT NO. 2 EXHAUST PIPE ASSEMBLY (for Regular Cab Standard Deck) |
Disconnect the fuel ratio sensor connector.
Disconnect the heated oxygen sensor connector.
Remove the 2 bolts and 2 nuts from the front No. 3 exhaust pipe.
Remove the 3 nuts, front No. 2 exhaust pipe and 2 gaskets.
| 24. REMOVE FRONT NO. 2 EXHAUST PIPE ASSEMBLY (except Regular Cab Standard Deck) |
Disconnect the fuel ratio sensor connector.
Disconnect the heated oxygen sensor connector.
Remove the 2 bolts from the center exhaust pipe.
Remove the 3 nuts, front No. 2 exhaust pipe and 2 gaskets.
| 25. REMOVE NO. 1 EXHAUST MANIFOLD HEAT INSULATOR |
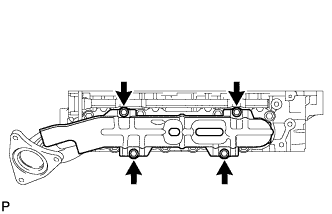 |
Remove the 4 bolts and heat insulator.
| 26. REMOVE EXHAUST MANIFOLD SUB-ASSEMBLY RH |
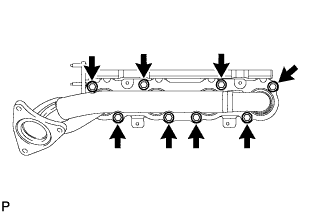 |
Remove the 8 nuts and exhaust manifold.
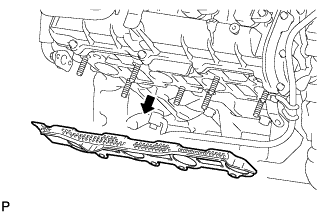 |
Remove the gasket.
| 27. REMOVE NO. 2 STEERING INTERMEDIATE SHAFT SUB-ASSEMBLY |
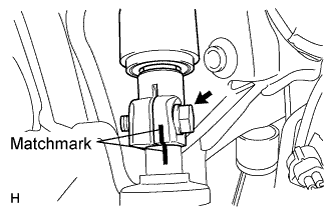 |
Put matchmarks on the No. 2 steering intermediate shaft and the power steering gear.
Remove the bolt and No. 2 steering intermediate shaft from the power steering gear.
| 28. REMOVE NO. 2 EXHAUST MANIFOLD HEAT INSULATOR |
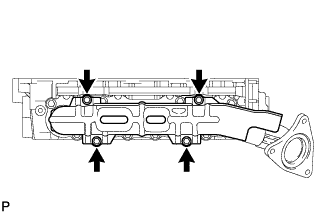 |
Remove the 4 bolts and heat insulator.
| 29. REMOVE EXHAUST MANIFOLD SUB-ASSEMBLY LH |
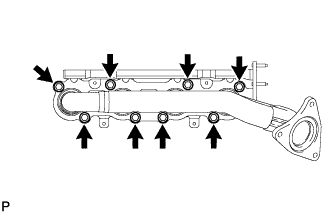 |
Remove the 8 nuts and exhaust manifold.
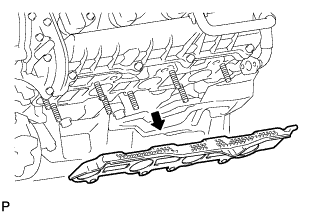 |
Remove the gasket.