 |
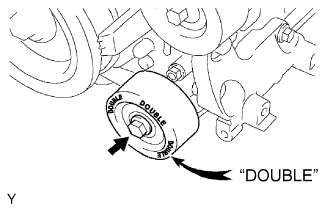
Install the No. 1 idler pulley with the bolt.
- Torque:
- 54 N*m{ 551 kgf*cm , 40 ft.*lbf }
- HINT:
- "DOUBLE" is marked on the No. 1 idler pulley to distinguish it from the No. 2 idler pulley.
ENGINE UNIT > INSTALLATION |
| 1. INSTALL NO. 1 IDLER PULLEY SUB-ASSEMBLY |
|
Install the No. 1 idler pulley with the bolt.
| 2. INSTALL NO. 2 IDLER PULLEY SUB-ASSEMBLY |
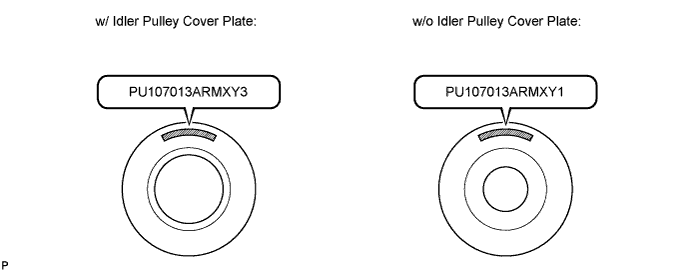
w/ Idler Pulley Cover Plate (PU107013ARMXY3):
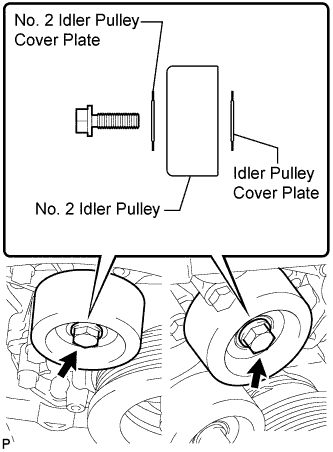 |
Install the idler pulley cover plate, idler pulley and No. 2 idler pulley cover plate with the bolt.
w/o Idler Pulley Cover Plate (PU107013ARMXY1):
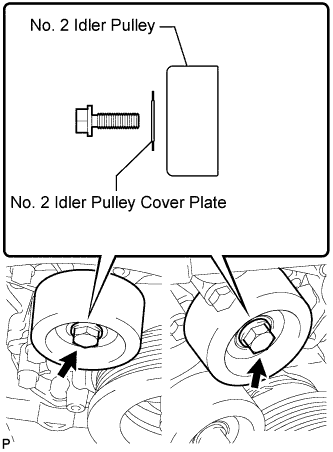 |
Install the idler pulley and No. 2 idler pulley cover plate with the bolt.
| 3. INSTALL FRONT NO. 1 ENGINE MOUNTING BRACKET LH |
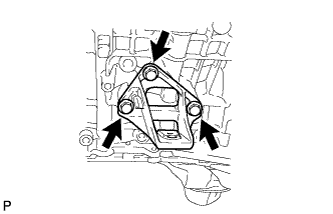 |
Install the engine mounting bracket with the 3 bolts.
| 4. INSTALL FRONT NO. 1 ENGINE MOUNTING BRACKET RH |
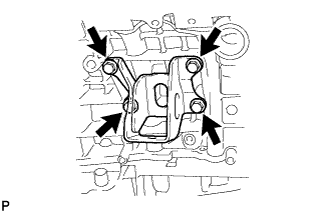 |
Install the engine mounting RH with the 4 bolts.
| 5. INSTALL ENGINE OIL LEVEL DIPSTICK GUIDE |
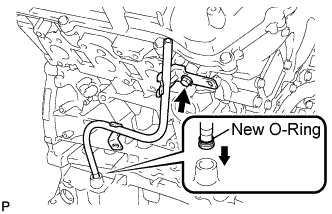 |
Install a new O-ring to the dipstick guide.
Apply a light coat of engine oil to the O-ring.
Push the dipstick guide end into the guide hole.
Install the dipstick guide with the bolt.
| 6. INSTALL V-RIBBED BELT TENSIONER ASSEMBLY |
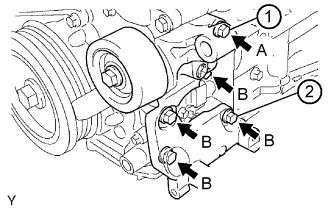 |
Temporarily install the V-ribbed belt tensioner with the 5 bolts.
Install the V-ribbed belt tensioner by tightening bolt 1 and 2 in numerical order.
Tighten the other bolts.
| Item | Length |
| A | 70 mm (2.76 in.) |
| B | 33 mm (1.30 in.) |
| 7. INSTALL IGNITION COIL ASSEMBLY |
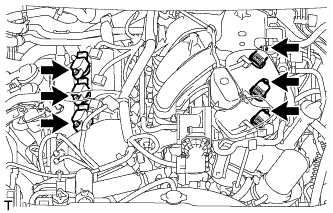 |
Install the 6 ignition coils with the 6 bolts.
Connect the 6 ignition coil connectors.
| 8. INSTALL ENGINE WIRE |
| 9. INSTALL INTAKE MANIFOLD |
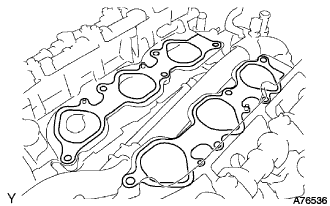 |
Set a new gasket on each cylinder head.
Set the intake manifold on the cylinder heads.
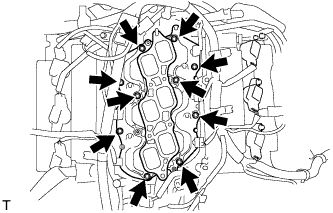 |
Install and uniformly tighten the 10 bolts in several passes.
| 10. INSTALL FUEL INJECTOR |
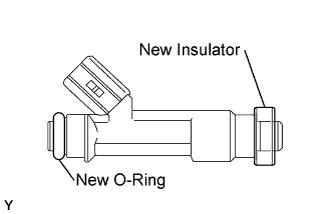 |
Install a new insulator onto each fuel injector.
Apply a light coat of spindle oil or gasoline to each new O-ring and install one onto each fuel injector.
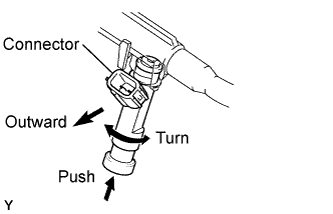 |
Install the 6 injectors.
While turning each fuel injector left and right, install it onto the fuel delivery pipe.
Position the fuel injector connectors facing outward.
| 11. INSTALL FUEL DELIVERY PIPE SUB-ASSEMBLY |
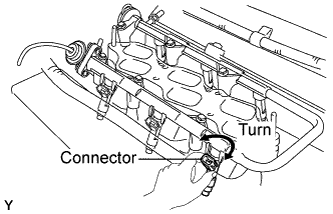 |
Place the fuel delivery pipe together with the 6 fuel injectors on the intake manifold.
Temporarily install the 6 bolts, which are used to hold the fuel delivery pipe, onto the intake manifold.
Check that the fuel injectors rotate smoothly.
Position the fuel injector connectors facing outward.
Tighten the 6 bolts, which are used to hold the fuel delivery pipe, to the intake manifold.
Connect the 6 fuel injector connectors.
| 12. CONNECT HEATER WATER PIPE SUB-ASSEMBLY |
Connect the heater water by-pass pipe's hose to the rear water by-pass joint.
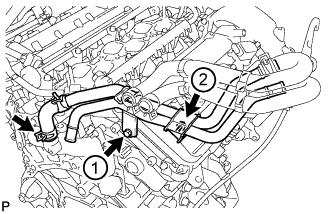 |
Temporarily install the heater water pipe, and then tighten the 2 bolts in the order shown in the illustration.
| 13. CONNECT NO. 1 WATER BY-PASS PIPE |
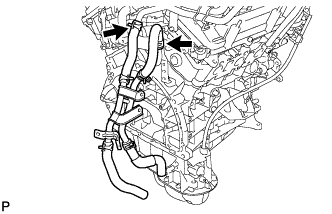 |
Connect the water by-pass pipe hoses to the water by-pass pipe and No. 1 water outlet pipe.
| 14. INSTALL ENGINE COOLANT TEMPERATURE SENSOR |
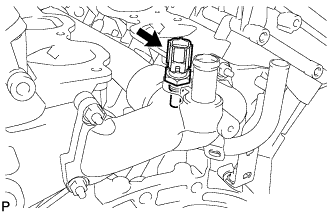 |
Install a new gasket and the engine coolant temperature sensor.
| 15. INSTALL OIL PRESSURE SWITCH |
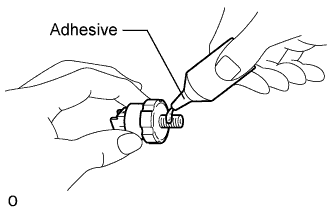 |
Apply adhesive to 2 or 3 threads of the oil pressure switch.
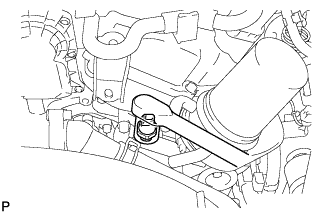 |
Using a 24 mm deep socket wrench, install the oil pressure switch.