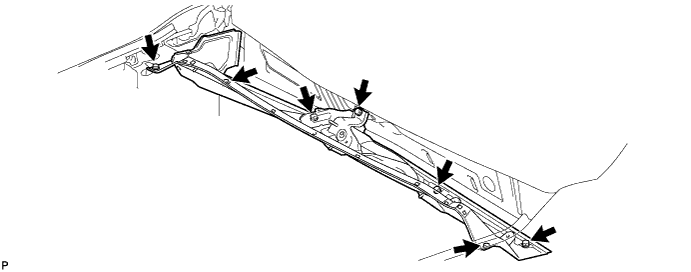
Remove the 7 bolts and outer panel.
INTAKE MANIFOLD > REMOVAL |
| 1. REMOVE FRONT WIPER MOTOR AND LINK ASSEMBLY |
Remove the front wiper motor and link (Click here).
| 2. REMOVE COWL TOP OUTER PANEL SUB-ASSEMBLY |
Disconnect the 2 washer hoses.
Remove the 7 bolts and outer panel.
| 3. REMOVE NO. 1 ENGINE UNDER COVER |
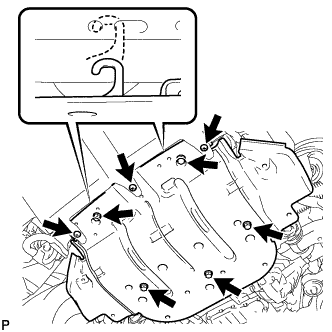 |
Remove the 3 screws and 5 bolts.
Unhook the engine under cover from the vehicle body as shown in the illustration.
| 4. DRAIN ENGINE COOLANT |
Loosen the radiator drain cock plug.
Remove the radiator cap. Then drain the coolant from the radiator.
Loosen the 2 cylinder block drain cock plugs. Then drain the coolant from the engine.
Tighten the 2 cylinder block drain cock plugs.
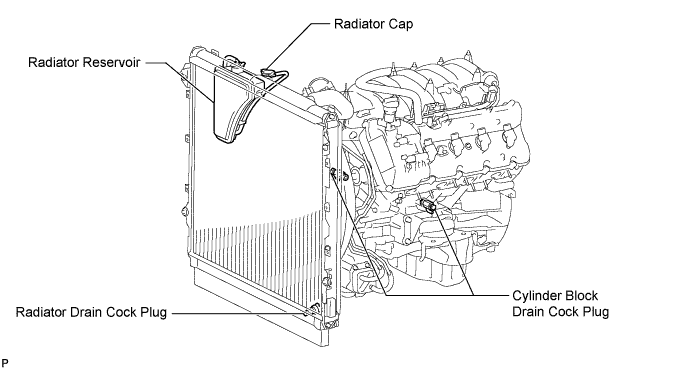
Tighten the radiator drain cock plug by hand.
| 5. REMOVE V-BANK COVER SUB-ASSEMBLY |
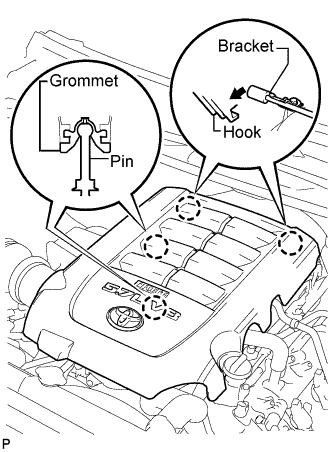 |
Raise the front of the V-bank cover to detach the 2 pins. Then remove the 2 V-bank cover hooks from the bracket, and remove the V-bank cover.
| 6. REMOVE AIR CLEANER HOSE ASSEMBLY |
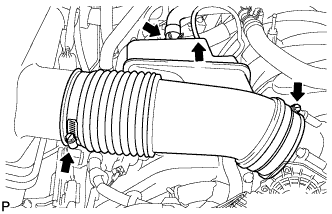 |
Disconnect the vacuum hose and ventilation hose.
Loosen the 2 clamps.
Remove the air cleaner hose.
| 7. DISCONNECT VENTILATION HOSE ASSEMBLY |
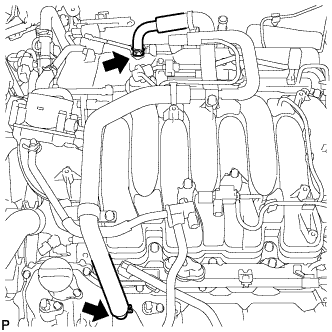 |
Disconnect the ventilation hose from the ventilation pipe of the cylinder head cover LH and RH.
| 8. REMOVE INTAKE MANIFOLD |
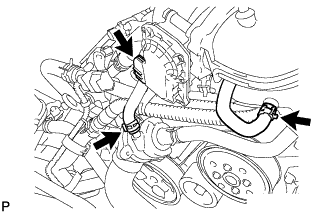 |
Disconnect the 2 water by-pass hoses.
Disconnect the throttle body connector.
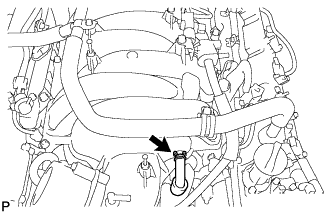 |
Disconnect the No. 1 ventilation hose.
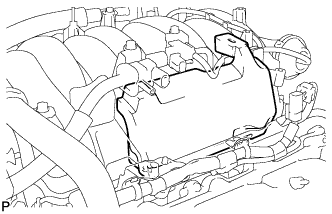 |
Remove the No. 1 engine cover sub-assembly.
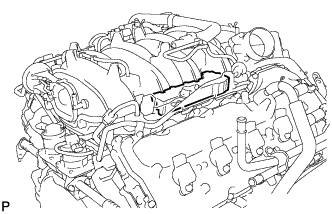 |
Remove the No. 3 engine cover.
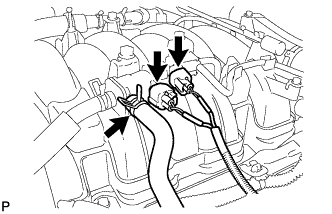 |
Disconnect the purge VSV connector.
Disconnect the purge line hose from the purge VSV.
Disconnect the vacuum switching valve connector (for ACIS).
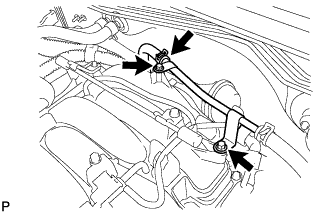 |
Remove the 2 bolts.
Disconnect the No. 1 tube from the union to connector tube hose, and move the hose aside.
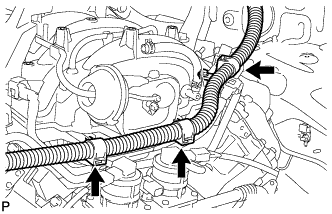 |
Disconnect the 3 wire clamps from the 3 wire brackets.
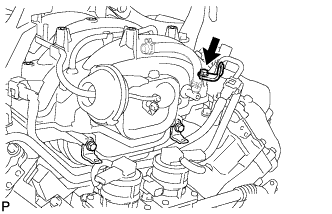 |
Remove the bolt and wire bracket from the intake manifold.
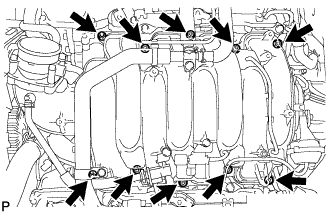 |
Remove the 2 nuts, 8 bolts, intake manifold and 2 gaskets.
| 9. REMOVE VENTILATION HOSE ASSEMBLY |
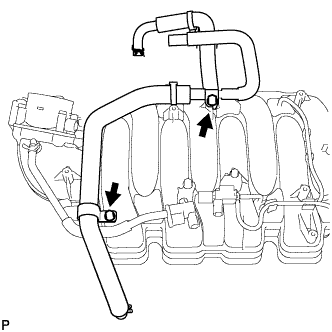 |
Remove the 2 bolts and ventilation hose from the intake manifold.
| 10. REMOVE V-BANK COVER BRACKET |
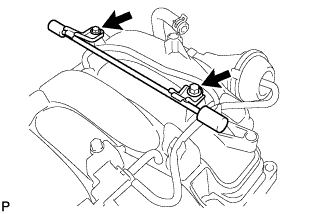 |
Remove the 2 bolts and bracket.
| 11. REMOVE V-BANK COVER PIN |
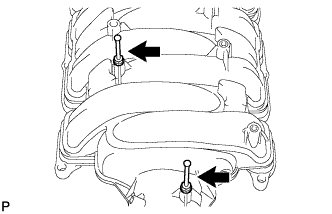 |
Remove the 2 pins from the intake manifold.
| 12. REMOVE THROTTLE BODY ASSEMBLY |
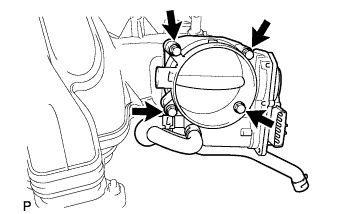 |
Remove the 4 bolts, throttle body and gasket.
| 13. REMOVE VACUUM SWITCHING VALVE ASSEMBLY (for ACIS) |
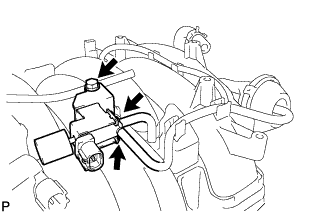 |
Disconnect the 2 vacuum hoses from the vacuum switching valve.
Remove the bolt and vacuum switching valve.
| 14. REMOVE PURGE VSV |
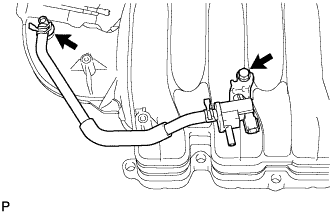 |
Disconnect the purge line hose from the intake manifold.
Remove the bolt and purge VSV.
| 15. REMOVE UNION TO CONNECTOR TUBE HOSE |
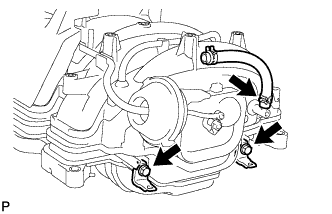 |
Remove the tube hose from the intake manifold.
Remove the 2 bolts and 2 wire brackets.