ULTRASONIC SENSOR (for Front Side) > REMOVAL |
| 1. PRECAUTION |
| 2. DISCONNECT CABLE FROM NEGATIVE BATTERY TERMINAL |
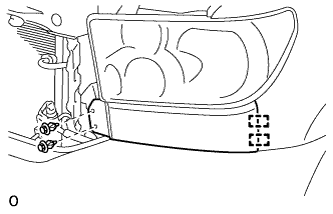
| 3. REMOVE FRONT END PANEL LH (for Resin Type Bumper) |
|
Using a clip remover, remove the 2 clips.
Detach the 2 pins and remove the panel.
| 4. REMOVE FRONT END PANEL RH (for Resin Type Bumper) |
| 5. REMOVE FRONT BUMPER COVER (for Resin Type Bumper) |
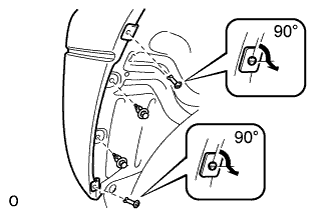 |
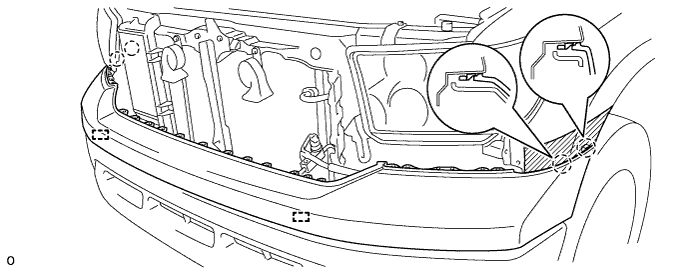
Using a screwdriver, remove the 2 pin hold clips.
Using a clip remover, remove the 2 clips.
Put protective tape around the bumper cover.
Using a clip remover, remove the 8 clips.
Remove the 9 screws.
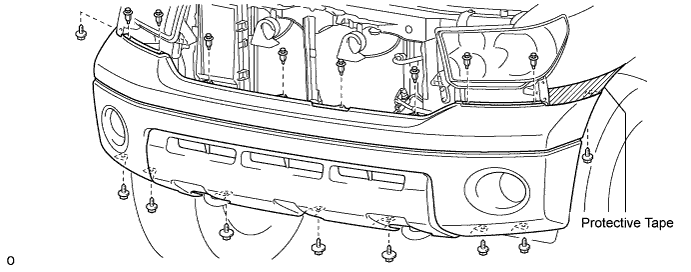
Detach the 4 claws and remove the bumper cover.
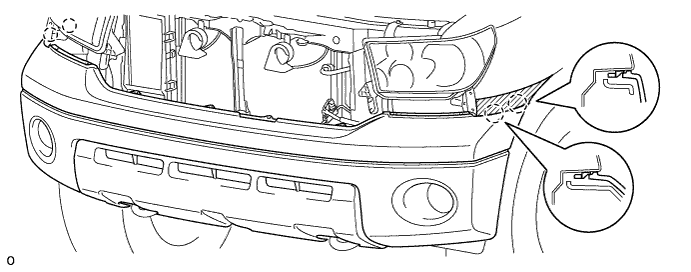
w/ Fog Light:
Disconnect the fog light connectors and remove the bumper cover.
w/ Intuitive Parking Assist System:
Disconnect the ultrasonic sensor connectors and remove the bumper cover.
| 6. REMOVE FRONT FENDER SPLASH SHIELD SUB-ASSEMBLY LH (for Steel Type Bumper) |
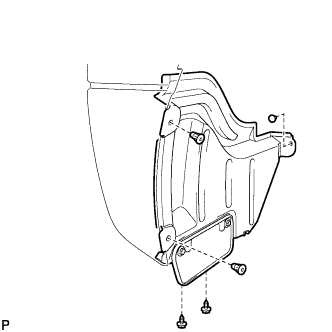 |
Remove the 3 clips, 2 screws and fender splash shield.
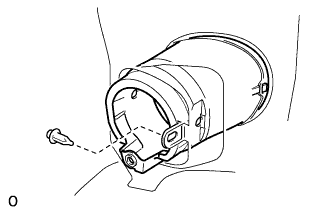 |
Remove the clip.
Disconnect the fog light connector.
| 7. REMOVE FRONT FENDER SPLASH SHIELD SUB-ASSEMBLY RH (for Steel Type Bumper) |
| 8. REMOVE FRONT END PANEL LH (for Steel Type Bumper) |
|
Using a clip remover, remove the 2 clips.
Detach the 2 pins and remove the panel.
| 9. REMOVE FRONT END PANEL RH (for Steel Type Bumper) |
| 10. REMOVE FRONT LOWER BUMPER COVER (for Steel Type Bumper) |
Put protective tape around the bumper cover.
Using a clip remover, remove the 8 clips.
Remove the 16 bolts.
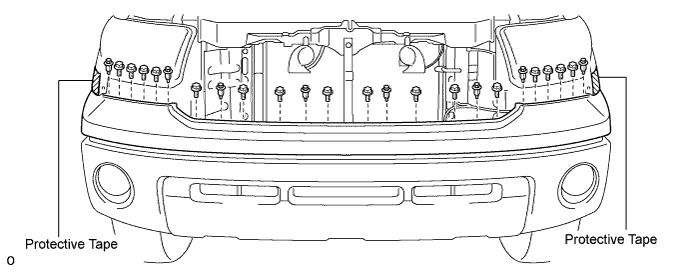
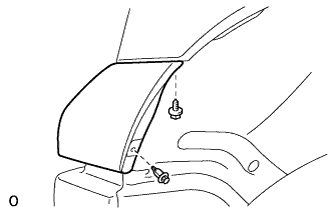 |
Remove the screw and clip.
Detach the 4 claws and 2 pins and remove the bumper cover.
| 11. REMOVE FRONT BUMPER BAR (for Steel Type Bumper) |
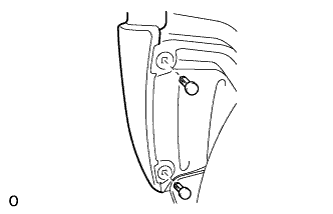 |
Remove the 2 clips.
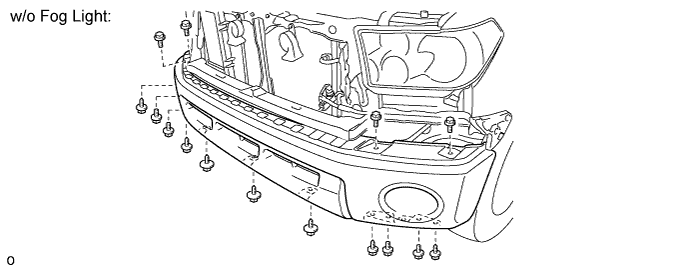
w/o Fog Light:
Remove the front bumper bar.
w/o Intuitive Parking Assist System:
Remove the 8 bolts, 7 screws and front bumper bar.
w/ Intuitive Parking Assist System:
Remove the 8 bolts and 7 screws. Then disconnect the ultrasonic sensor connectors and remove the front bumper bar.
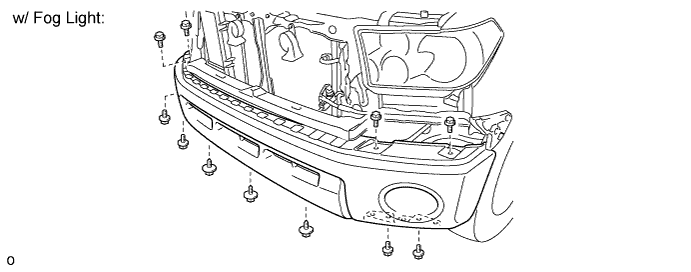
w/ Fog Light:
Remove the front bumper bar.
w/o Intuitive Parking Assist System:
Remove the 8 bolts, 3 screws and bumper bar.
w/ Intuitive Parking Assist System:
Remove the 8 bolts and 3 screws. Then disconnect the ultrasonic sensor connectors and remove the front bumper bar.
| 12. REMOVE NO. 1 ULTRASONIC SENSOR |
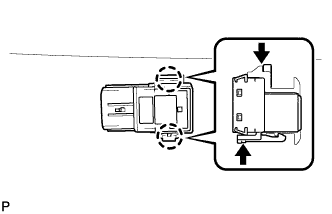 |
While pushing down on the lever with a finger to release the one claw, detach the claw on the other side to remove the ultrasonic sensor.
| 13. REMOVE NO. 1 ULTRASONIC SENSOR RETAINER |
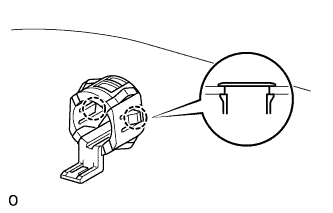 |
Detach the 2 claws and remove the sensor retainer from the front bumper.