 |
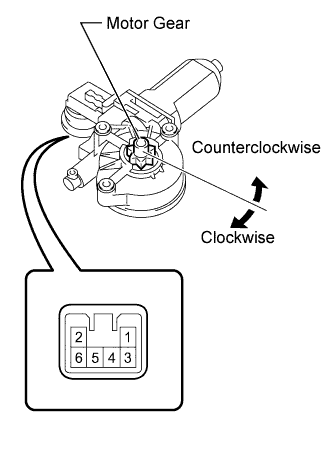
Apply battery voltage to connector terminals 1 and 2.
POWER WINDOW REGULATOR MOTOR (for Front Door) > INSPECTION |
| 1. INSPECT FRONT POWER WINDOW REGULATOR MOTOR ASSEMBLY LH (w/o Jam Protection Function) |
|
Apply battery voltage to connector terminals 1 and 2.
Apply battery voltage to the regulator motor and check the operation of the regulator motor.
| Measurement Condition | Specified Condition |
| Battery positive (+) → 1 Battery negative (-) → 2 | Motor gear rotates counterclockwise |
| Battery positive (+) → 2 Battery negative (-) → 1 | Motor gear rotates clockwise |
| 2. INSPECT FRONT POWER WINDOW REGULATOR MOTOR ASSEMBLY LH (w/ Jam Protection Function) |
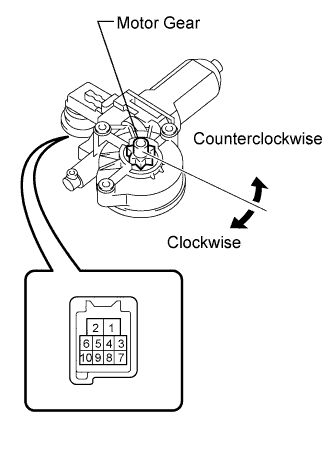 |
Apply battery voltage to the regulator motor and check the operation of the regulator motor.
| Measurement Condition | Motor Condition | Specified Condition |
| Battery positive (+) → Terminal 2 Battery negative (-) → Terminal 1, 4 and 10 | Auto | Motor gear rotates clockwise |
| Battery positive (+) → Terminal 2 Battery negative (-) → Terminal 1, 4 and 7 | Motor gear rotates counterclockwise | |
| Battery positive (+) → Terminal 2 Battery negative (-) → Terminal 1 and 10 | Manual | Motor gear rotates clockwise |
| Battery positive (+) → Terminal 2 Battery negative (-) → Terminal 1 and 7 | Motor gear rotates counterclockwise |
| 3. INSPECT FRONT POWER WINDOW REGULATOR MOTOR ASSEMBLY RH (w/o Jam Protection Function) |
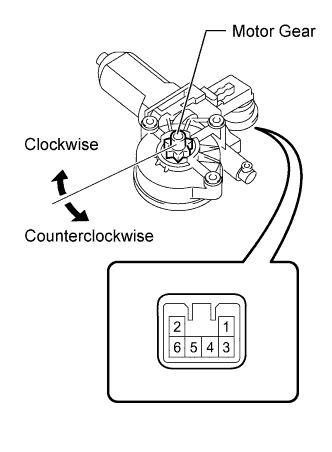 |
Apply battery voltage to connector terminals 1 and 2.
Apply battery voltage to the regulator motor and check the operation of the regulator motor.
| Measurement Condition | Specified Condition |
| Battery positive (+) → 1 Battery negative (-) → 2 | Motor gear rotates clockwise |
| Battery positive (+) → 2 Battery negative (-) → 1 | Motor gear rotates counterclockwise |
| 4. INSPECT FRONT POWER WINDOW REGULATOR MOTOR ASSEMBLY RH (w/ Jam Protection Function) |
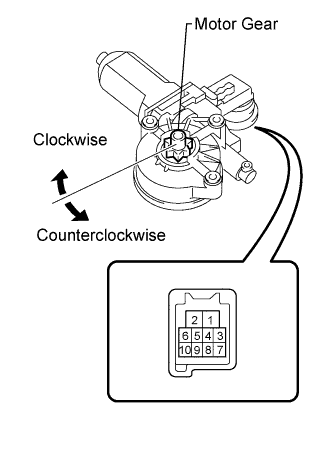 |
Apply battery voltage to the regulator motor and check the operation of the regulator motor.
| Measurement Condition | Motor Condition | Specified Condition |
| Battery positive (+) → Terminal 2 Battery negative (-) → Terminal 1, 4 and 7 | Auto | Motor gear rotates clockwise |
| Battery positive (+) → Terminal 2 Battery negative (-) → Terminal 1, 4 and 10 | Motor gear rotates counterclockwise | |
| Battery positive (+) → Terminal 2 Battery negative (-) → Terminal 1 and 7 | Manual | Motor gear rotates clockwise |
| Battery positive (+) → Terminal 2 Battery negative (-) → Terminal 1 and 10 | Motor gear rotates counterclockwise |