 |
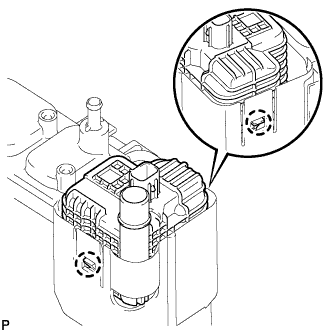
Engage the 2 claws to install a new canister pump module to the charcoal canister.
- NOTICE:
- Do not allow foreign matter such as grease, oil or water to adhere to the O-rings.
- Ensure that the claws are engaged properly.
CANISTER > INSTALLATION |
| 1. INSTALL CANISTER PUMP MODULE |
|
Engage the 2 claws to install a new canister pump module to the charcoal canister.
| 2. INSTALL CHARCOAL CANISTER SUPPORT BRACKET |
Install the charcoal canister support bracket with the 2 bolts.
| 3. INSTALL CHARCOAL CANISTER BASE BRACKET |
Engage the claw to install the charcoal canister base bracket.
| 4. INSTALL CHARCOAL CANISTER ASSEMBLY |
Install the charcoal canister assembly with the 4 bolts.
Attach the wire harness clamp.
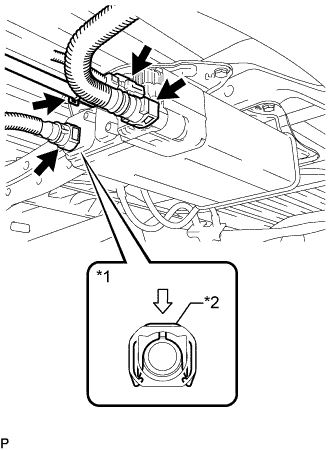 |
Connect the vent line hose.
| *1 | Vent Line Hose |
| *2 | Retainer |
 | Push |
Push the hose into the port and push the retainer to lock it.
Connect the air inlet line hose.
Connect the purge line hose.
Connect the canister pump module connector.
Connect the wiring harness clamp bracket with the nut.