 |
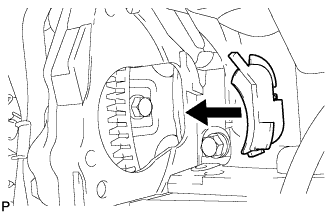
Install the flywheel housing side cover.
STARTER > INSTALLATION |
| 1. INSTALL STARTER ASSEMBLY |
|
Install the flywheel housing side cover.
Install the starter with the 2 bolts.
Install the starter wire with the nut.
Connect the starter connector.
Attach the 2 wire harness clamps.
| 2. INSTALL STARTER COVER |
Install the starter cover with the 3 bolts.
| 3. INSTALL EXHAUST MANIFOLD SUB-ASSEMBLY RH |
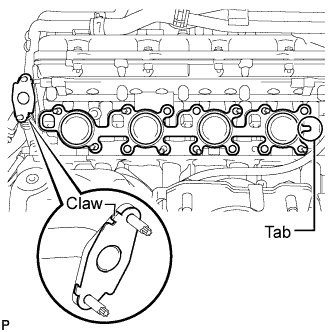 |
Install a new gasket to the cylinder head and a new gasket to the No. 2 air tube.
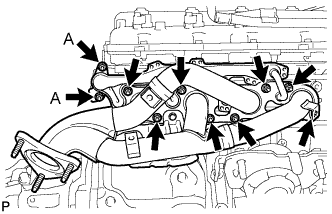 |
Temporarily install the exhaust manifold with the 2 nuts labeled A and 8 new nuts.
Uniformly tighten the nuts that are not labeled A, and then tighten the 2 nuts labeled A.
| 4. INSTALL NO. 1 EXHAUST MANIFOLD HEAT INSULATOR |
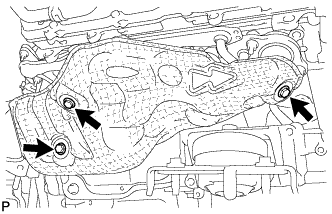 |
Install the heat insulator with the 3 bolts.
| 5. INSTALL FRONT EXHAUST PIPE ASSEMBLY |
Install a new gasket and the exhaust pipe to the exhaust manifold RH with 3 new nuts.
Install a new gasket and the exhaust pipe to the center exhaust pipe with the 2 bolts.
Connect the air fuel ratio sensor connector.
Connect the heated oxygen sensor connector and attach the 2 clamps.
| 6. INSTALL ENGINE OIL LEVEL DIPSTICK GUIDE |
Apply a light coat of engine oil to a new O-ring.
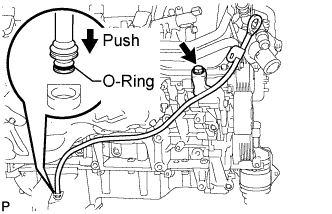 |
Install the O-ring to the guide.
Install the dipstick guide with the bolt.
Install the dipstick.
| 7. INSTALL GENERATOR ASSEMBLY |
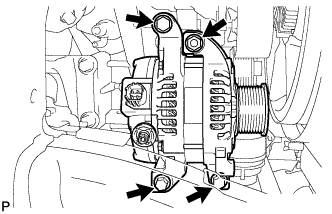 |
Install the generator with the 3 bolts and nut.
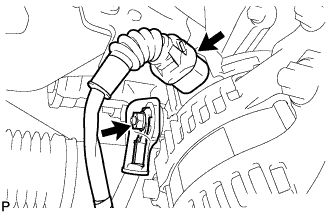 |
Connect the generator connector.
Connect the generator wire with the nut.
Install the terminal cap.
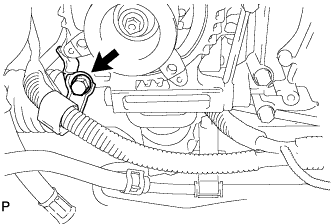 |
Install the harness bracket to the generator with the bolt.
| 8. CONNECT VANE PUMP ASSEMBLY |
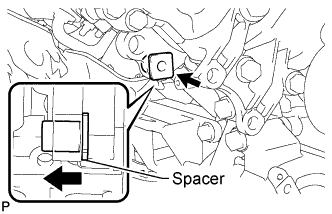 |
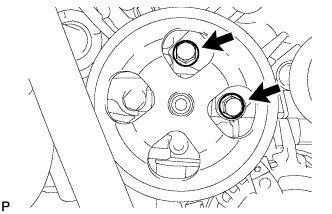 |
Connect the vane pump to the timing chain cover with the 2 bolts.
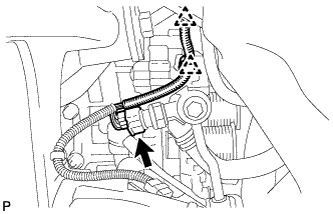 |
Attach the 2 clamps and connect the power steering oil pressure switch connector.
| 9. INSTALL FRONT FENDER APRON SEAL RH |
Install the apron seal with the 5 clips.
| 10. INSTALL FAN AND GENERATOR V BELT |
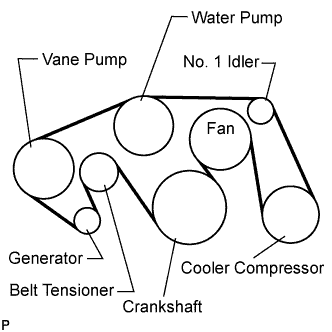 |
Set the V belt onto every part.
While turning the belt tensioner counterclockwise, remove the pin.
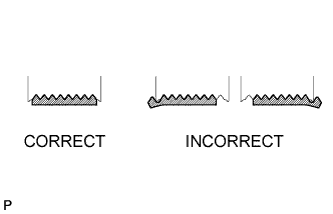 |
After installing the belt, check that it fits properly in the ribbed grooves.
| 11. INSTALL AIR CLEANER ASSEMBLY |
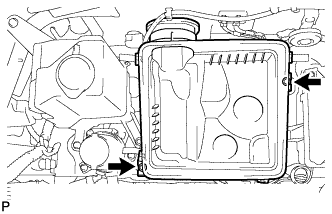 |
Install the air cleaner case with the 2 bolts.
Install the air cleaner element onto the air cleaner case.
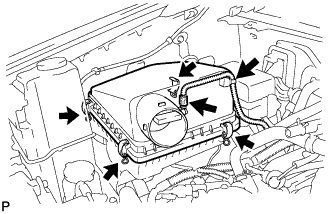 |
Install the air cleaner cap.
Fasten the 4 hook clamps.
Connect the MAF meter connector.
Attach the wire harness clamp.
| 12. INSTALL AIR CLEANER HOSE ASSEMBLY |
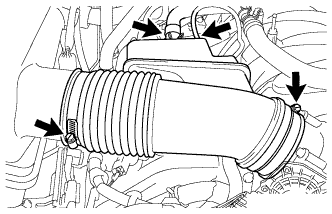 |
Install the air cleaner hose with the 2 clamps.
Connect the vacuum hose and ventilation hose.
| 13. INSTALL V-BANK COVER SUB-ASSEMBLY |
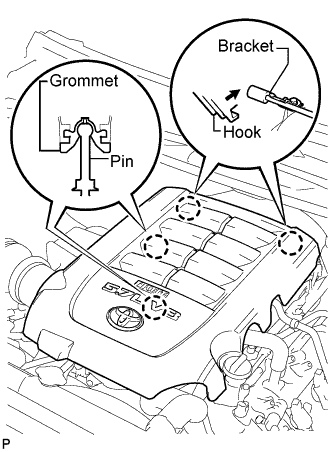 |
Attach the 2 V-bank cover hooks to the bracket. Then align the 2 V-bank cover grommets with the 2 pins, and press down on the V-bank cover to attach the pins.
| 14. INSTALL NO. 1 ENGINE UNDER COVER |
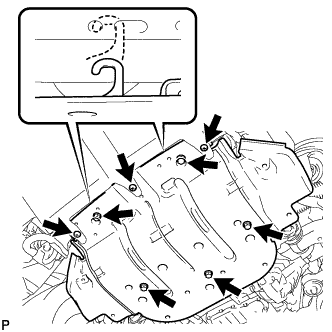 |
Hook the engine under cover to the vehicle body as shown in the illustration.
Install the 3 screws and 5 bolts.
| 15. CONNECT CABLE TO NEGATIVE BATTERY TERMINAL |