 |
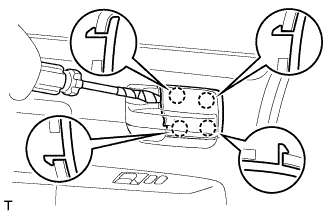
Using a screwdriver, detach the 4 claws and remove the inside handle bezel.
- HINT:
- Tape the screwdriver tip before use.
FRONT DOOR (for Regular Cab) > DISASSEMBLY |
| 1. PRECAUTION |
| 2. DISCONNECT CABLE FROM NEGATIVE BATTERY TERMINAL |
| 3. REMOVE FRONT DOOR INSIDE HANDLE BEZEL PLUG LH |
|
Using a screwdriver, detach the 4 claws and remove the inside handle bezel.
| 4. REMOVE FRONT UPPER ARMREST BASE PANEL LH (w/ Power Window) |
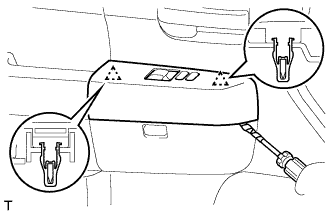 |
Using a screwdriver, detach the 2 clips and front upper armrest base panel.
Disconnect the connectors.
| 5. REMOVE POWER WINDOW REGULATOR MASTER SWITCH ASSEMBLY (w/ Power Window) |
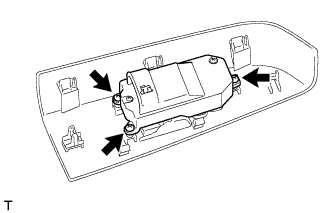 |
Remove the 3 screws and power window regulator master switch.
| 6. REMOVE FRONT DOOR WINDOW REGULATOR HANDLE ASSEMBLY (w/o Power Window) |
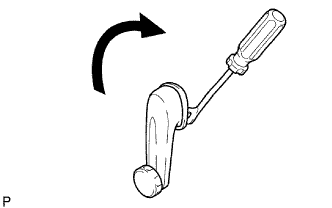 |
Insert a clip remover between the plate and trim.
Turn the handle clockwise to remove the handle.
| 7. REMOVE FRONT LOWER DOOR FRAME BRACKET GARNISH LH |
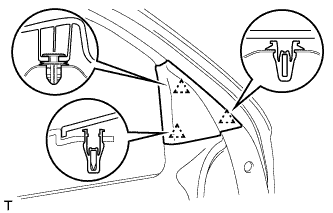 |
Detach the 3 clips and front lower door frame bracket garnish.
| 8. REMOVE FRONT DOOR ARMREST COVER LH |
| 9. REMOVE FRONT DOOR TRIM BOARD SUB-ASSEMBLY LH |
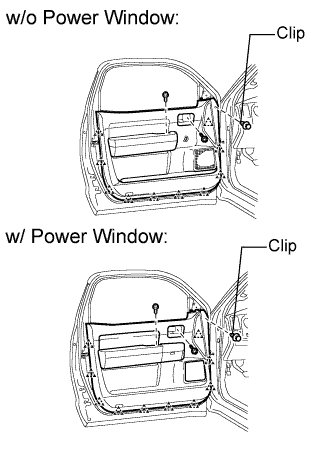 |
Remove the 2 screws.
Using a clip remover, remove the clip.
Detach the 10 clips and remove the trim cover. Then disconnect the connector.
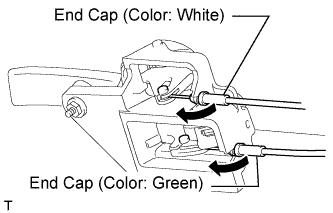 |
Disconnect the 2 cables from the inside handle.
Remove the inside handle.
| 10. REMOVE FRONT INNER DOOR GLASS WEATHERSTRIP LH |
| 11. REMOVE OUTER REAR VIEW MIRROR ASSEMBLY LH |
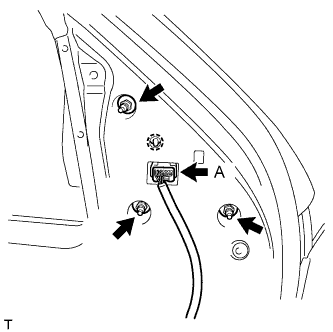 |
w/ Power Mirror Control System:
Disconnect the connector labeled A.
Remove the 3 nuts.
Detach the claw and remove the outer rear view mirror.
| 12. REMOVE FRONT NO. 1 SPEAKER ASSEMBLY |
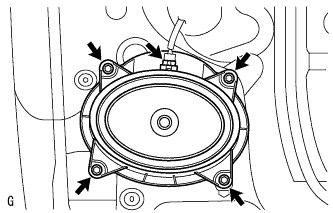 |
Disconnect the speaker connector.
Remove the 4 screws and speaker.
| 13. REMOVE FRONT NO. 1 DOOR TRIM BRACKET |
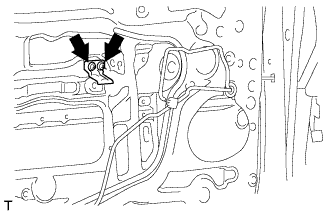 |
Remove the 2 screws and bracket.
| 14. REMOVE FRONT DOOR SERVICE HOLE COVER LH |
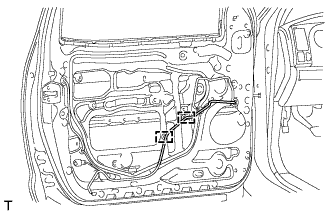 |
Using a clip remover, detach the 2 clamps.
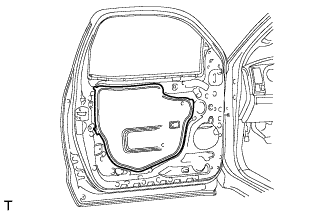 |
Remove the front door service hole cover.
| 15. REMOVE FRONT DOOR GLASS SUB-ASSEMBLY LH |
for Driver Side:
Temporarily install the power window regulator master switch.
for Passenger Side:
Temporarily install the power window regulator switch.
Connect the cable to the negative (-) battery terminal.
Remove the hole plug.
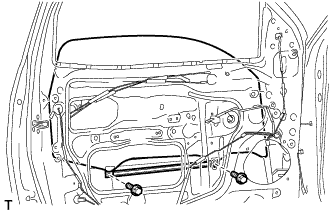 |
Move the door glass until the bolts appear in the service holes.
Remove the 2 bolts.
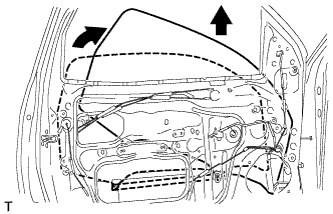 |
Remove the door glass in the direction indicated by the arrows in the illustration.
for Driver Side:
Remove the power window regulator master switch.
for Passenger Side:
Remove the power window regulator switch.
Disconnect the cable from the negative (-) battery terminal.
| 16. REMOVE FRONT DOOR WINDOW REGULATOR SUB-ASSEMBLY LH (w/ Power Window) |
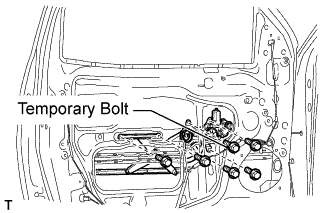 |
Disconnect the connector.
Loosen the temporary bolt.
Remove the 5 bolts and window regulator.
Remove the window regulator through the service hole.
Remove the temporary bolt from the window regulator.
| 17. REMOVE FRONT POWER WINDOW REGULATOR MOTOR ASSEMBLY LH (w/ Power Window) |
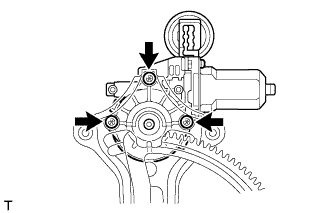 |
Using a T25 "TORX" driver, remove the 3 screws and motor.
| 18. REMOVE FRONT DOOR WINDOW REGULATOR SUB-ASSEMBLY LH (w/o Power Window) |
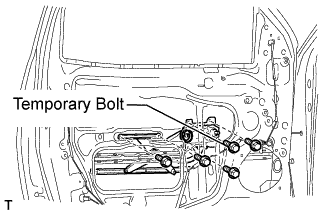 |
Loosen the temporary bolt.
Remove the 4 bolts and window regulator.
Remove the window regulator through the service hole.
Remove the temporary bolt from the window regulator.
| 19. REMOVE SIDE AIRBAG SENSOR ASSEMBLY LH |
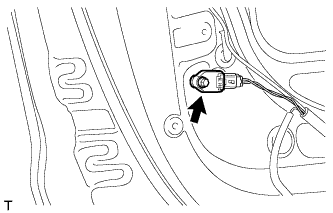 |
Disconnect the connector.
Remove the bolt and side airbag sensor.
| 20. REMOVE FRONT REAR DOOR GUIDE BRACKET GARNISH LH |
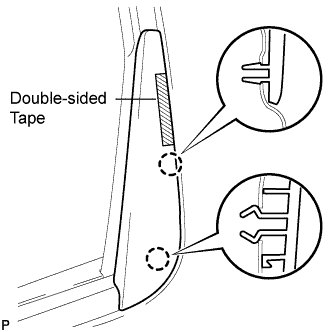 |
Detach the 2 claws and remove the garnish.
| 21. REMOVE FRONT OUTER DOOR GLASS WEATHERSTRIP ASSEMBLY LH |
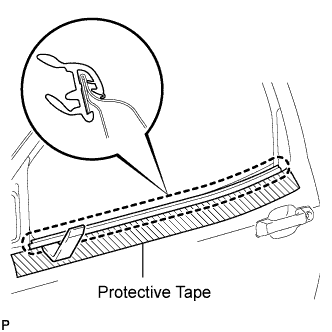 |
Put protective tape around the weatherstrip outer.
Using a moulding remover, detach the claw and remove the weatherstrip.
| 22. REMOVE FRONT DOOR GLASS RUN LH |
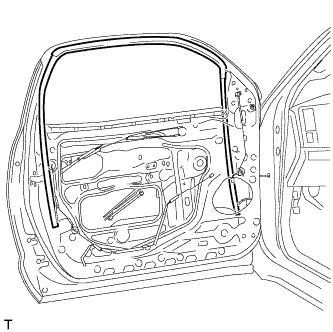 |
Remove the front door glass run.
| 23. REMOVE FRONT DOOR REAR LOWER FRAME SUB-ASSEMBLY LH |
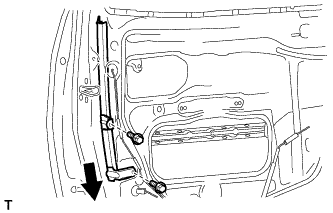 |
Remove the 2 bolts and front door rear lower frame.
| 24. REMOVE FRONT DOOR FRONT LOWER FRAME SUB-ASSEMBLY LH |
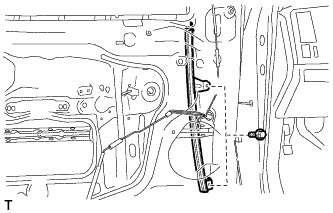 |
Remove the 2 bolts and front door front lower frame.
| 25. REMOVE FRONT DOOR OUTSIDE HANDLE COVER LH |
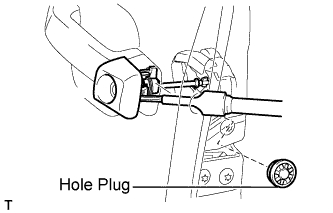 |
Remove the hole plug.
Using a T30 "TORX" wrench, loosen the screw and remove the front door outside handle cover and the door lock key cylinder as a unit.
Remove the cylinder from the cover.
| 26. REMOVE FRONT DOOR LOCK ASSEMBLY LH (w/o Power Door Lock) |
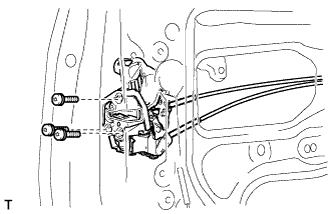 |
Using a T30 "TORX" wrench, remove the 3 screws and door lock.
| 27. REMOVE FRONT DOOR LOCK ASSEMBLY LH (w/ Power Door Lock) |
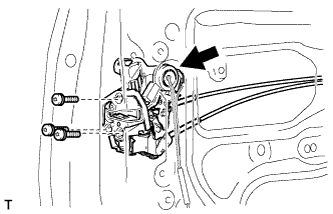 |
Disconnect the connector.
Using a T30 "TORX" wrench, remove the 3 screws and door lock.
| 28. REMOVE FRONT DOOR LOCK REMOTE CONTROL CABLE ASSEMBLY LH |
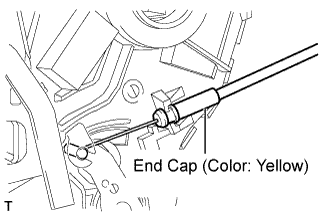 |
Remove the front door lock remote control cable assembly.
| 29. REMOVE FRONT DOOR INSIDE LOCKING CABLE ASSEMBLY LH |
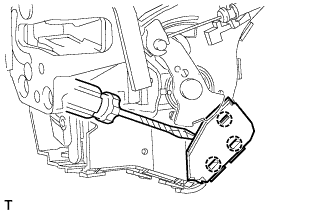 |
Using a screwdriver, detach the 3 claws.
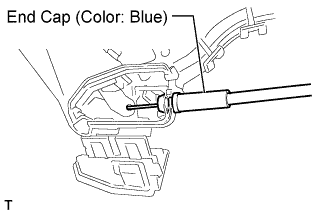 |
Remove the front door inside locking cable assembly.
| 30. REMOVE FRONT DOOR HANDLE ASSEMBLY OUTSIDE LH |
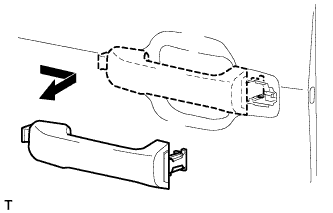 |
Remove the handle by sliding and pulling it in the direction indicated by the arrow in the illustration.
| 31. REMOVE FRONT DOOR OUTSIDE HANDLE FRAME SUB-ASSEMBLY LH |
Remove the outside handle pads front and rear.
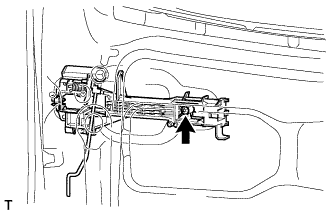 |
Using a T30 "TORX" wrench, loosen the screw.
Slide the outside handle frame to remove it.
| 32. REMOVE FRONT DOOR LOCK OPEN ROD LH |
Remove the lock open rod from the outside handle frame.
| 33. REMOVE FRONT NO. 2 DOOR STIFFENER CUSHION |
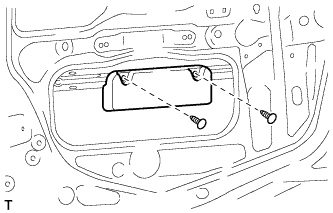 |
Using a clip remover, remove the 2 clips and stiffener cushion.
| 34. REMOVE FRONT DOOR PANEL PROTECTOR LH |
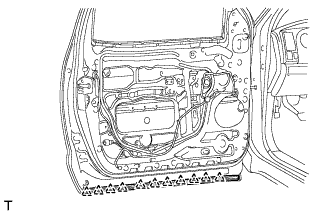 |
Using a clip remover, detach the 11 clips and remove the door panel protector.
| 35. REMOVE FRONT DOOR CHECK ASSEMBLY LH |
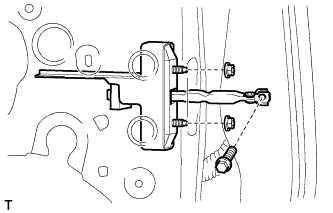 |
Remove the bolt, 2 nuts and door check.
| 36. REMOVE FRONT DOOR WEATHERSTRIP LH |
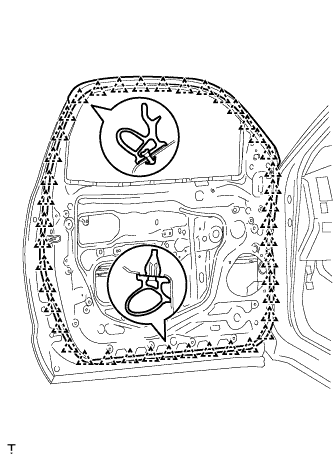 |
Using a clip remover, detach the 43 clips and remove the weatherstrip.