 |
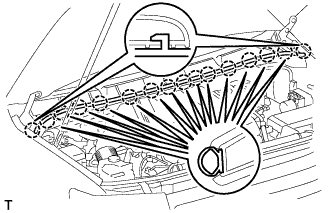
Using a clip remover, detach the 16 claws and remove the cowl top seal.
FRONT WIPER MOTOR > REMOVAL |
| 1. REMOVE FRONT WIPER ARM AND BLADE ASSEMBLY LH |
Remove the nut, wiper arm and blade.
| 2. REMOVE FRONT WIPER ARM AND BLADE ASSEMBLY RH |
Remove the nut, wiper arm and blade.
| 3. REMOVE HOOD TO COWL TOP SEAL |
|
Using a clip remover, detach the 16 claws and remove the cowl top seal.
| 4. REMOVE FRONT FENDER TO COWL SIDE SEAL LH |
Using a clip remover, detach the claw and remove the cowl side seal.
| 5. REMOVE FRONT FENDER TO COWL SIDE SEAL RH |
| 6. REMOVE COWL TOP VENTILATOR LOUVER SUB-ASSEMBLY |
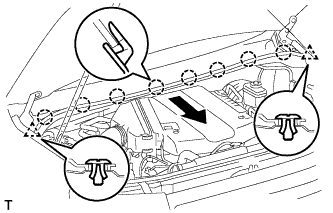 |
Remove the 2 clips.
Detach the 8 claws and remove the ventilator louver.
| 7. REMOVE FRONT WIPER MOTOR AND LINK ASSEMBLY |
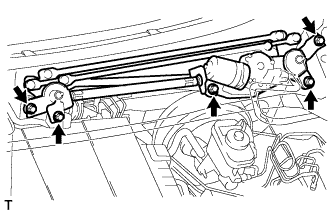 |
Disconnect the connector.
Remove the nut.
Remove the 4 bolts and wiper motor and link assembly.
| 8. REMOVE WINDSHIELD WIPER MOTOR ASSEMBLY |
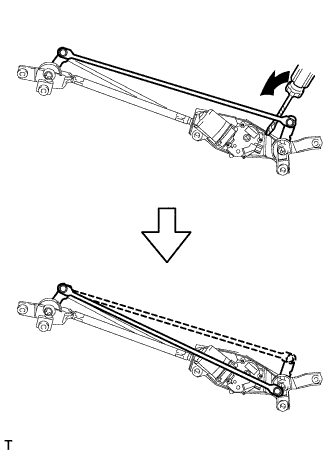 |
Using a screwdriver, disconnect the rod of the wiper link from the wiper motor as shown in the illustration.
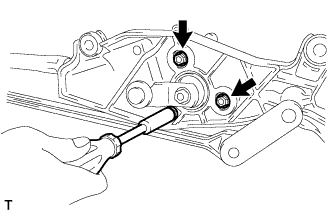 |
Remove the 3 bolts.
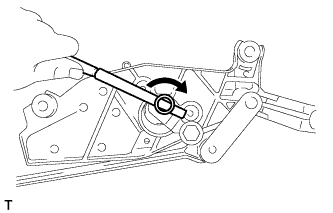 |
Rotate the crank arm clockwise and remove the wiper motor.