 |
Remove any old FIPG material and be careful not to drop oil on the contact surfaces of the differential tube and actuator.
AUTOMATIC DISCONNECTING DIFFERENTIAL ACTUATOR (for 4WD) > INSTALLATION |
| 1. INSTALL AUTOMATIC DISCONNECTING DIFFERENTIAL ACTUATOR |
|
Remove any old FIPG material and be careful not to drop oil on the contact surfaces of the differential tube and actuator.
Clean the contact surfaces with any residual FIPG material using gasoline or alcohol.
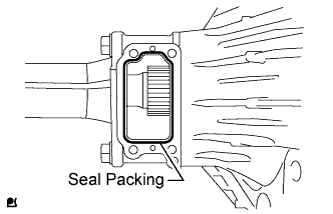
Apply seal packing to the differential tube as shown in the illustration.
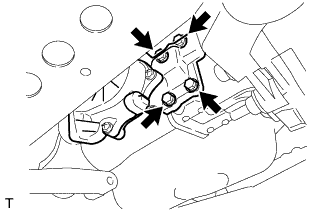 |
Clean the threads of the 4 bolts and retainer bolt holes with toluene or trichloroethylene.
Install the actuator onto the differential tube.
Apply adhesive to 2 to 3 threads of each bolt end.
Install the 4 bolts.
Connect the actuator hose.
Connect the actuator connector.
| 2. INSTALL NO. 1 ENGINE UNDER COVER |
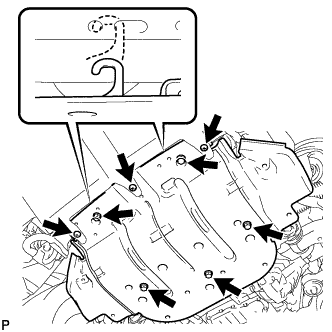 |
Hook the engine under cover to the vehicle body as shown in the illustration.
Install the 3 screws and 5 bolts.
| 3. INSPECT AUTOMATIC DISCONNECTING DIFFERENTIAL ACTUATOR |
Inspect the automatic disconnecting differential actuator (Click here).