BACK POWER WINDOW SWITCH > REMOVAL |
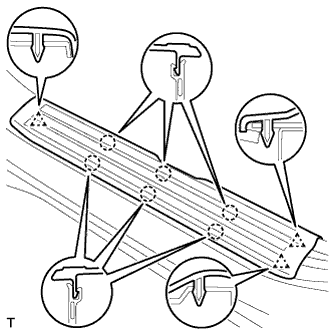
| 1. REMOVE FRONT DOOR SCUFF PLATE LH |
|
Detach the 6 claws and 3 clips, and remove the front door scuff plate LH.
| 2. REMOVE COWL SIDE TRIM BOARD LH |
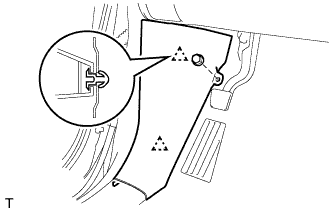 |
Remove the nut.
Detach the 2 clips and remove the cowl side trim board LH.
| 3. REMOVE INSTRUMENT SIDE PANEL LH |
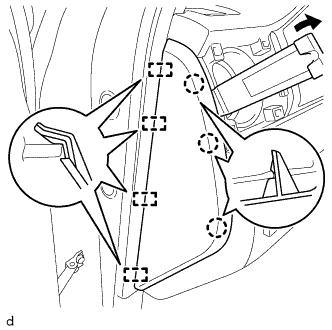 |
Using a moulding remover B, detach the 3 claws, 4 guides and remove the instrument side panel LH.
| 4. REMOVE LOWER CENTER INSTRUMENT COVER (for Column Shift Type) |
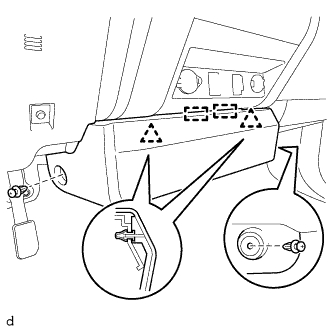 |
Remove the 2 clips.
Detach the 2 clips, 2 guides and remove the lower center instrument cover.
| 5. REMOVE LOWER INSTRUMENT PANEL FINISH PANEL SUB-ASSEMBLY LH |
Operate the tilt lever to fully extend and raise the steering column.
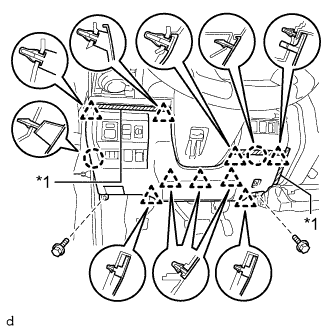 |
Apply protective tape as shown in the illustration.
| *1 | Protective Tape |
Remove the 2 bolts <A>.
Detach the 9 clips, 2 claws and remove the lower instrument panel finish panel sub-assembly LH.
Disconnect each connector.
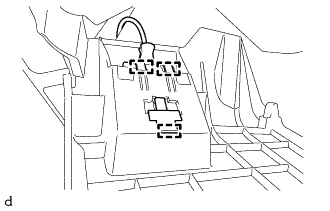 |
Detach the 3 hooks and disconnect the hood lock control lever from the lower instrument panel finish panel sub-assembly LH.
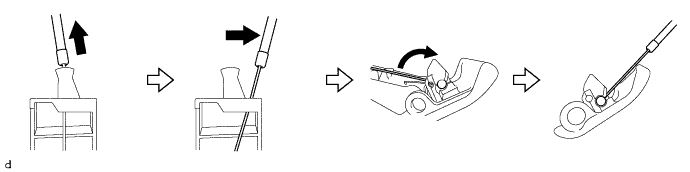
Pull and slide the hood lock control cable, rotate the hood lock control cable, and then disconnect the hood lock control cable from the hood lock control lever.
| 6. REMOVE BACK DOOR POWER WINDOW REGULATOR SWITCH ASSEMBLY |
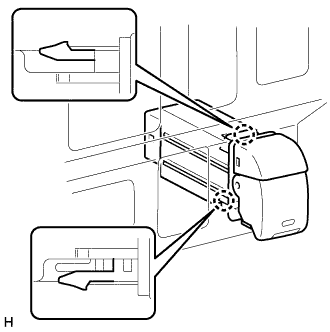 |
Using a screwdriver, detach the 2 claws and remove the back door power window regulator switch assembly.