ULTRASONIC SENSOR (for Front Side) > REMOVAL |
| 1. REMOVE RADIATOR GRILLE SUB-ASSEMBLY |
| 2. REMOVE FRONT END PANEL LH |
|
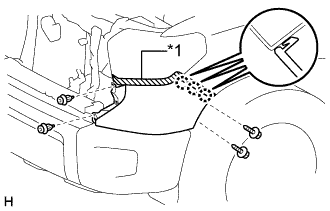
Put protective tape around the front end panel LH.
| *1 | Protective Tape |
Remove the 2 screws and 2 clips.
Detach the 3 claws and remove the front end panel LH.
| 3. REMOVE FRONT END PANEL RH |
| 4. REMOVE FRONT BUMPER CENTER UPPER RETAINER |
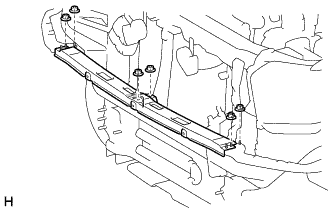 |
Remove the 6 nuts and front bumper center upper retainer.
| 5. REMOVE FRONT BUMPER COVER |
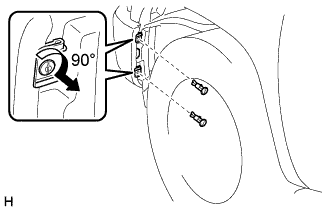 |
for Steel Type Bumper:
Using a screwdriver, remove the 2 pin hold clips.
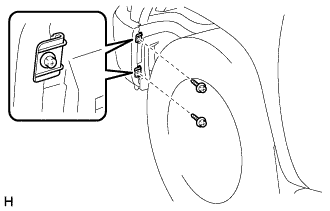 |
for Resin Type Bumper:
Remove the 2 screws.
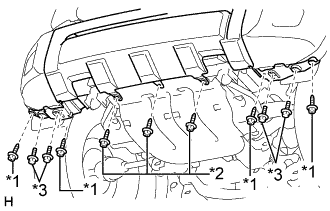 |
Remove the 4 bolts.
| *1 | Screw A |
| *2 | Screw B |
| *3 | Bolt |
Remove the 4 screws labeled A and 3 screws labeled B.
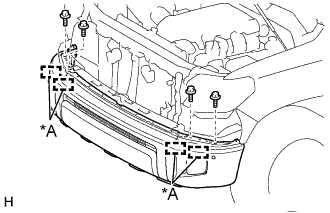 |
Remove the 4 bolts.
| *A | w/ Intuitive Parking Assist System |
w/ Fog Light:
Disconnect the fog light connectors and remove the front bumper cover.
w/ Intuitive Parking Assist System:
Detach the 4 clamps and disconnect the wire harness.
Disconnect the ultrasonic sensor connectors and remove the front bumper cover.
| 6. REMOVE NO. 1 ULTRASONIC SENSOR RETAINER (for Steel Type Bumper) |
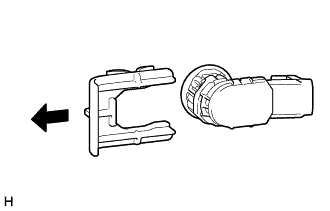 |
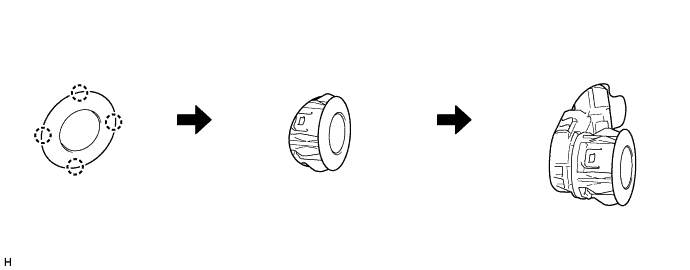
Remove the No. 1 ultrasonic sensor retainer as shown in the illustration.
| 7. REMOVE NO. 1 ULTRASONIC SENSOR (for Steel Type Bumper) |
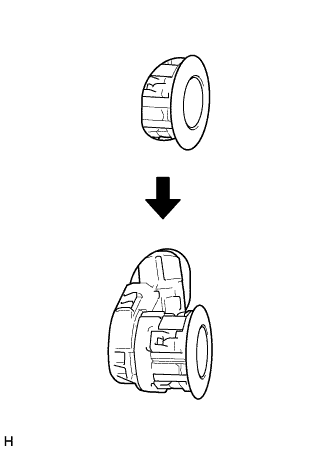 |
Remove the No. 1 ultrasonic sensor as shown in the illustration.
| 8. REMOVE NO. 1 ULTRASONIC SENSOR (for Resin Type Bumper) |
Detach the 4 claws and remove the No. 1 ultrasonic sensor as shown in the illustration.