 |
Disconnect the connector.
ULTRASONIC SENSOR (for Rear Side) > REMOVAL |
| 1. REMOVE CONNECTOR COVER (for Steel Type Bumper) |
| 2. REMOVE CONNECTOR COVER (for Resin Type Bumper) |
| 3. REMOVE WIRING HARNESS CONNECTOR (for Steel Type Bumper) |
|
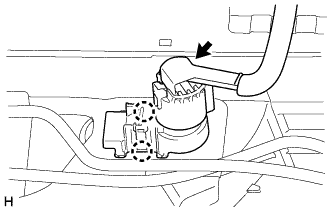
Disconnect the connector.
Detach the 2 claws and remove the wiring harness connector.
| 4. REMOVE WIRING HARNESS CONNECTOR (for Resin Type Bumper) |
|
Disconnect the connector.
Detach the 2 claws and remove the wiring harness connector.
| 5. REMOVE REAR BUMPER COVER (for Steel Type Bumper) |
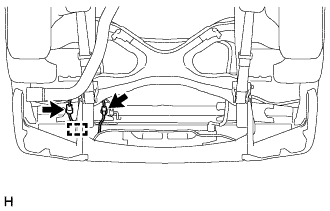 |
Disconnect the 2 connectors and detach the clamp.
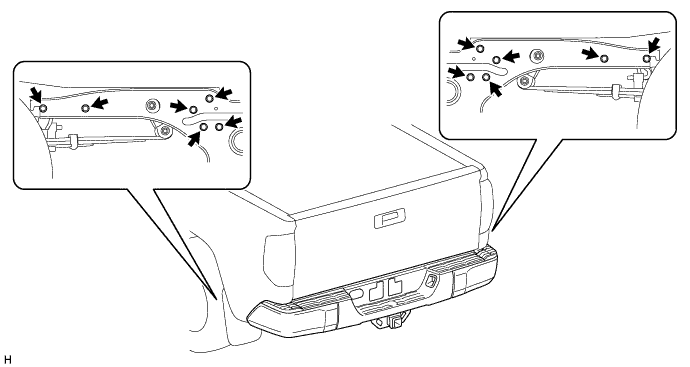
w/ Towing Package:
Using an engine lifter or equivalent, remove the 12 bolts and rear bumper cover.
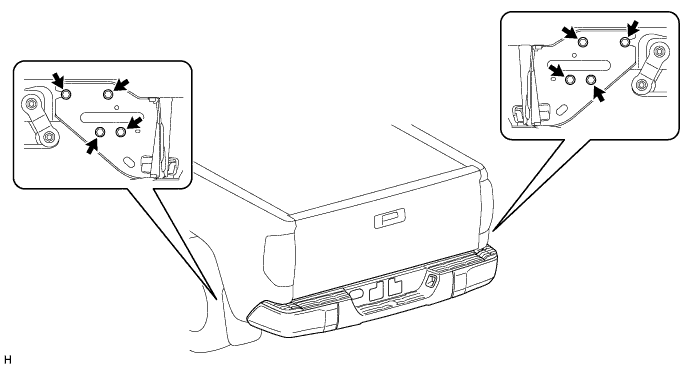
w/o Towing Package:
Using an engine lifter or equivalent, remove the 8 bolts and rear bumper cover.
| 6. REMOVE REAR BUMPER COVER (for Resin Type Bumper) |
|
Disconnect the 2 connectors and detach the clamp.
w/ Towing Package:
Using an engine lifter or equivalent, remove the 12 bolts and rear bumper cover.
w/o Towing Package:
Using an engine lifter or equivalent, remove the 8 bolts and rear bumper cover.
| 7. REMOVE REAR BUMPER PLATE LH (for Steel Type Bumper) |
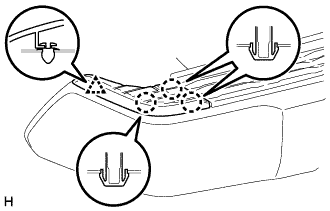 |
Detach the 3 claws and clip and remove the rear bumper plate LH.
| 8. REMOVE REAR BUMPER PLATE LH (for Resin Type Bumper) |
|
Detach the 3 claws and clip and remove the rear bumper plate LH.
| 9. REMOVE REAR BUMPER PLATE RH (for Steel Type Bumper) |
| 10. REMOVE REAR BUMPER PLATE RH (for Resin Type Bumper) |
| 11. REMOVE REAR BUMPER PAD SUB-ASSEMBLY (for Steel Type Bumper) |
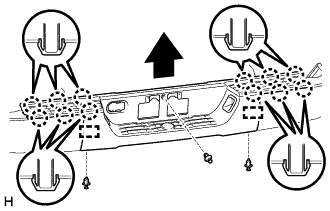 |
Remove the 3 clips.
Detach the 12 claws and 2 guides and remove the rear bumper pad sub-assembly LH as shown in the illustration.
| 12. REMOVE REAR BUMPER PAD SUB-ASSEMBLY (for Resin Type Bumper) |
|
Remove the 3 clips.
Detach the 12 claws and 2 guides and remove the rear bumper pad sub-assembly LH as shown in the illustration.
| 13. REMOVE LICENSE PLATE LIGHT ASSEMBLY LH |
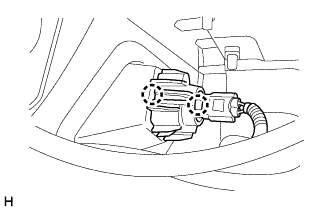 |
Detach the 2 claws.
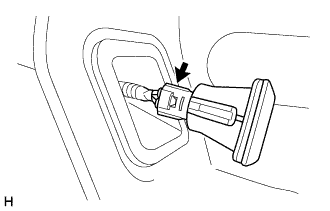 |
Disconnect the connector and remove the license plate light assembly LH.
| 14. REMOVE LICENSE PLATE LIGHT ASSEMBLY RH |
| 15. REMOVE REAR BUMPER EXTENSION INSERT LH (for Resin Type Bumper) |
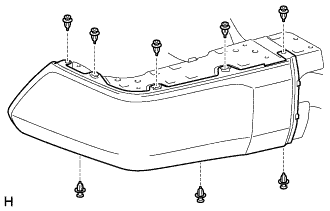 |
Remove the 8 clips and rear bumper extension insert LH.
| 16. REMOVE REAR BUMPER EXTENSION INSERT RH (for Resin Type Bumper) |
| 17. REMOVE REAR BUMPER BAR CORNER REINFORCEMENT LH (for Steel Type Bumper) |
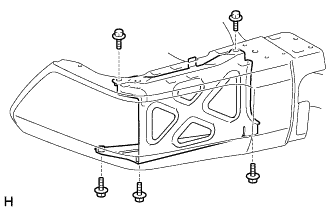 |
Remove the 5 bolts and rear bumper bar corner reinforcement LH.
| 18. REMOVE REAR BUMPER BAR CORNER REINFORCEMENT RH (for Steel Type Bumper) |
| 19. REMOVE NO. 2 FRAME WIRE (for Steel Type Bumper) |
w/ Towing Package:
Detach all the clamps and remove the No. 2 frame wire from the receiver hitch bracket sub-assembly.
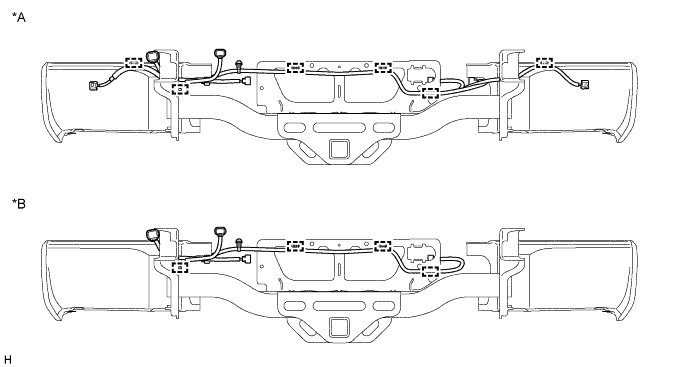
| *A | w/ Intuitive Parking Assist System | *B | w/o Intuitive Parking Assist System |
w/o Towing Package:
Detach all the clamps and remove the No. 2 frame wire from the rear bumper reinforcement sub-assembly.
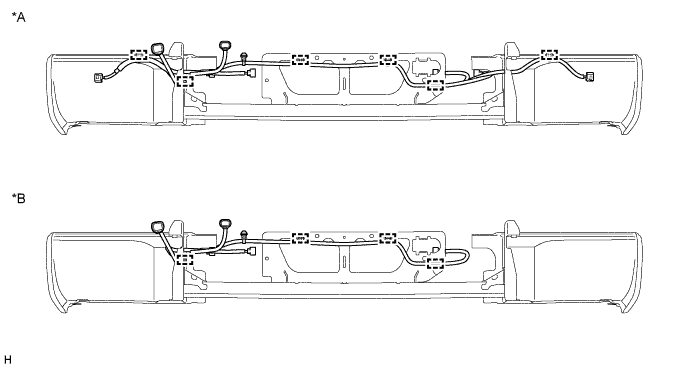
| *A | w/ Intuitive Parking Assist System | *B | w/o Intuitive Parking Assist System |
| 20. REMOVE NO. 2 ULTRASONIC SENSOR RETAINER (for Steel Type Bumper) |
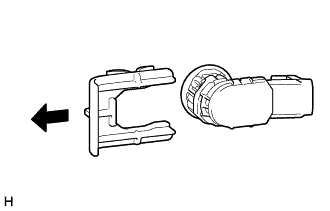 |
Remove the No. 2 ultrasonic sensor retainer as shown in the illustration.
| 21. REMOVE NO. 2 ULTRASONIC SENSOR (for Steel Type Bumper) |
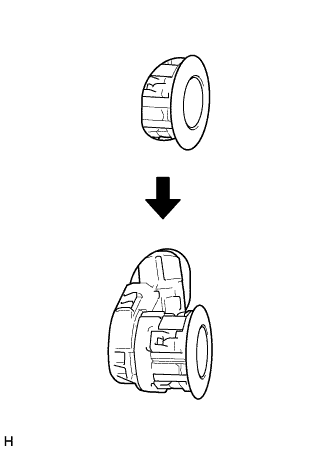 |
Remove the No. 2 ultrasonic sensor as shown in the illustration.
| 22. REMOVE NO. 2 ULTRASONIC SENSOR (for Resin Type Bumper) |
Detach the 4 claws and remove the No. 2 ultrasonic sensor as shown in the illustration.
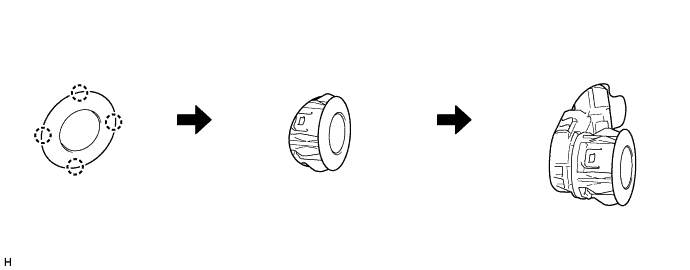
| 23. REMOVE NO. 3 ULTRASONIC SENSOR |
Detach the 4 claws and remove the No. 3 ultrasonic sensor as shown in the illustration.