FUEL SYSTEM > PRECAUTION |
| 1.DISCHARGE FUEL SYSTEM PRESSURE |
Disconnect the cable from the negative (-) battery terminal.
![]() |
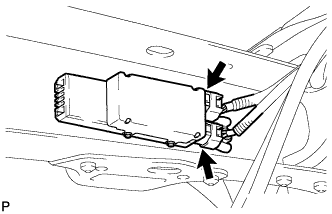
Disconnect the 2 fuel pump ECU connectors.
Connect the cable to the negative (-) battery terminal.
Start the engine. After the engine has stopped on its own, turn the ignition switch off.
Crank the engine again, and check that the engine does not start.
Loosen the fuel tank cap, and then discharge the pressure in the fuel tank completely.
Connect the 2 fuel pump ECU connectors.
| 2.FUEL SYSTEM |
When disconnecting the high fuel pressure line, a large amount of gasoline will spill out. Follow these procedures.
Perform the "DISCHARGE FUEL SYSTEM PRESSURE" procedures above.
Put a container under the connecting part of the pressure line.
Slowly loosen the connection.
Disconnect the connection.
Plug the connection with a rubber plug.
![]() |
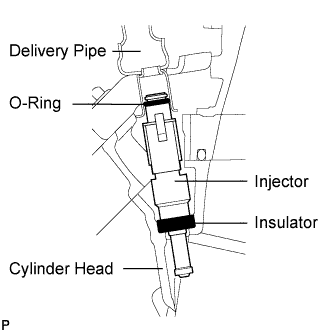
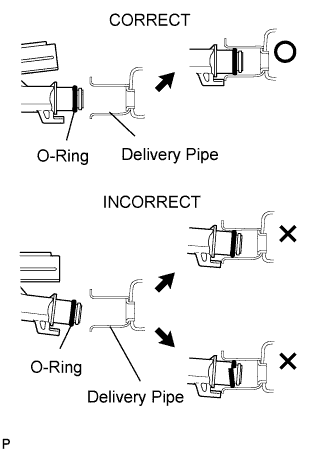
Observe these precautions when removing and installing the injectors:
![]() |
Install the injector to the delivery pipe and cylinder head as shown in the illustration.
Observe these precautions when disconnecting the fuel tube connector (for quick type A).
![]() |
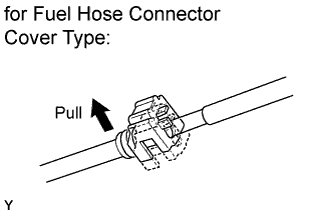
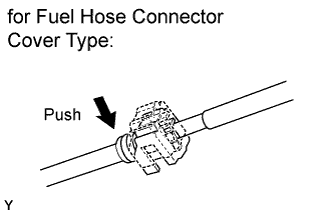
for Fuel Hose Connector Cover Type:
Detach the lock claws by lifting up the cover as shown in the illustration.
![]() |
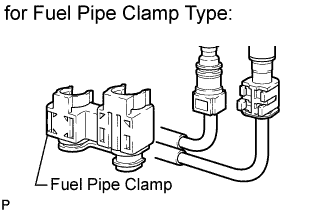
for Fuel Pipe Clamp Type:
Remove the fuel pipe clamp from the fuel tube connector.
Check for dirt or mud on the pipe and around the connector before disconnection. Clean if necessary.
![]() |
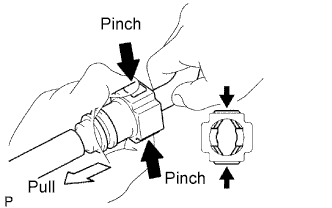
Pinch the connector and disconnect the connector and pipe.
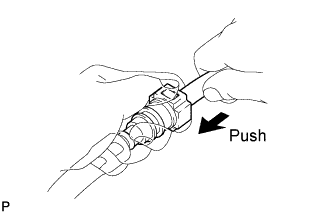
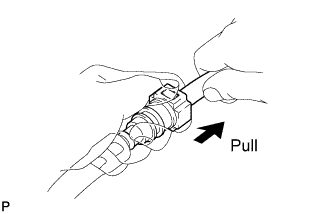
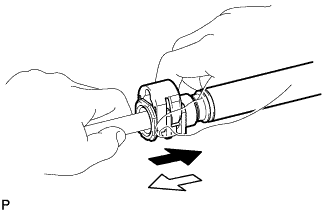
If the connector and the pipe are stuck together, pinch the connector, push and pull the pipe to disconnect the pipe.
Check for dirt or mud on the seal surface of the disconnected pipe. Clean if necessary.
To protect the disconnected pipe and connector from damage and contamination, cover them with plastic bags.
![]() |
Observe these precautions when connecting the fuel tube connector (for quick type A).
Check that there is no damage or contamination in the connected part of the pipe.
Align the axis of the connector with the axis of the pipe. Push the pipe into the connector until the connector makes a "click" sound. If the connection is tight, apply a small amount of fresh spindle oil or gasoline on the tip of the pipe.
![]() |
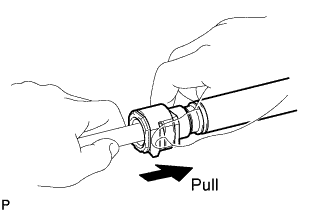
After connecting the pipe and connector, try to pull apart the pipe and the connector to confirm that they are securely connected.
![]() |
for Fuel Pipe Clamp Type:
Install the fuel pipe clamp to the connector.
![]() |
for Fuel Hose Connector Cover Type:
Attach the lock claws to the connector by pushing down on the cover as shown in the illustration.
Check that there is no fuel leakage.
Observe these precautions when disconnecting the fuel tube connector (for quick type B).
Check that there is no damage or foreign matter on the part of the pipe that contacts the connector.
![]() |
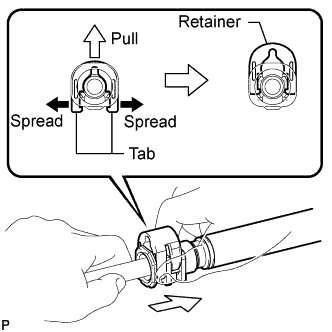
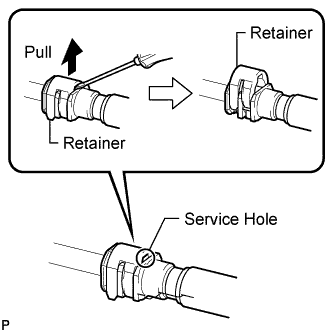
Spread the tabs of the retainer outward and pull the retainer upwards to disconnect the connector from the pipe.
![]() |
![]() |
Check for foreign matter on the seal surface of the disconnected pipe. Clean if necessary.
To protect the disconnected pipe and connector from damage and foreign matter, cover them with a plastic bag.
Observe these precautions when connecting the fuel tube connector (for quick type B).
Check for foreign matter on the pipe and around the connector before connecting it. Clean if necessary.
![]() ![]() |
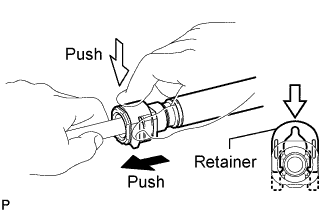
Align the axis of the connector with the axis of the pipe. Push the connector onto the pipe, and then push in the retainer until a "click" sound is heard.
Check that there is no fuel leakage.
| 3.CHECK FOR FUEL LEAK |
Check that there are no fuel leaks after performing maintenance anywhere on the fuel system .