 |
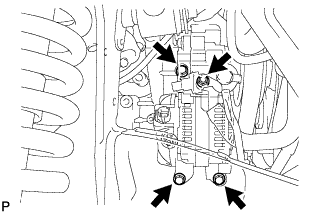
Install the generator with the 3 bolts and nut.
- Torque:
- 43 N*m{ 439 kgf*cm , 32 ft.*lbf }
GENERATOR > INSTALLATION |
| 1. INSTALL GENERATOR ASSEMBLY |
|
Install the generator with the 3 bolts and nut.
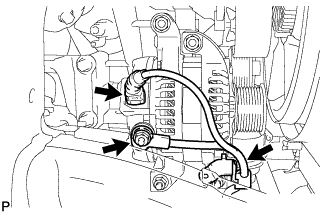 |
Connect the generator connector.
Connect the generator wire with the nut.
Install the terminal cap.
Install the harness bracket to the generator with the bolt.
| 2. CONNECT VANE PUMP ASSEMBLY |
 |
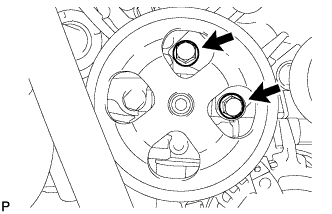 |
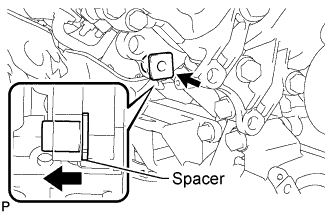
Connect the vane pump to the timing chain cover with the 2 bolts.
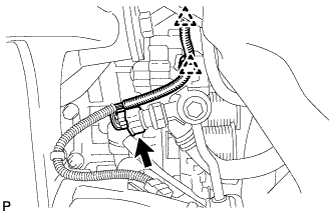 |
Attach the 2 clamps and connect the power steering oil pressure switch connector.
| 3. INSTALL FRONT FENDER APRON SEAL RH |
Install the apron seal with the 5 clips.
| 4. INSTALL FAN AND GENERATOR V BELT |
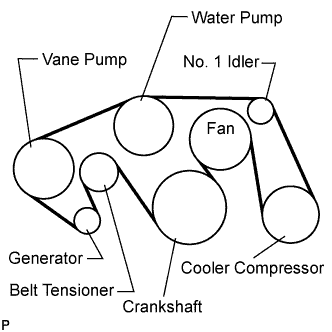 |
Set the V belt onto every part.
While turning the belt tensioner counterclockwise, remove the pin.
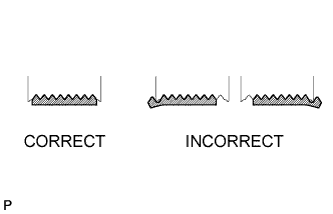 |
After installing the belt, check that it fits properly in the ribbed grooves.
| 5. INSTALL NO. 1 ENGINE UNDER COVER SUB-ASSEMBLY |
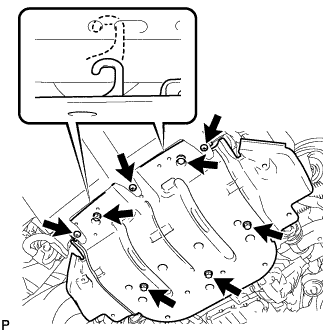 |
Hook the engine under cover to the vehicle body as shown in the illustration.
Install the 3 screws and 5 bolts.
| 6. INSTALL AIR CLEANER ASSEMBLY |
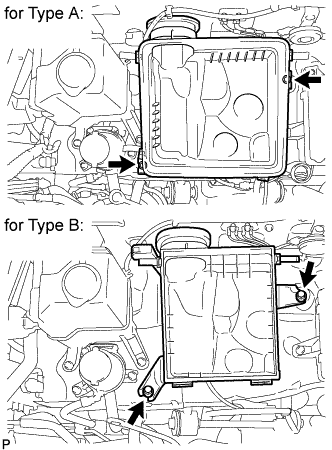 |
Install the air cleaner case with the 2 bolts.
Install the air cleaner element onto the air cleaner case.
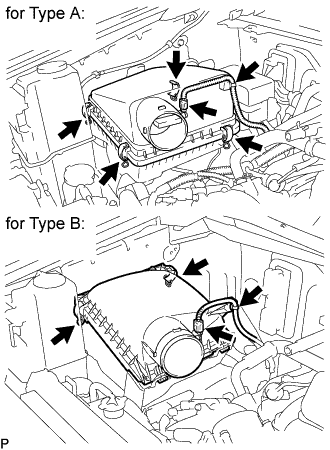 |
Install the air cleaner cap.
for Type A:
Install the air cleaner cap and fasten the 4 hook clamps.
for Type B:
Install the air cleaner cap and fasten the 2 hook clamps.
Connect the MAF meter connector.
Attach the wire harness clamp.
| 7. INSTALL AIR CLEANER HOSE ASSEMBLY |
Install the air cleaner hose assembly with the 2 hose clamps.
Connect the vacuum hose to the air cleaner hose assembly.
Connect the ventilation hose to the air cleaner hose assembly, and slide the clamp to secure the hose.
| 8. INSTALL V-BANK COVER |
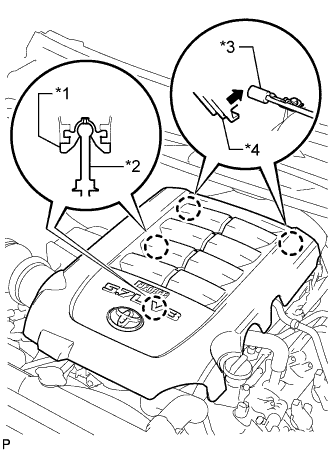 |
Attach the 2 V-bank cover hooks to the No. 1 V-bank cover bracket. Then align the 2 V-bank cover grommets with the 2 pins, and press down on the V-bank cover sub-assembly to attach the pins.
| *1 | V-bank Cover Grommet |
| *2 | Pin |
| *3 | No. 1 V-bank Cover Bracket |
| *4 | V-bank Cover Hook |
| 9. CONNECT CABLE TO NEGATIVE BATTERY TERMINAL |