 |
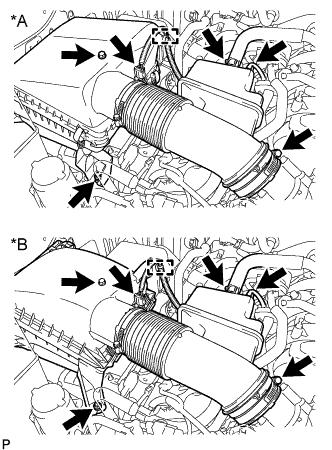
Detach the clamp and disconnect the mass air flow meter connector.
| *A | for Type A |
| *B | for Type B |
GENERATOR > REMOVAL |
| 1. PRECAUTION |
| 2. DISCONNECT CABLE FROM NEGATIVE BATTERY TERMINAL |
| 3. REMOVE FAN AND GENERATOR V BELT |
Remove the fan and generator V belt (Click here).
| 4. REMOVE AIR CLEANER ASSEMBLY |
|
Detach the clamp and disconnect the mass air flow meter connector.
| *A | for Type A |
| *B | for Type B |
Disconnect the ventilation hose and vacuum hose.
Loosen the hose clamp.
Remove the 2 bolts and air cleaner assembly.
| 5. REMOVE FRONT FENDER APRON SEAL RH |
Remove the 6 clips and fender apron seal.
| 6. DISCONNECT POWER STEERING OIL PRESSURE SWITCH CONNECTOR |
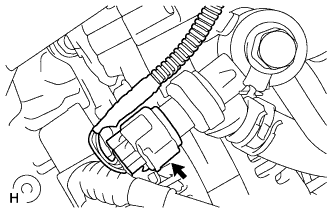 |
Disconnect the power steering oil pressure sensor connector.
| 7. DISCONNECT VANE PUMP ASSEMBLY |
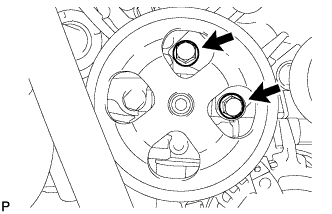 |
Remove the 2 bolts and disconnect the vane pump assembly.
| 8. REMOVE GENERATOR ASSEMBLY |
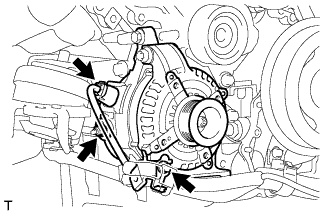 |
Remove the terminal cap.
Disconnect the generator connector.
Remove the nut and disconnect the generator wire.
Remove the bolt and disconnect the wire harness bracket from the generator.
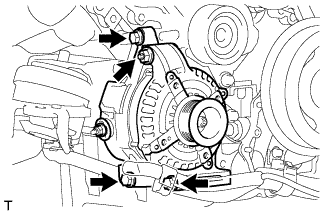 |
Remove the 3 bolts, nut and generator.