Home › ENGINE · 3UR-FBE › CHARGING › GENERATOR

GENERATOR > REMOVAL

for Preparation Click here


1. PRECAUTION

NOTICE:
After turning the ignition switch off, waiting time may be required before disconnecting the cable from the battery terminal. Therefore, make sure to read the disconnecting the cable from the battery terminal notice before proceeding with work (Click here).


2. DISCONNECT CABLE FROM NEGATIVE BATTERY TERMINAL


3. REMOVE V-BANK COVER


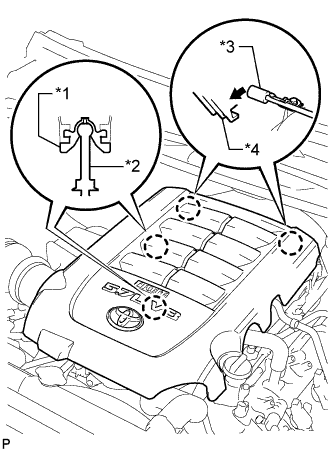
    A165576E04
  1. Raise the front of the V-bank cover sub-assembly to detach the 2 pins. Then remove the 2 V-bank cover hooks from the No. 1 V-bank cover bracket, and remove the V-bank cover sub-assembly.
    Text in Illustration 
    *1
    V-bank Cover Grommet
    *2
    Pin
    *3
    No. 1 V-bank Cover Bracket
    *4
    V-bank Cover Hook


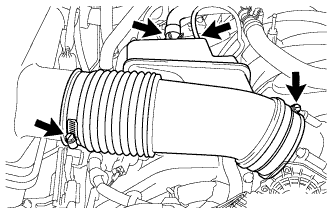
4. REMOVE AIR CLEANER HOSE ASSEMBLY


    A187008
  1. Disconnect the vacuum hose from the air cleaner hose assembly.

  1. Slide the clamp and disconnect the ventilation hose from the air cleaner hose assembly.

  1. Loosen the 2 hose clamps.

  1. Remove the air cleaner hose assembly.


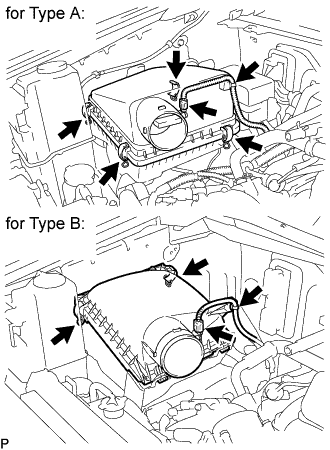
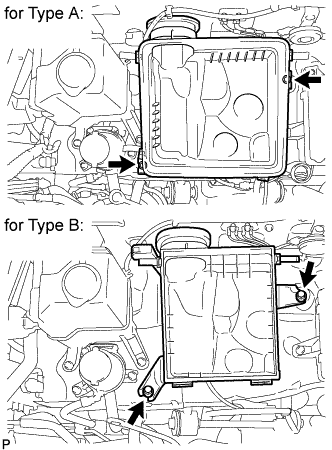
5. REMOVE AIR CLEANER ASSEMBLY


    A309637E01
  1. Remove the air cleaner cap.

    1. Disconnect the MAF meter connector.

    2. Using a clip remover, detach the wire harness clamp.

    3. for Type A:
      Unfasten the 4 hook clamps and then remove the air cleaner cap.

    4. for Type B:
      Unfasten the 2 hook clamps and then remove the air cleaner cap.

  1. Remove the air cleaner element.


    A309638E01
  1. Remove the 2 bolts and air cleaner case.


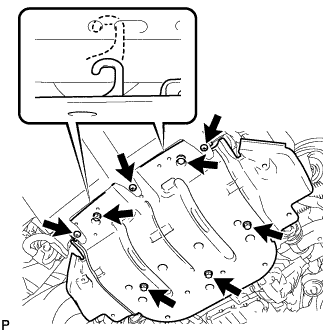
6. REMOVE NO. 1 ENGINE UNDER COVER SUB-ASSEMBLY


    A150108
  1. Remove the 3 screws and 5 bolts.

  1. Unhook the engine under cover from the vehicle body as shown in the illustration.


7. REMOVE FAN AND GENERATOR V BELT


    A163770E01
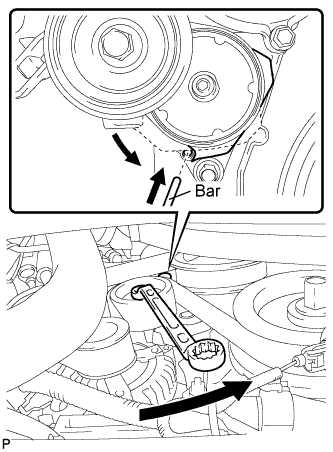
  1. While turning the belt tensioner counterclockwise, align the service hole for the belt tensioner and the belt tensioner fixing position, and then insert a bar of φ 5 mm (0.197 in.) into the service hole to fix the belt tensioner in place.

    HINT:
    The pulley bolt for the belt tensioner has a left-hand thread.

  1. Remove the V belt.


8. REMOVE FRONT FENDER APRON SEAL RH
  1. Remove the 5 clips and apron seal.


9. DISCONNECT VANE PUMP ASSEMBLY


    A164433
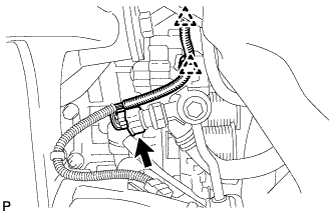
  1. Detach the 2 clamps and disconnect the power steering oil pressure switch connector.


    A163289
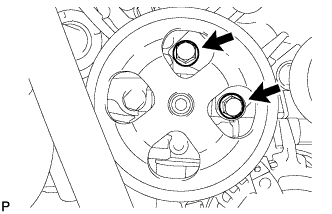
  1. Remove the 2 bolts and disconnect the vane pump.


10. REMOVE GENERATOR ASSEMBLY


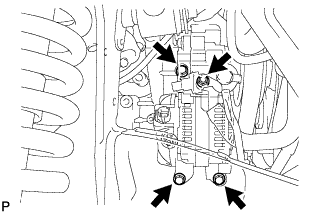
    A156405
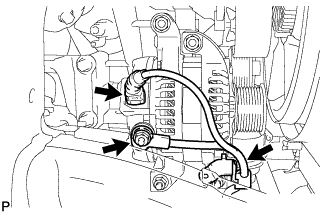
  1. Disconnect the generator connector.

  1. Remove the terminal cap and nut, and disconnect the generator wire.

  1. Remove the bolt and disconnect the wire harness bracket from the generator.


    A156406
  1. Remove the 3 bolts, nut and generator.